Solution: Missing IPv4 Address on Ethernet (eth0) in Raspberry Pi 4B (Raspbian Bookworm)
Raspbian recently upgraded from Bullseye to Bookworm last month, bringing many changes. As of writing this blog, less than 30 days have passed, so there aren’t many reference solutions available—we can only rely on previous versions or figure it out ourselves. In the future, the official team may fix this issue, or new problems may arise. If I encounter any, I’ll write a new article and link it here.
Under certain configurations, the Ethernet port name may be
end1instead ofeth0—replace it with your actual port name.
In my previous article, I mentioned testing Ubuntu Server 22.04.3 LTS. Although the display worked normally, it didn’t show the IP address for eth0 (the onboard RJ45 port). Below is the part of the boot sequence that displays IP addresses for all interfaces (I didn’t take a screenshot of ifconfig output):
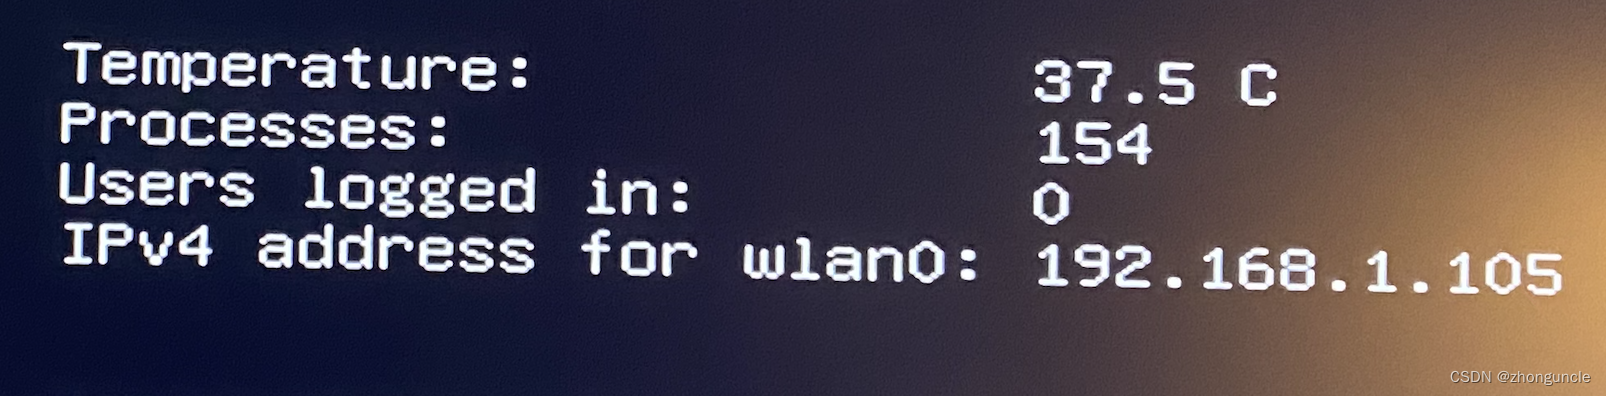
As you can see, only the wireless network wlan0 has an IP address.
When I switched back to Raspbian, eth0 appeared in the output but lacked an inet (IPv4) or inet6 (IPv6) address. Here’s the ifconfig result:
$ ifconfig
eth0: flags=4163<UP,BROADCAST,RUNNING,MULTICAST>  mtu 1500
        ether xxxxxxxxxxxxx  txqueuelen 1000  (Ethernet)
        RX packets 75  bytes 20834 (20.3 KiB)
        RX errors 0  dropped 0  overruns 0  frame 0
        TX packets 58  bytes 9199 (8.9 KiB)
        TX errors 0  dropped 0 overruns 0  carrier 0  collisions 0
While wireless works, the Raspberry Pi 4’s Micro SD card interface only maxes out at 46MB/s. For external SSDs or large file transfers, wireless speeds are far from peak performance (often only a quarter of the maximum). With Ethernet, speeds can stably reach 45MB/s.
I tried several methods, which are documented below.
Environment: Raspberry Pi 4B 4GB + Raspbian 2023-10-10 release
Three Failed Attempts
Although the following methods didn’t work for this specific issue, they might be useful in other scenarios—so I’ve documented them here.
1. Disable and Re-enable eth0
$ ifconfig eth0 down
$ ifconfig eth0 up
The simplest “restart trick”—it didn’t work.
2. Assign a Static IPv4 to eth0
$ ifconfig eth0 xxx.xxx.x.x netmask 255.255.255.0 up
This occasionally worked temporarily, but the IP address disappeared after rebooting the Raspberry Pi. Here’s the post-reboot output:
$ ifconfig
eth0: flags=4163<UP,BROADCAST,RUNNING,MULTICAST>  mtu 1500
        inet6 xxxxxxxxxxxxxxx  prefixlen 64  scopeid 0x20<link>
        ether xxxxxxxxxxxx  txqueuelen 1000  (Ethernet)
        RX packets 75  bytes 20834 (20.3 KiB)
        RX errors 0  dropped 0  overruns 0  frame 0
        TX packets 58  bytes 9199 (8.9 KiB)
        TX errors 0  dropped 0 overruns 0  carrier 0  collisions 0
An IPv6 address appeared, but the IPv4 address vanished after every reboot—no matter how I configured it.
3. Set eth0 Speed to 100Mbps
$ ethtool -s eth0 speed 100 duplex full
Limiting the Ethernet speed to 100Mbps can help with low-quality cables that don’t support Gigabit—but it didn’t resolve the issue here.
Solution
The second method got the closest to working, so I reinstalled the system to ensure no prior modifications interfered, then continued troubleshooting. After reinstallation, the result matched the post-reboot state of the second method: only an IPv6 address was displayed, no IPv4.
Since the second method involved network settings, I focused my research there. I discovered that Raspbian had undergone major network configuration changes—and finally found a solution.
Method 1: GUI (Graphical Interface)
The GUI method is more intuitive:
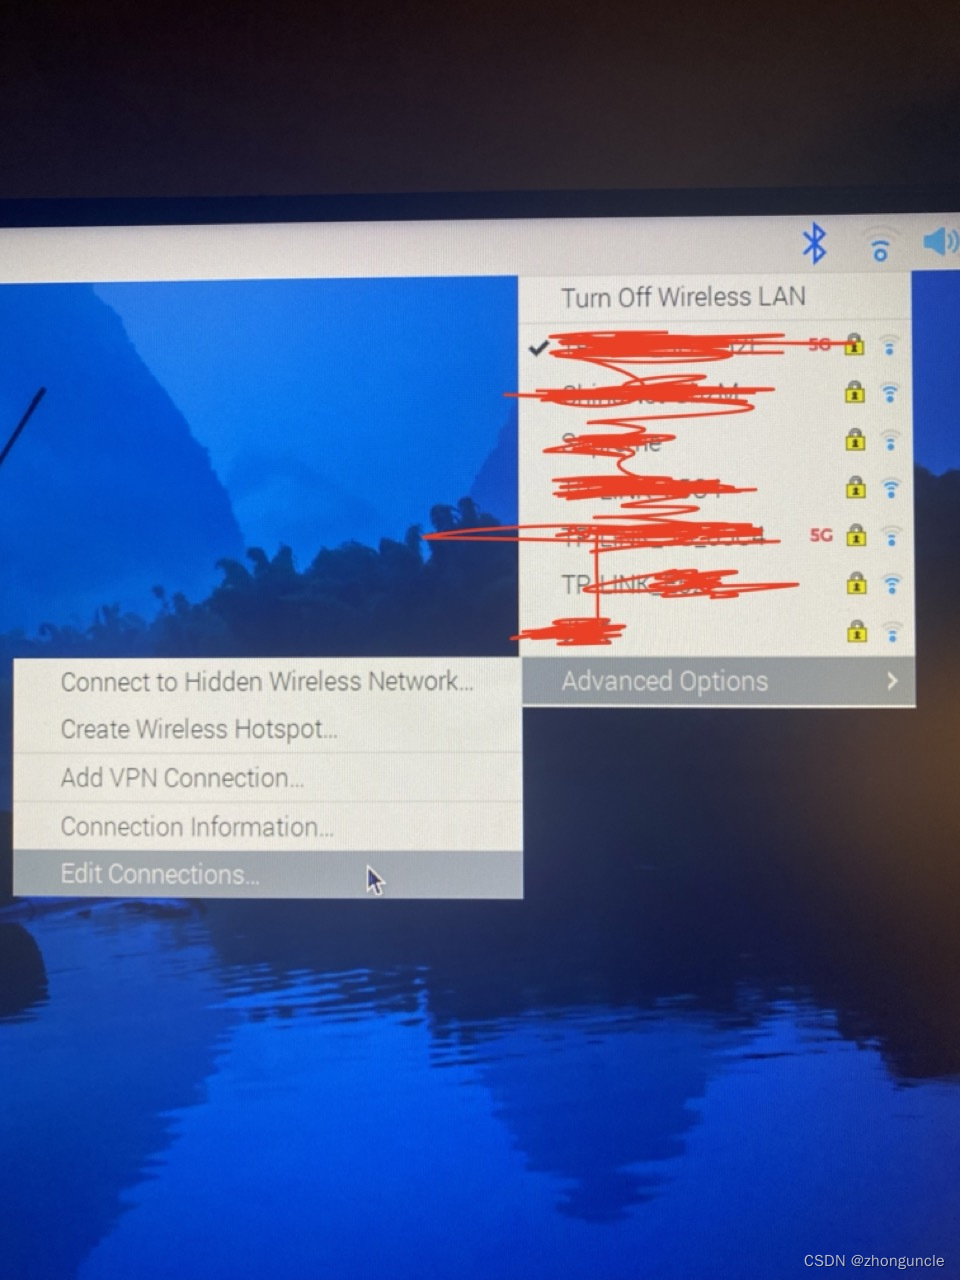
- Select “Edit Connection…” from the network menu (it may take a moment for the window to pop up):
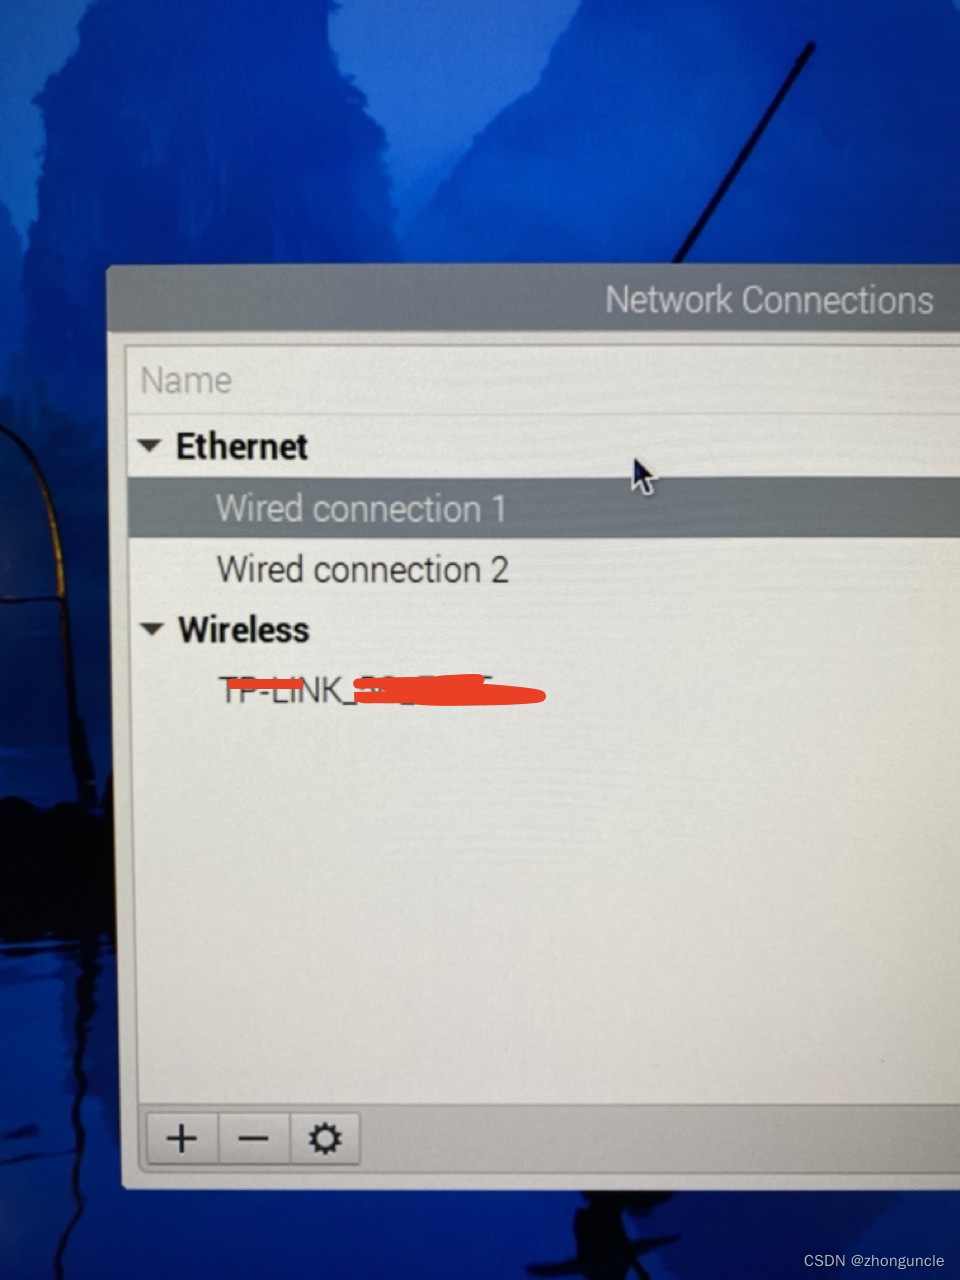
- Choose “Wired connection 1” (the second entry in the screenshot is my USB Ethernet adapter for testing):
- You’ll see the following interface:
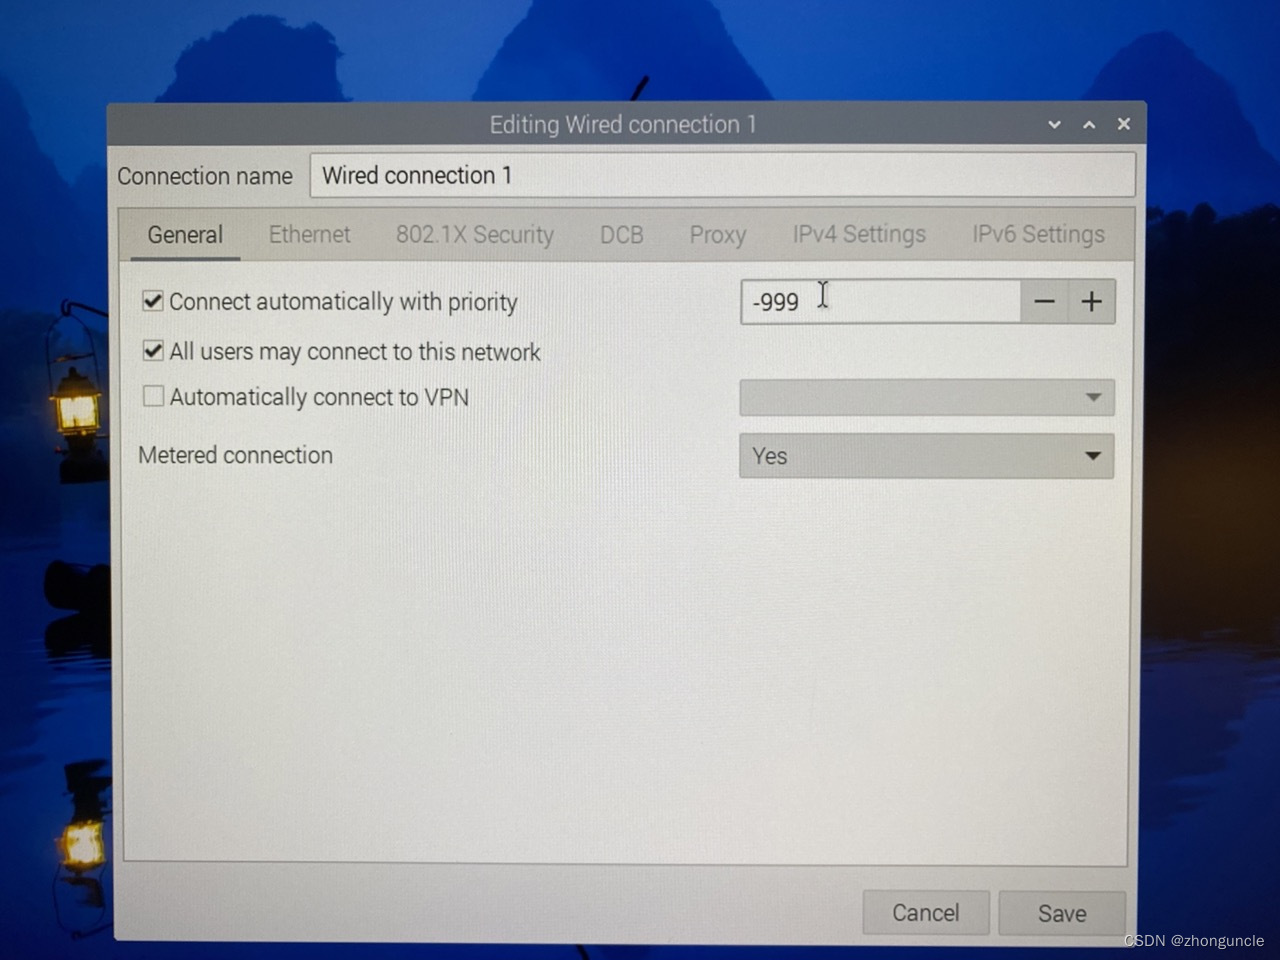
-
Change the “-999” value to
0or1. This sets the connection priority—Wi-Fi defaults to 0, and-999means the Ethernet interface is disabled by default. While testing showed this change didn’t always affect the outcome, it’s safer to adjust it. -
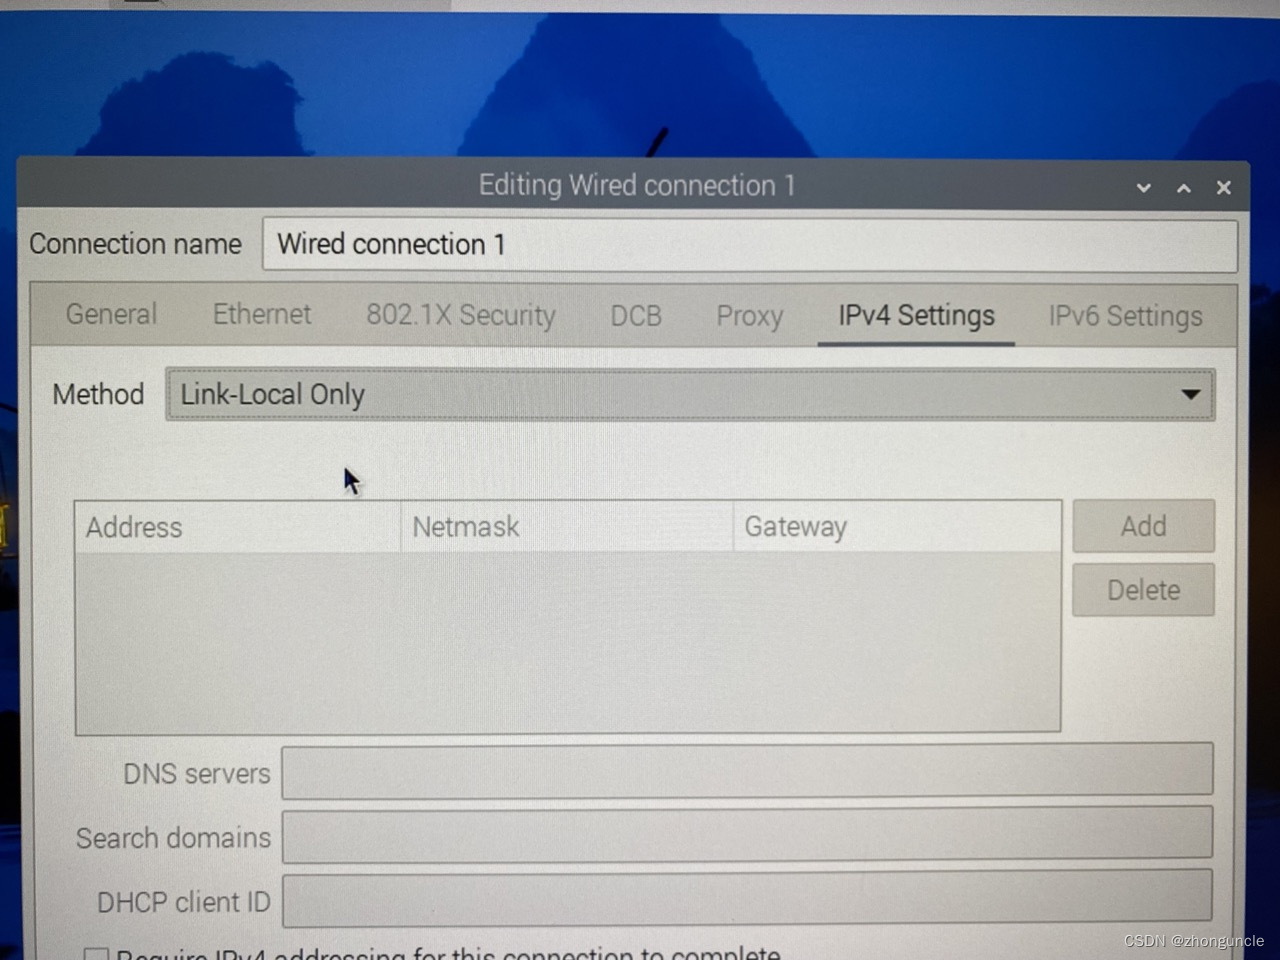
Switch to the “IPv4 Settings” tab, then change the “Method” dropdown to
Link_Local Only:
- Run
ifconfigagain—you should now see an IPv4 address foreth0(reboot if necessary).
Method 2: CLI (Command Line Interface)
The CLI method is faster—this single command is equivalent to the GUI steps above:
sudo nmcli c a ifname eth0 type ethernet ipv4.method link-local ipv6.method link-local
Note: Replace eth0 with your actual Ethernet port name (e.g., end0 if applicable)!
I hope these will help someone in need~