Mount and unmount external hard drive on Mac by diskutil in Terminal
Recently, when I used macOS to mount an external hard drive, I couldn’t mount it using mount. Many articles didn’t explain the various situations in detail, so I wrote a blog to record it.
How to mount and unmount the hard disk (or partition)
mount and umount cannot be used on macOS. If used, unknown special files or no permissions will be displayed, as follows:
$ mount /dev/disk3s2
mount: /dev/disk3s2: unknown special file or file system.
$ umount /dev/disk3s2
umount: unmount(/Volumes/backup): Operation not permitted
If you add sudo to umount, Resource busy will be displayed, prompting you to use diskutil unmount, as follows:
$ sudo umount /dev/disk3s2
Password:
umount(/Volumes/backup): Resource busy -- try 'diskutil unmount'
In some cases, if you use diskutil mount /dev/disk3s2 as usual, you will find that it can be mounted successfully, as follows:
$ diskutil mount /dev/disk3s2
Volume backup on /dev/disk3s2 mounted
Uninstallation using diskutil unmount /dev/disk3s2 will also be successful, as follows:
$ diskutil unmount /dev/disk3s2
Volume backup on disk3s2 unmounted
As a reminder, you don’t need to write the path here. You can also write diskutil unmount disk3s2 directly. If you know the hard disk or volume name, you can directly use the name to load or unload, as follows:
$ sudo diskutil mount backup
Volume backup on backup mounted
It should be noted that “partition” in macOS is not the same concept as partition in Windows.
But if you want to load or unmount all volumes in a partition, you must use mountDisk and unmountDisk, otherwise the following content will be displayed:
$ diskutil unmount disk2
disk2 was already unmounted or it has a partitioning scheme so use "diskutil unmountDisk" instead
Note that although there is Disk in this option, it operates on “a partition”, not “a hard disk”. Because it is loaded based on the table in a certain hard disk partition.
How to obtain the hard disk path and hard disk volume name
You can get information about the connected hard drive through “System Information” and “Disk Utility”, but this is too troublesome.
You can use `diskutil list to view all hard drives that have been connected to the Mac, as follows (only the first external hard drive is retained):
/dev/disk2 (external, physical):
    #: TYPE NAME SIZE IDENTIFIER
    0: GUID_partition_scheme *1.0 TB disk2
    1: EFI EFI 209.7 MB disk2s1
    2: Apple_APFS Container disk3 1000.0 GB disk2s2

/dev/disk3 (synthesized):
    #: TYPE NAME SIZE IDENTIFIER
    0: APFS Container Scheme - +1000.0 GB disk3
                                  Physical Store disk2s2
    1: APFS Volume backup 323.2 GB disk3s2
At this time, you can get the names of the locations of each partition and file.
**If you just want to know how to load and unload, then just read this. The following is to solve some questions of curious babies and record some APFS knowledge, such as what is the underlying operation of mounting an APFS partition. **
Expand knowledge
What is the difference between the above two parts?
As you can see in the above content, a hard disk actually generates two parts: /dev/disk2 (external, physical) and /dev/disk3 (synthesized). What’s the difference between the two?
/dev/disk2 (external, physical) part
This part represents the physical part of the hard drive. That is, this part of “Disk Utility”:
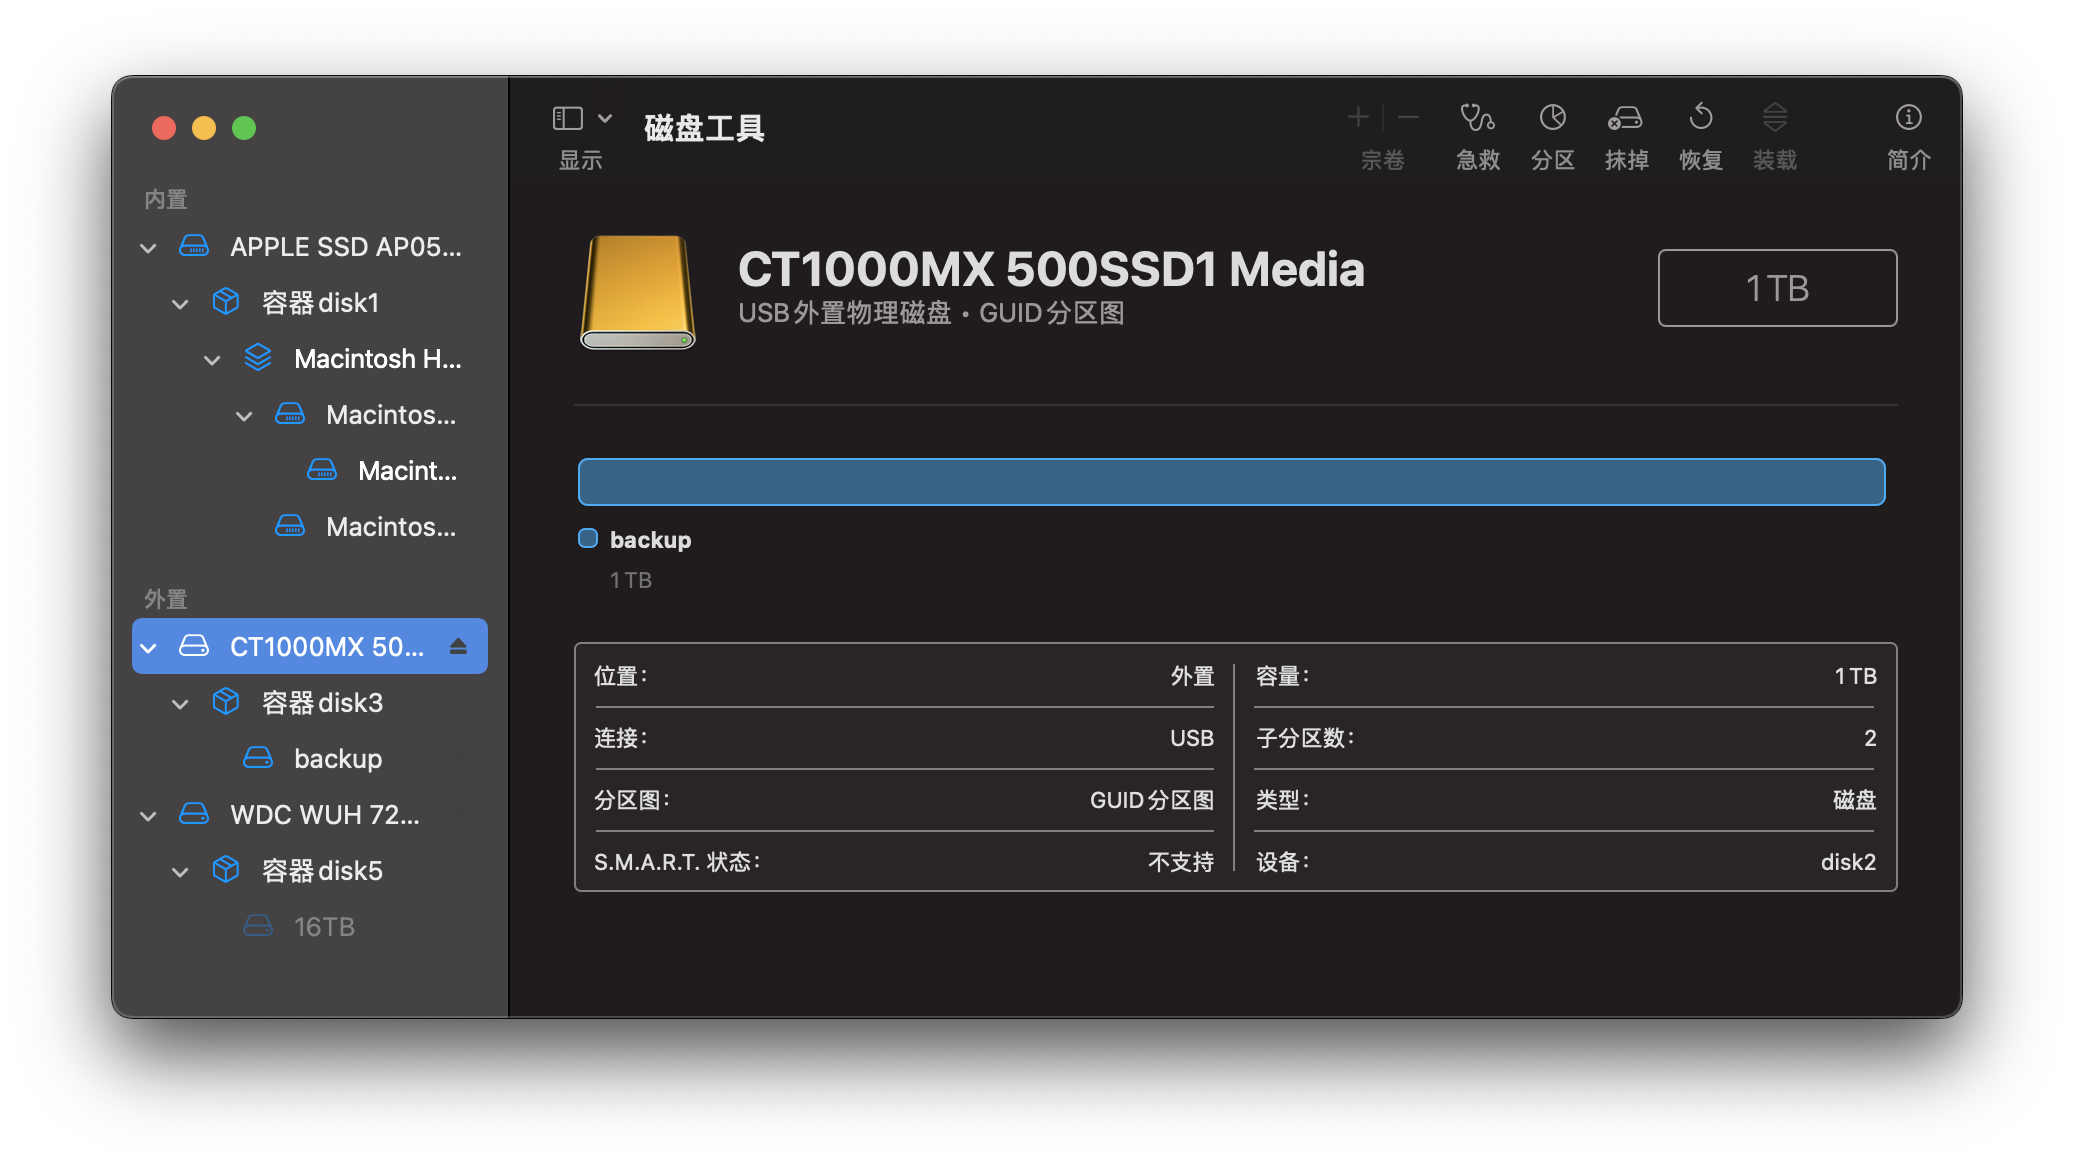
Stored in /dev/disk2 is the boot file of the hard disk, which is the hard disk node instance (device node entry), which also includes the hard disk identifier (disk identifier) of each part. The TYPE of disk2 is also written as GUID_partition_scheme (GUID partition scheme).
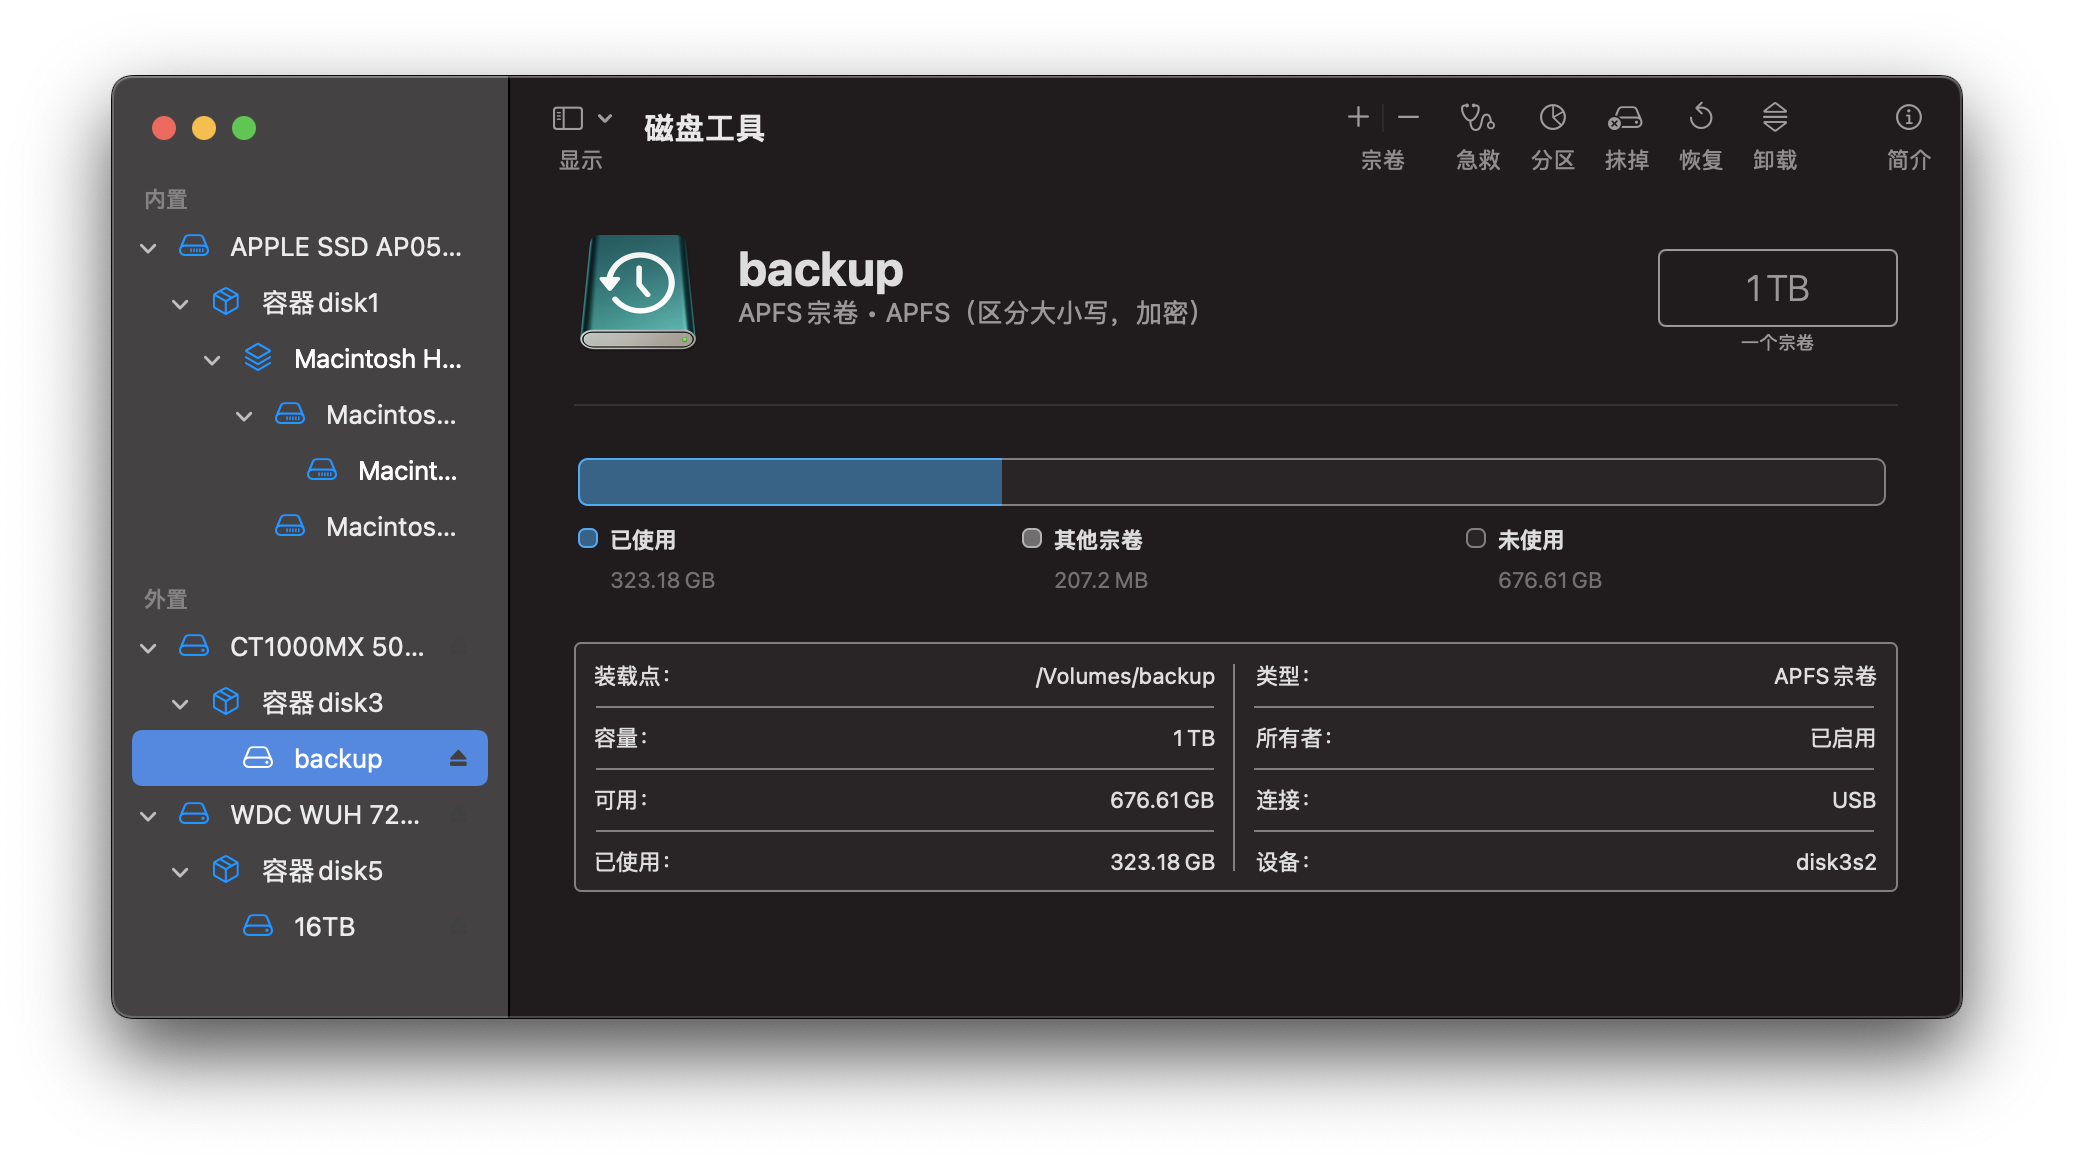
The disk2s2 part is the container part you see in “Disk Utility” (if you are an eagle-eyed reader, you will find that this part is called container disk3, and the “device” part is also “disk3”. The next chapter will explain why this is so) :

If you try to load the container disk2s2 the following message will be displayed:
$ sudo diskutil mount disk2s2
Volume on disk2s2 failed to mount because it appears to be
an APFS Physical Store (or is the APFS Container already mounted?)
Note that for this mount operation, Disk Arbitration reports that
the operation is not supported (kDAReturnUnsupported)
But you can load the EFI part if you need it:
$ sudo diskutil mount disk2s1
Volume EFI on disk2s1 mounted
/dev/disk3 (synthesized) section
This part is the volume part of the container above.
/dev/disk3 is the “APFS Container Scheme” (APFS container scheme), which contains various information about the volume. This is why the volume can be loaded directly through the backup in the NAME part instead of having to use a device. path.
/dev/disk3s2 is the APFS volume contained in the container. If you load the /dev/disk3s2 part, you can access the NAME in the loading location (the default is /Volumes/). file to access the hard disk contents in APFS format (all devices in Unix are files).
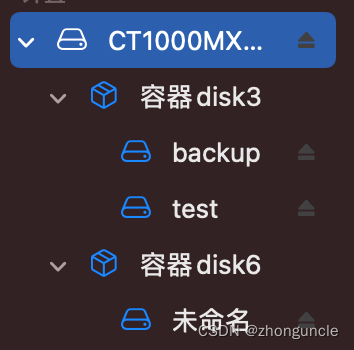
This is what you see in Disk Utility (this is my Time Machine drive):
If there is only one volume in the hard disk, then this volume is usually diskXs2 in /dev.
By default, the generated volumes are in the /Volumes/ directory and can be accessed here (equivalent to /mnt in Linux):
$ ls /Volumes/
16TB Macintosh HD backup
Why is the container displayed as container disk3 in the second picture (what is the “Physical Store diskXsX” part)
Sharp-eyed students may notice that in the second picture, the container part is called container disk3, and the “device” part is also “disk3”, not disk2s2, but the “physical storage area” is disk2s2.
This is because in APFS a partition contains a separate container (the container is responsible for space management and garbage protection). A container or partition can contain multiple volumes. This is different from some other file systems. Most of the partitions of other file systems are directly the file system layer (File System Layer). The following is the hierarchy of hard disks with multiple partitions on the hard disk in “Disk Utility”:
The following figure shows the space division of the APFS partition on the hard disk, and the right side is the space division inside the container:
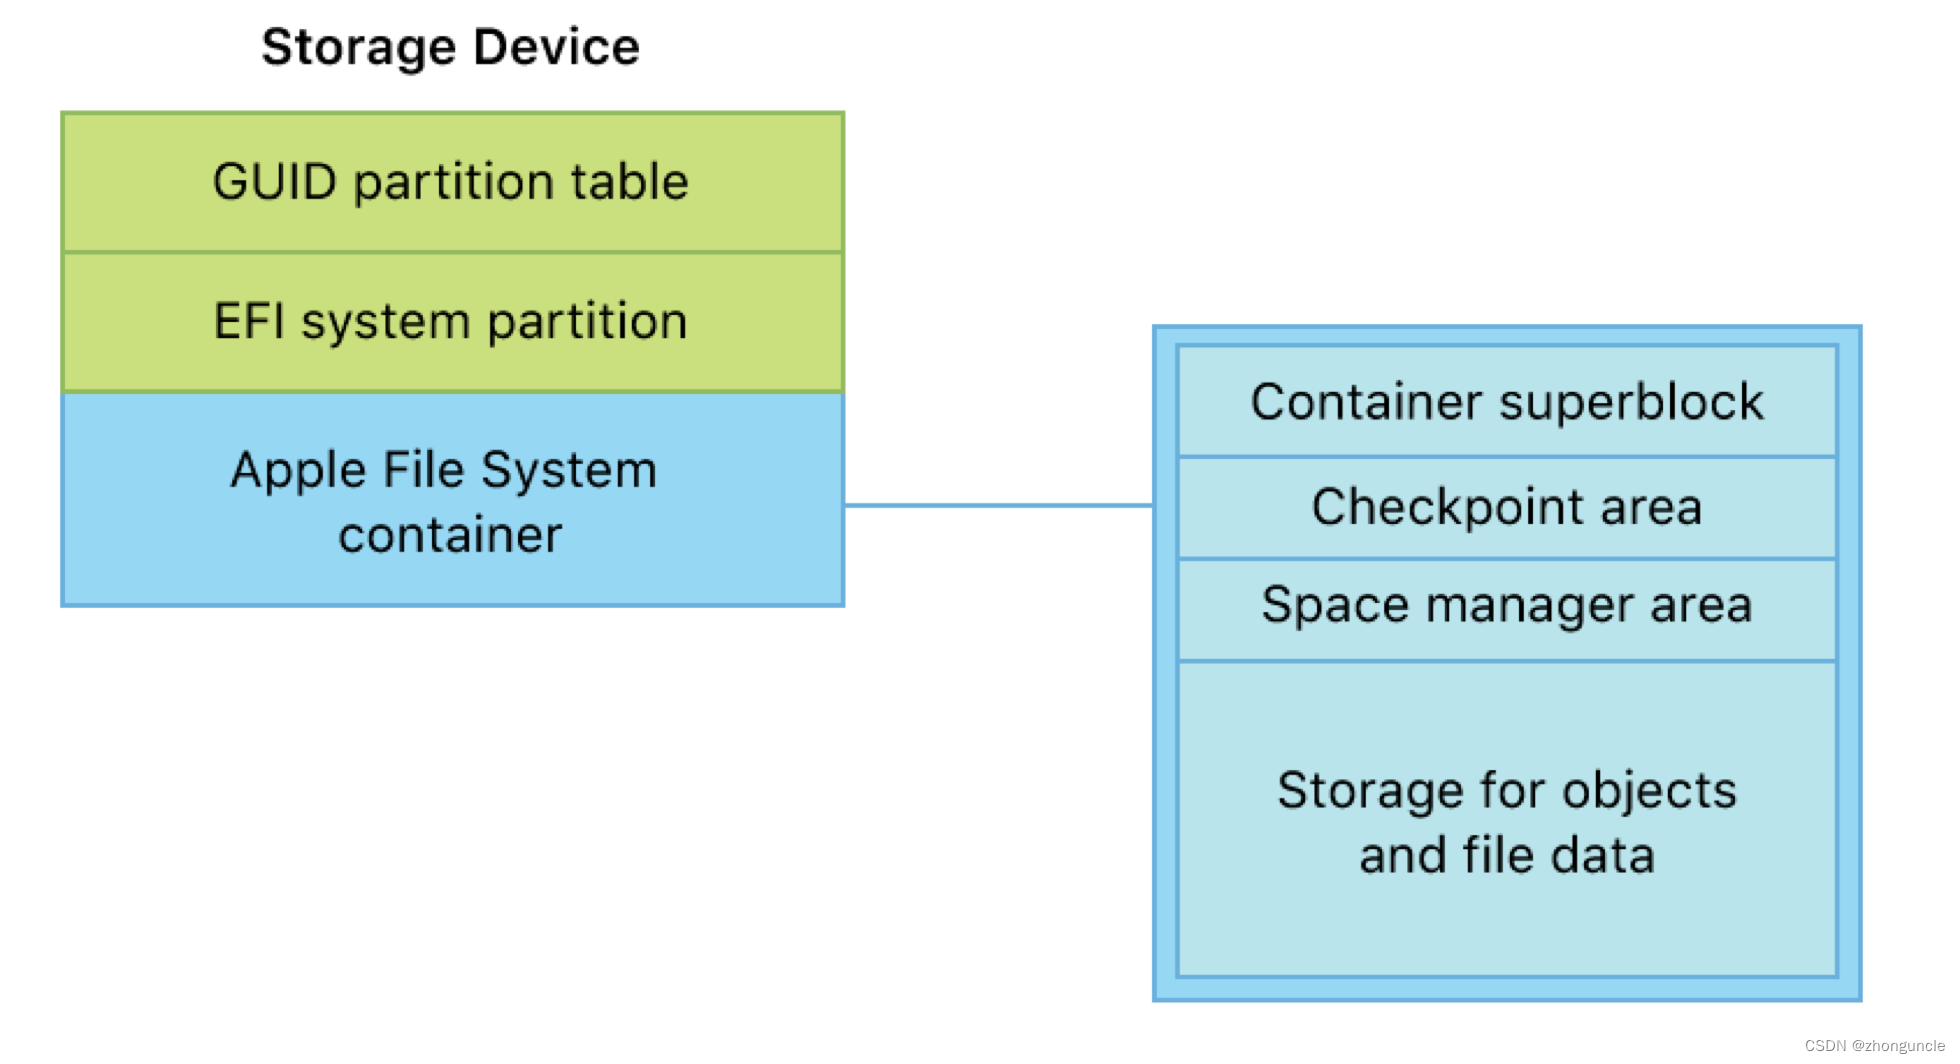
In other words, the “Apple File System container” part is the general name of the right part in the above picture, and the space on the hard disk is also the sum of the right part. There is no separate part called “Apple File System container”. This is why the container’s physical storage area is disk2s2 (which is the third part of the hard disk), but further operations are required inside the container to allocate it into disk3 as it is further differentiated internally.
I hope these will help someone in need~