FaceFusion Running Slow? Fix It with NVIDIA cuDNN Installation
It’s another FaceFusion issue! While using it, I noticed it was barely faster than running on CPU. I initially thought this was normal—until I watched others’ demos and realized it should be much quicker.
Problem Description
First, the terminal displayed the following error:
2025-01-31 12:30:59.244128068 [E:onnxruntime:Default, provider_bridge_ort.cc:1862 TryGetProviderInfo_CUDA] /onnxruntime_src/onnxruntime/core/session/provider_bridge_ort.cc:1539 onnxruntime::Provider& onnxruntime::ProviderLibrary::Get() [ONNXRuntimeError] : 1 : FAIL : Failed to load library libonnxruntime_providers_cuda.so with error: libcudnn.so.9: cannot open shared object file: No such file or directory

This error occurs because NVIDIA cuDNN is not installed, or the installed version is incompatible.
Note: If this error doesn’t appear every time (i.e., not consistently when selecting “cuda” in FaceFusion), it may be a temporary glitch—simply restart FaceFusion to fix it.
Additionally, FaceFusion only processed 1–2 frames per second. nvidia-smi showed GPU utilization at just 45% and VRAM usage at a mere 500 MB. This scenario typically means either:
- You didn’t select “cuda” as the execution provider in FaceFusion, or
- cuDNN is not properly installed.
How to Check cuDNN Installation & Version?
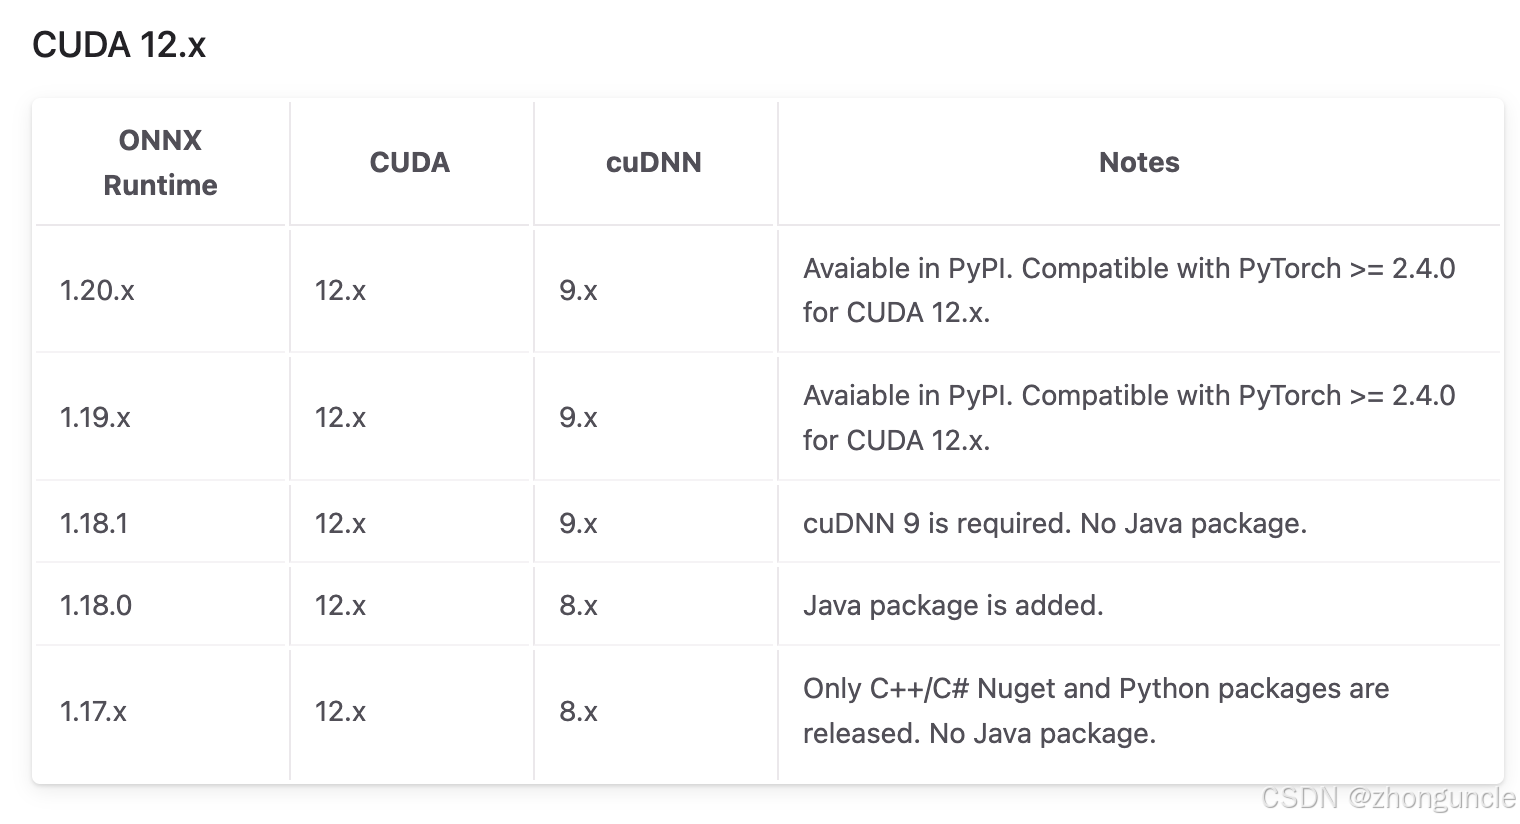
For compatibility between ONNX Runtime, cuDNN, and CUDA, refer to the official documentation: Requirements - CUDA Execution Provider - ONNX Runtime. For example, requirements for CUDA 12.x are shown below:
From the error message, we know the issue lies with cuDNN. Unlike checking Python versions with python --version, there’s no universal command-line tool to verify cuDNN. The methods I found online didn’t work, so I figured out these reliable approaches:
Method 1: Check for cuDNN Sample Files
When cuDNN is installed, it includes sample projects for testing. You can check for these files to confirm installation:
$ ls /usr/src/ | grep cudnn
cudnn_samples_v9
The directory name cudnn_samples_v9 indicates cuDNN version 9.
Method 2: Locate Installation Path (Debian/Ubuntu)
If you’re unsure about installation, use dpkg to find the cuDNN samples path (works for Debian/Ubuntu-based systems):
$ dpkg -L libcudnn9-samples
/.
/usr
/usr/share
/usr/share/doc
.....
Method 3: Verify with PyTorch (Most Practical)
If you’re working with models, you likely have PyTorch installed. Use this Python snippet to check cuDNN availability and version:
import torch
print(torch.backends.cudnn.m.is_available())
print(torch.backends.cudnn.version())
Sample output:
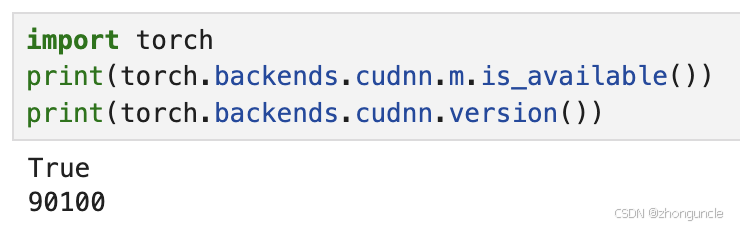
This confirms cuDNN is installed (output: True) with version 9.0.1.
How to Install cuDNN
If cuDNN is missing or incompatible, download it directly from the official NVIDIA website (not via package managers). Older system versions may cause issues with package manager installations.
Official download link: cuDNN Downloads
This is not redundant advice! I wasted an entire afternoon trying to install it via package managers—save yourself the hassle and use the official installer.
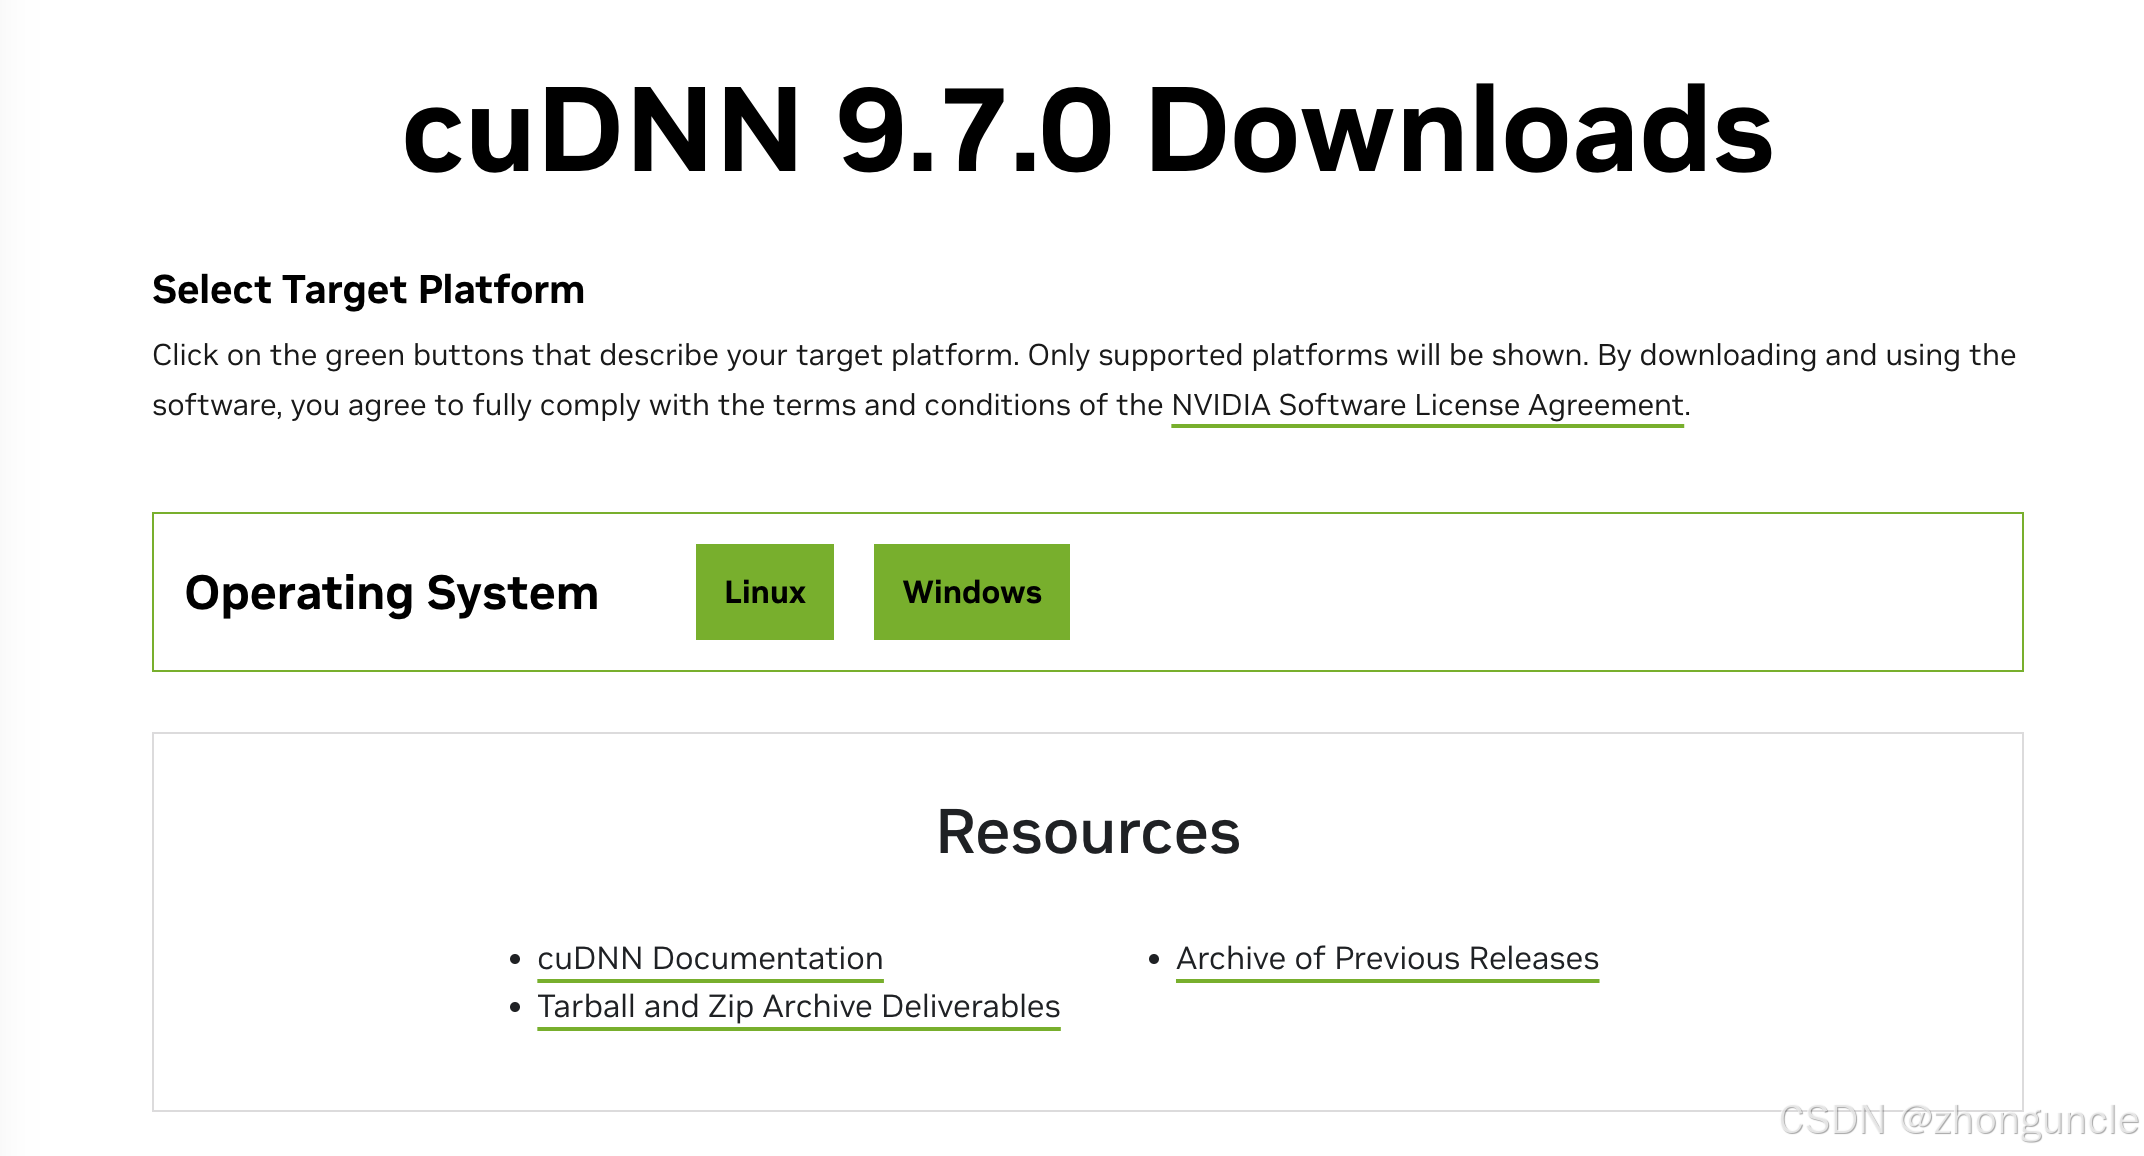
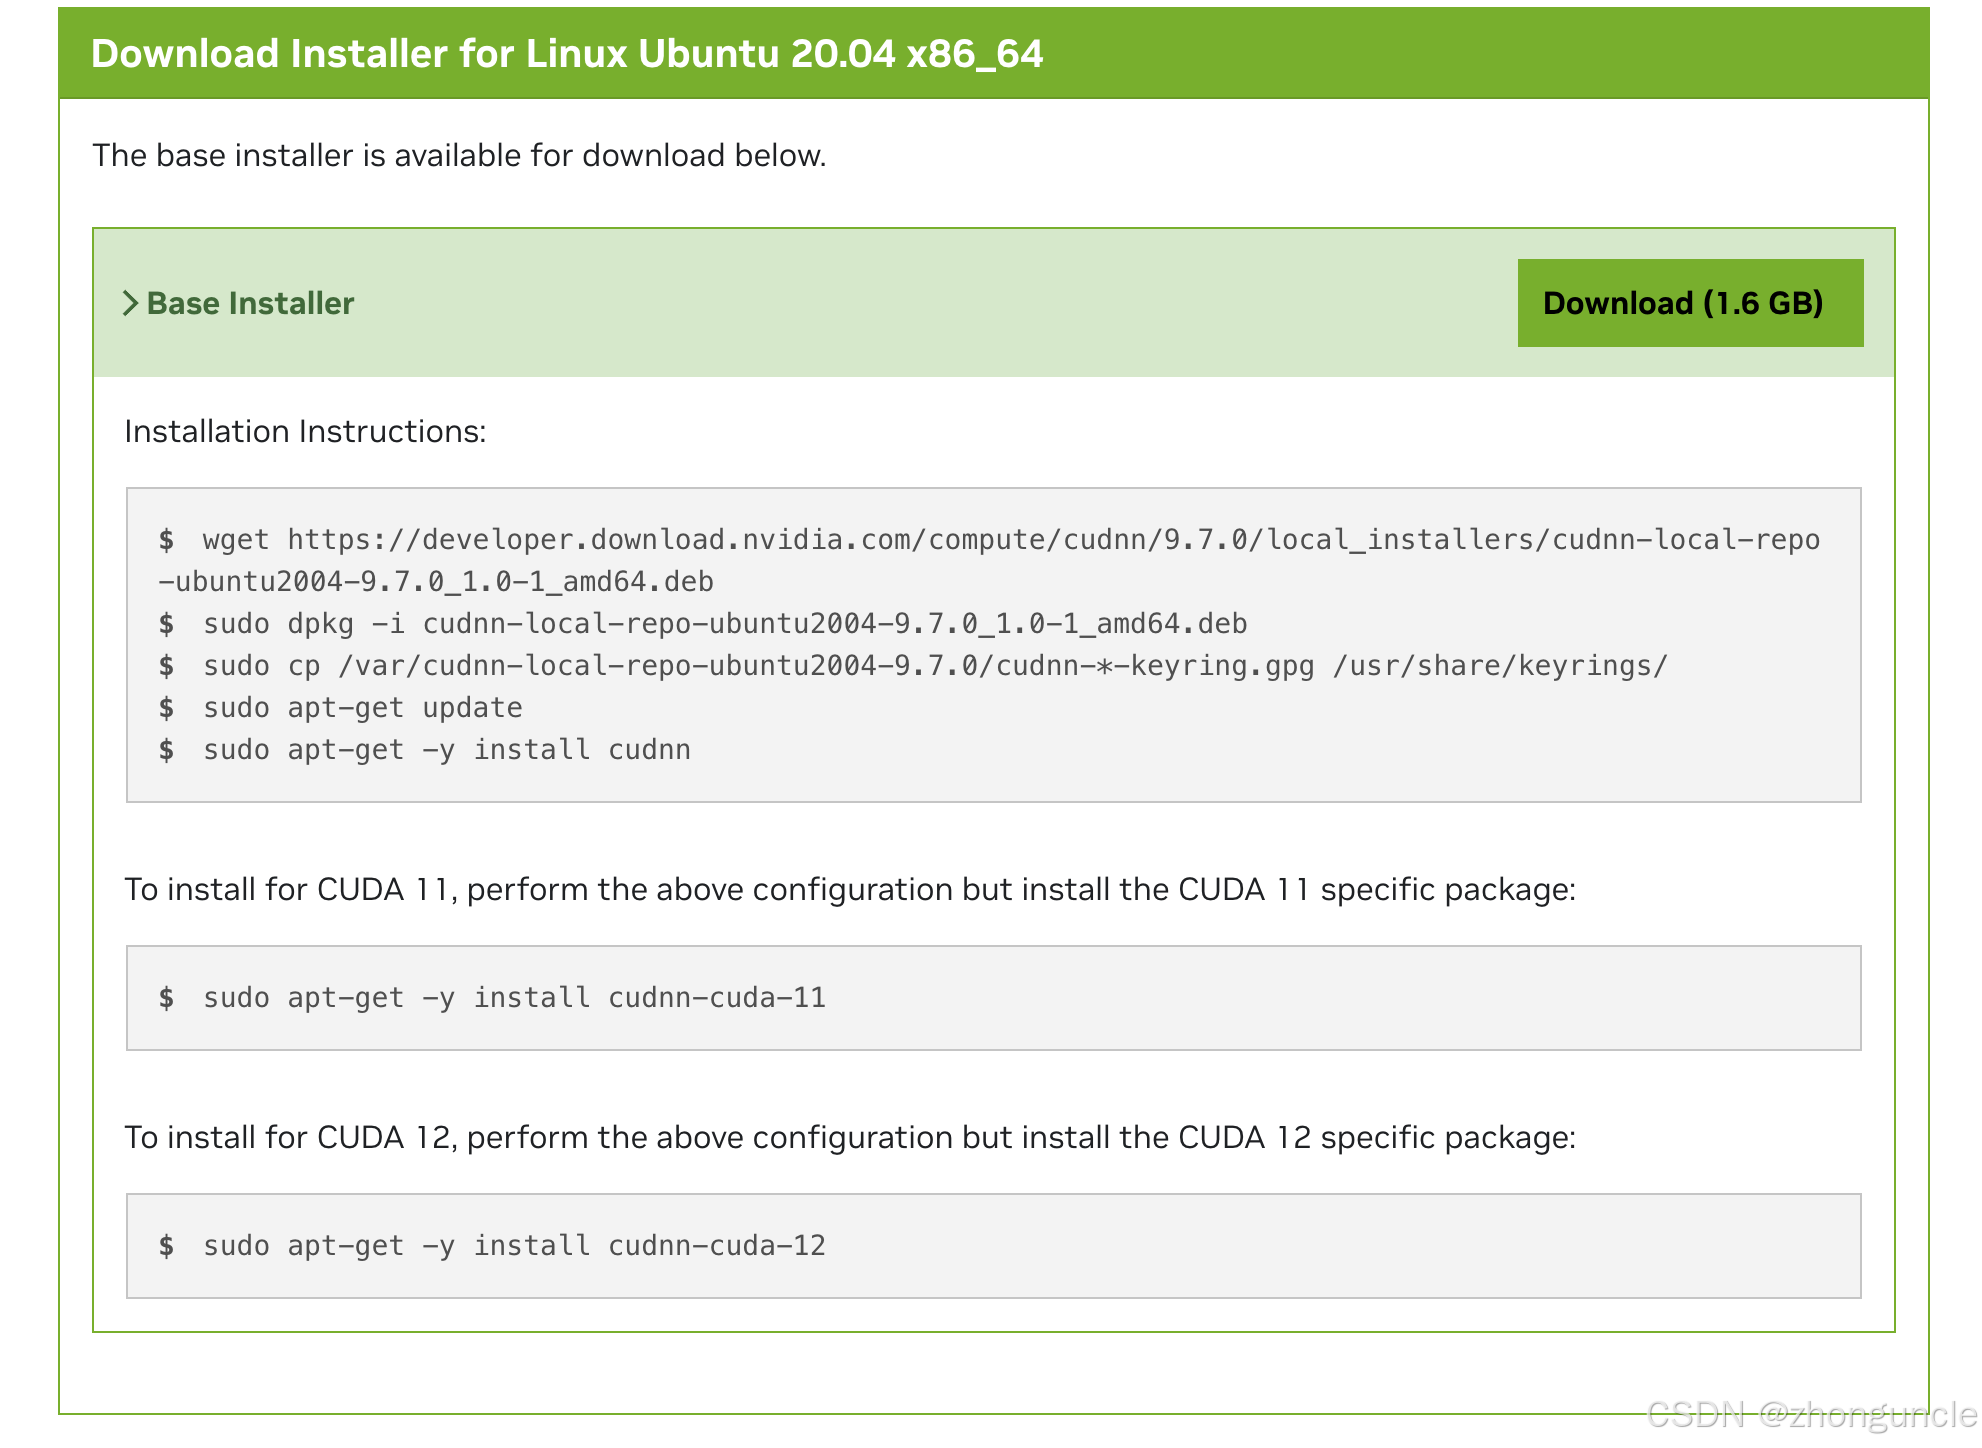
Detailed installation instructions are provided on the download page—no need to search elsewhere:
Results After Installation
After installing the correct cuDNN version:
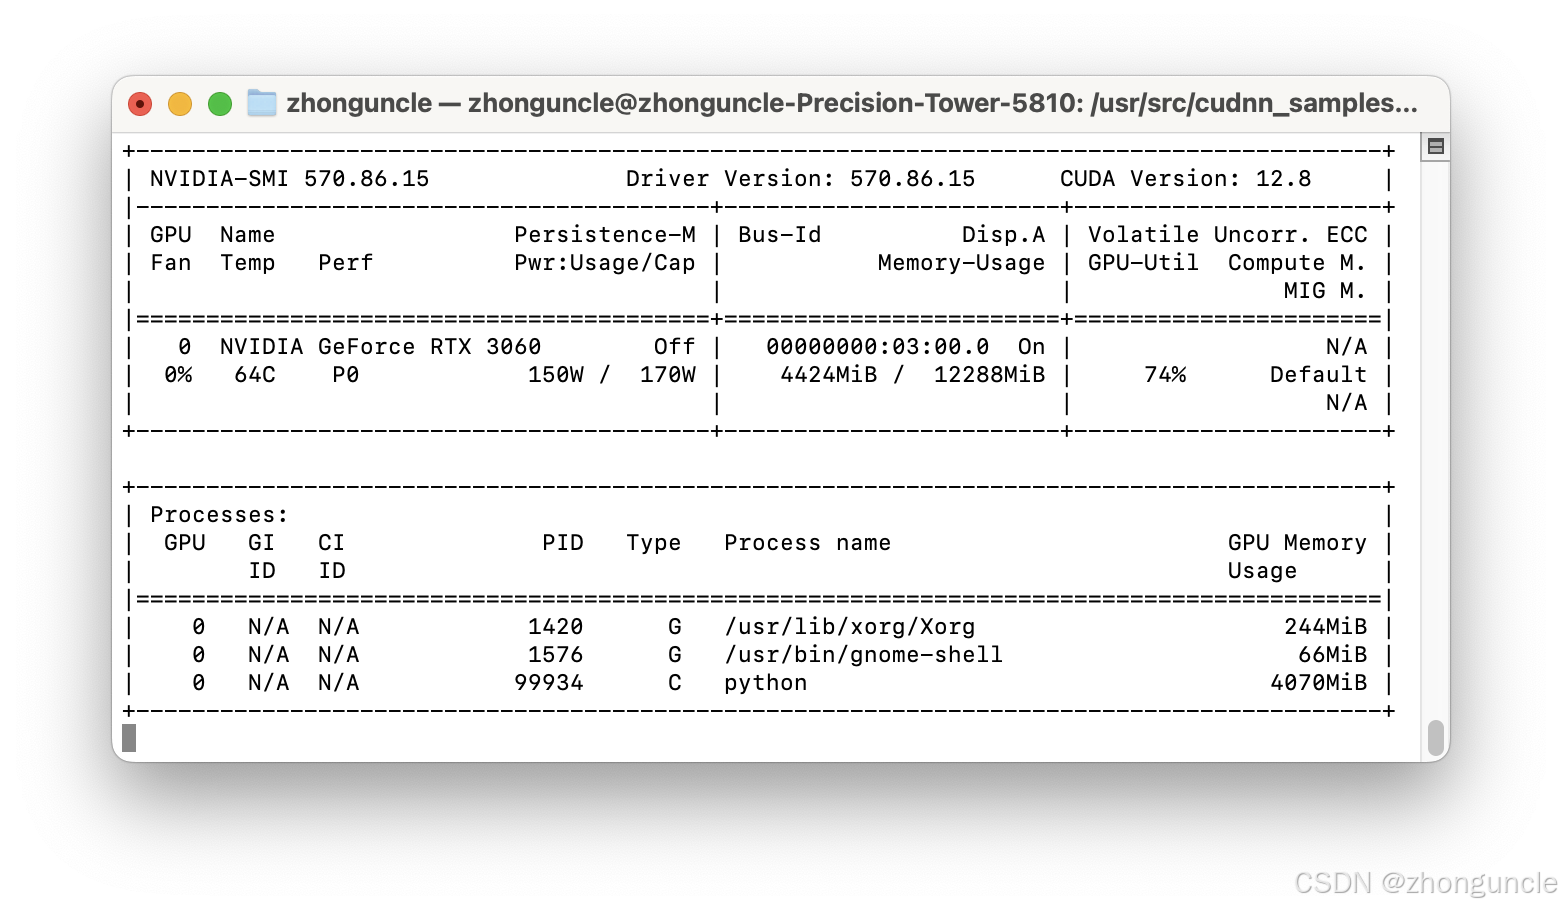
- FaceFusion’s speed increased to 10–20 frames per second.
nvidia-smishowed stable GPU utilization above 90% and VRAM usage reaching 5000 MB.

This speed is finally acceptable!
I hope these will help someone in need~