Dell T5810 Workstation Build for Machine Learning & Gaming: A Budget-Friendly Guide with 3060 12GB or 2080Ti 22GB
This is mostly a personal note to avoid re-researching solutions to problems I’ve already solved. However, since it took me about 20 days to write this article from start to finish, I can’t remember many details—so I may update it in the future.
Most of my current devices have weak GPUs, as I never dabbled in GPU programming or deep learning before. As a result, they’re mostly CPU-heavy and GPU-light. But now I plan to study this field seriously, so I needed a new device. With a limited budget, I chose the following configuration (all prices are final paid amounts):
Since the 2080Ti I bought had coil whine that was really unbearable, I returned it and replaced it with a quieter 3060 12GB with moderate performance. It’s more than sufficient for beginners learning machine learning.
Before(You can But two 2080Ti 22GB and use NVLink):
| Component | Price |
|---|---|
| T5810 Barebone (825W) | 630 |
| E5 2680v4 | 58 |
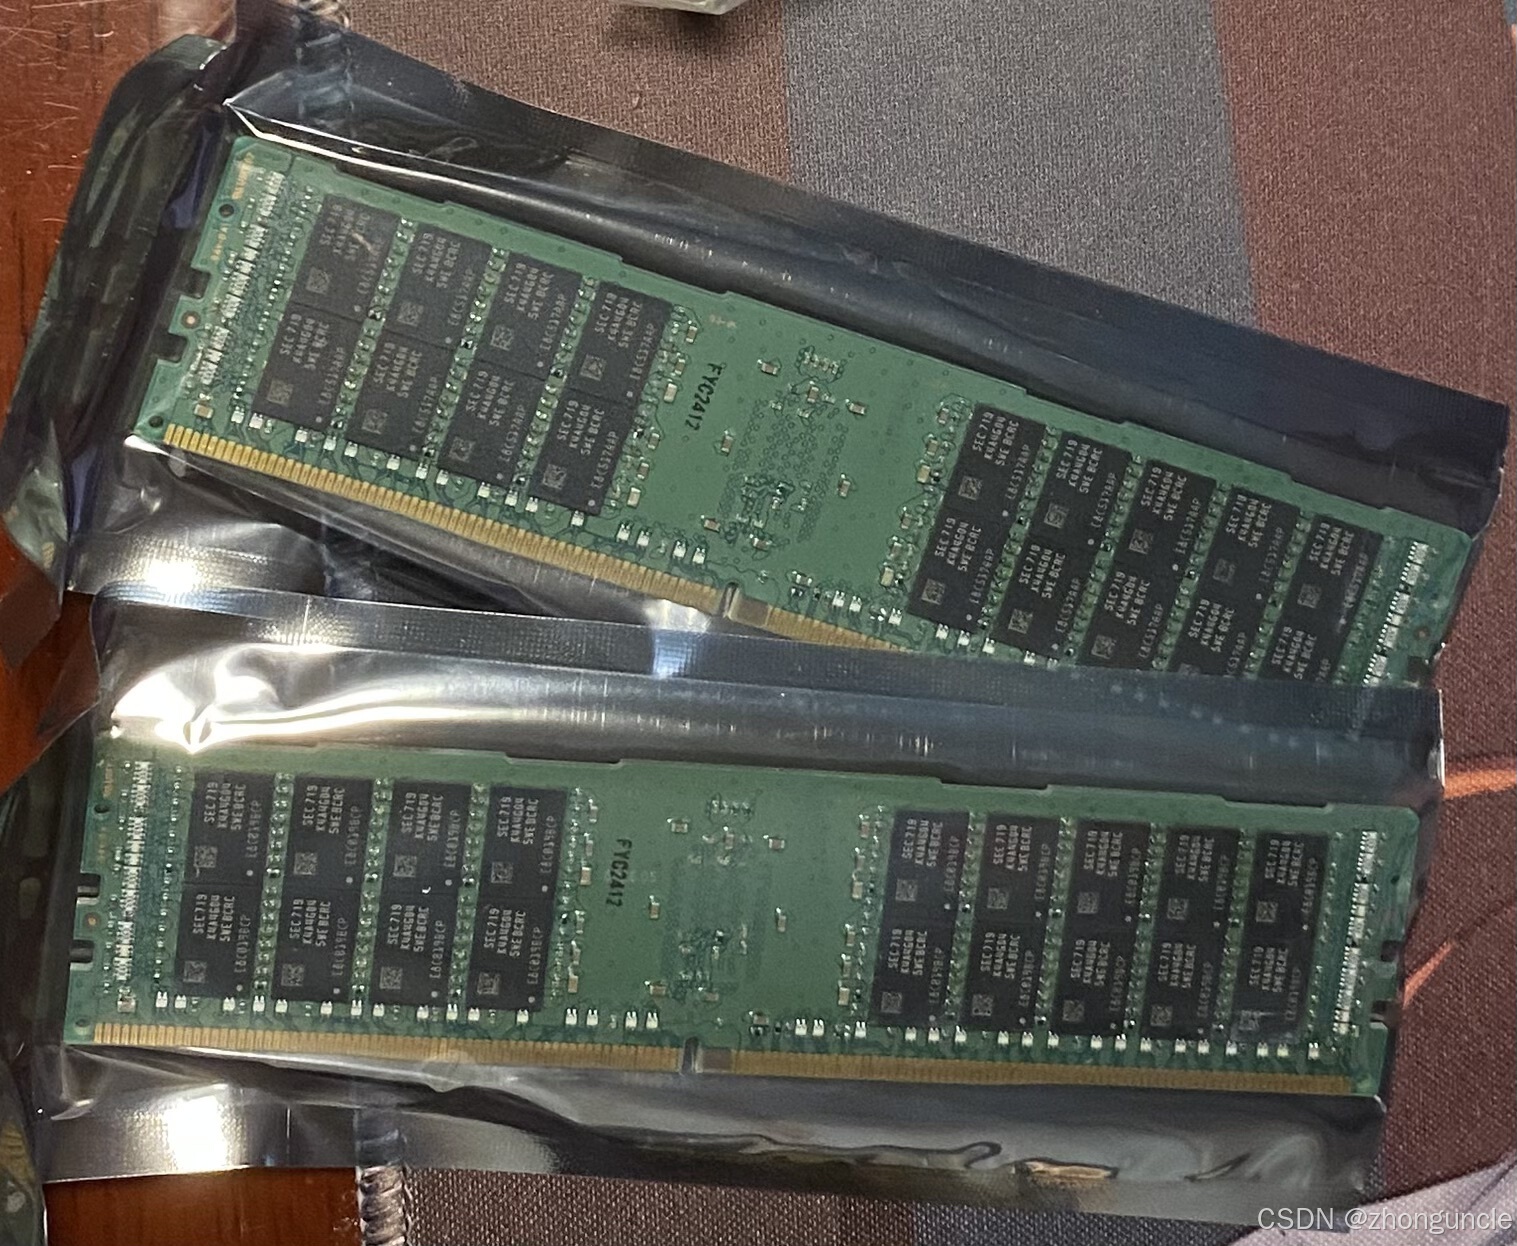
| 32GB | 168 |
| RTX 2080 Ti 22GB | 2400 |
| AX210 | 88 |
| Total | 3344 |
After:
| Component | Price |
|---|---|
| T5810 Barebone (825W) | 630 |
| E5 2680v4 | 58 |
| 32GB | 168 |
| RTX 3060 12GB | 1500 |
| AX210 | 88 |
| Total | 2444 |
Important note: Always buy from a seller in a nearby city, especially if you want to start learning quickly. For one thing, shipping costs are much higher for distant sellers; for another, you can resolve issues much faster. I bought and it took 2-3 days to arrive. When it did, I found the power supply was 425W instead of the 685W I ordered. Later, I discovered they had an 825W option (the seller recommended 750W+ for the 2080Ti), so I asked them to send the higher-wattage one directly and paid the price difference.
Since I already have several hard drives, I didn’t buy new ones. But note that if you use an M.2 SSD, you’ll need to buy an adapter card— the T5810 doesn’t have native M.2 slots. They cost around 10 yuan on Xianyu (a Chinese second-hand platform).
After receiving the workstation, check the BIOS settings. Sometimes RAID mode is enabled by default. Keep it on if you need it, but disable it otherwise— otherwise, you may encounter issues with the hard drive later (e.g., it may stop working if you unplug it while powered on).
Additionally, the T5810 doesn’t come with a Wi-Fi card or Bluetooth. I looked for one compatible with both Windows and Linux and settled on the AX210—it’s more stable and not much more expensive.
If you want to play games, spend an extra 100 yuan to get a 2667 v4 or 2690 v4 CPU, which have slightly higher clock speeds. I plan to upgrade later since these two models have recently increased in price. The 2680 v4 I bought only reaches a maximum actual frequency of 2.88GHz most of the time, rarely hitting the rated 3.30GHz. This causes frame drops and stutters when starting many games (even with the 2080Ti). For some games, the 3060 12G delivers similar frame rates at 4K and 2K— such as the recently released “Yan Yun Shi Liu Sheng” (Sixteen Tones of Yan Yun).
Performance Testing
First, I tested the CPU performance since the new power supply hadn’t arrived yet, and I didn’t dare plug in the GPU.
CPU
CPU-Z test results:
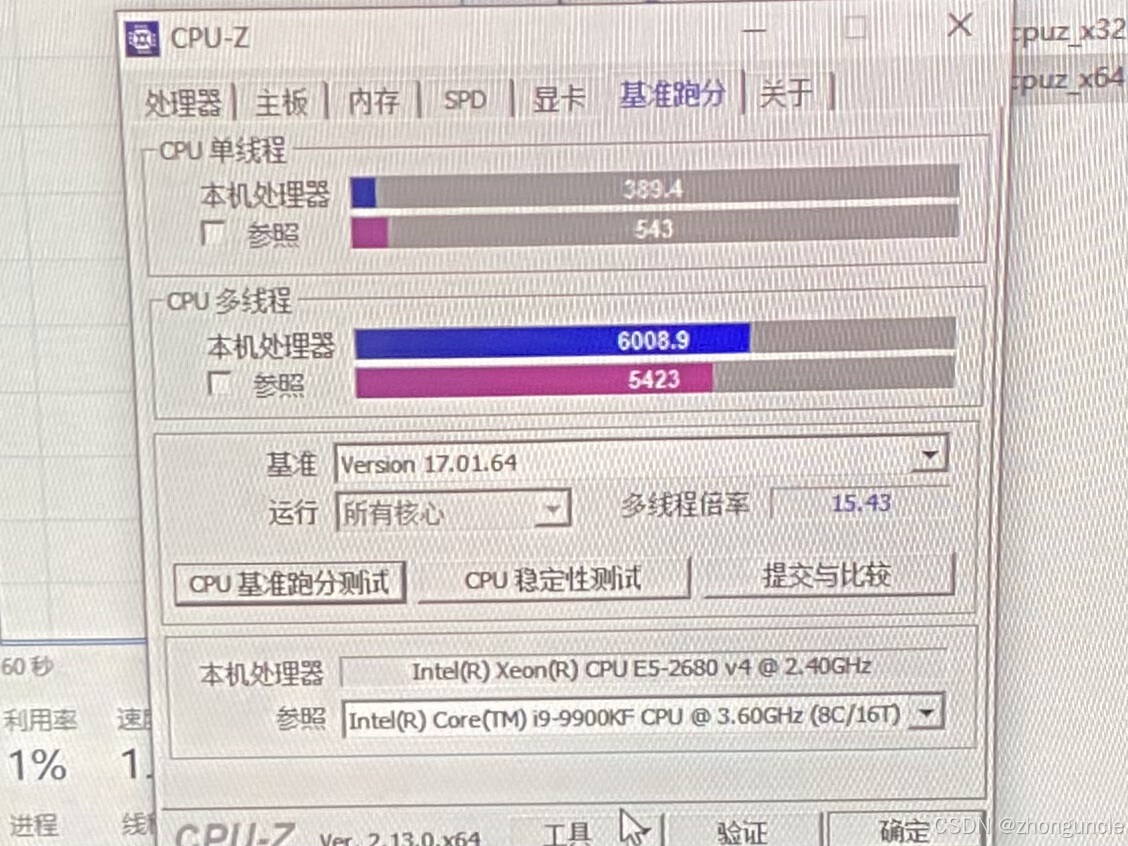
As you can see, its multi-core performance is similar to the i9-9900K, but single-core performance is significantly worse. However, you can’t ask for much for $50. For the price of the CPU and motherboard (excluding the GPU), you could only buy an AMD Ryzen 5 5600X bundle with a motherboard if you chose newer hardware. Additionally, ECC RAM is cheaper.
In daily use, it doesn’t feel much different from recent CPUs. There’s only a brief stutter when starting games or switching large scenes, but no issues after loading. However, games that are single-core intensive still struggle, as I mentioned earlier.
When using OBS for 1080P 30fps recording at 40Mbps with medium-quality software encoding, CPU usage is only 5%~10%.
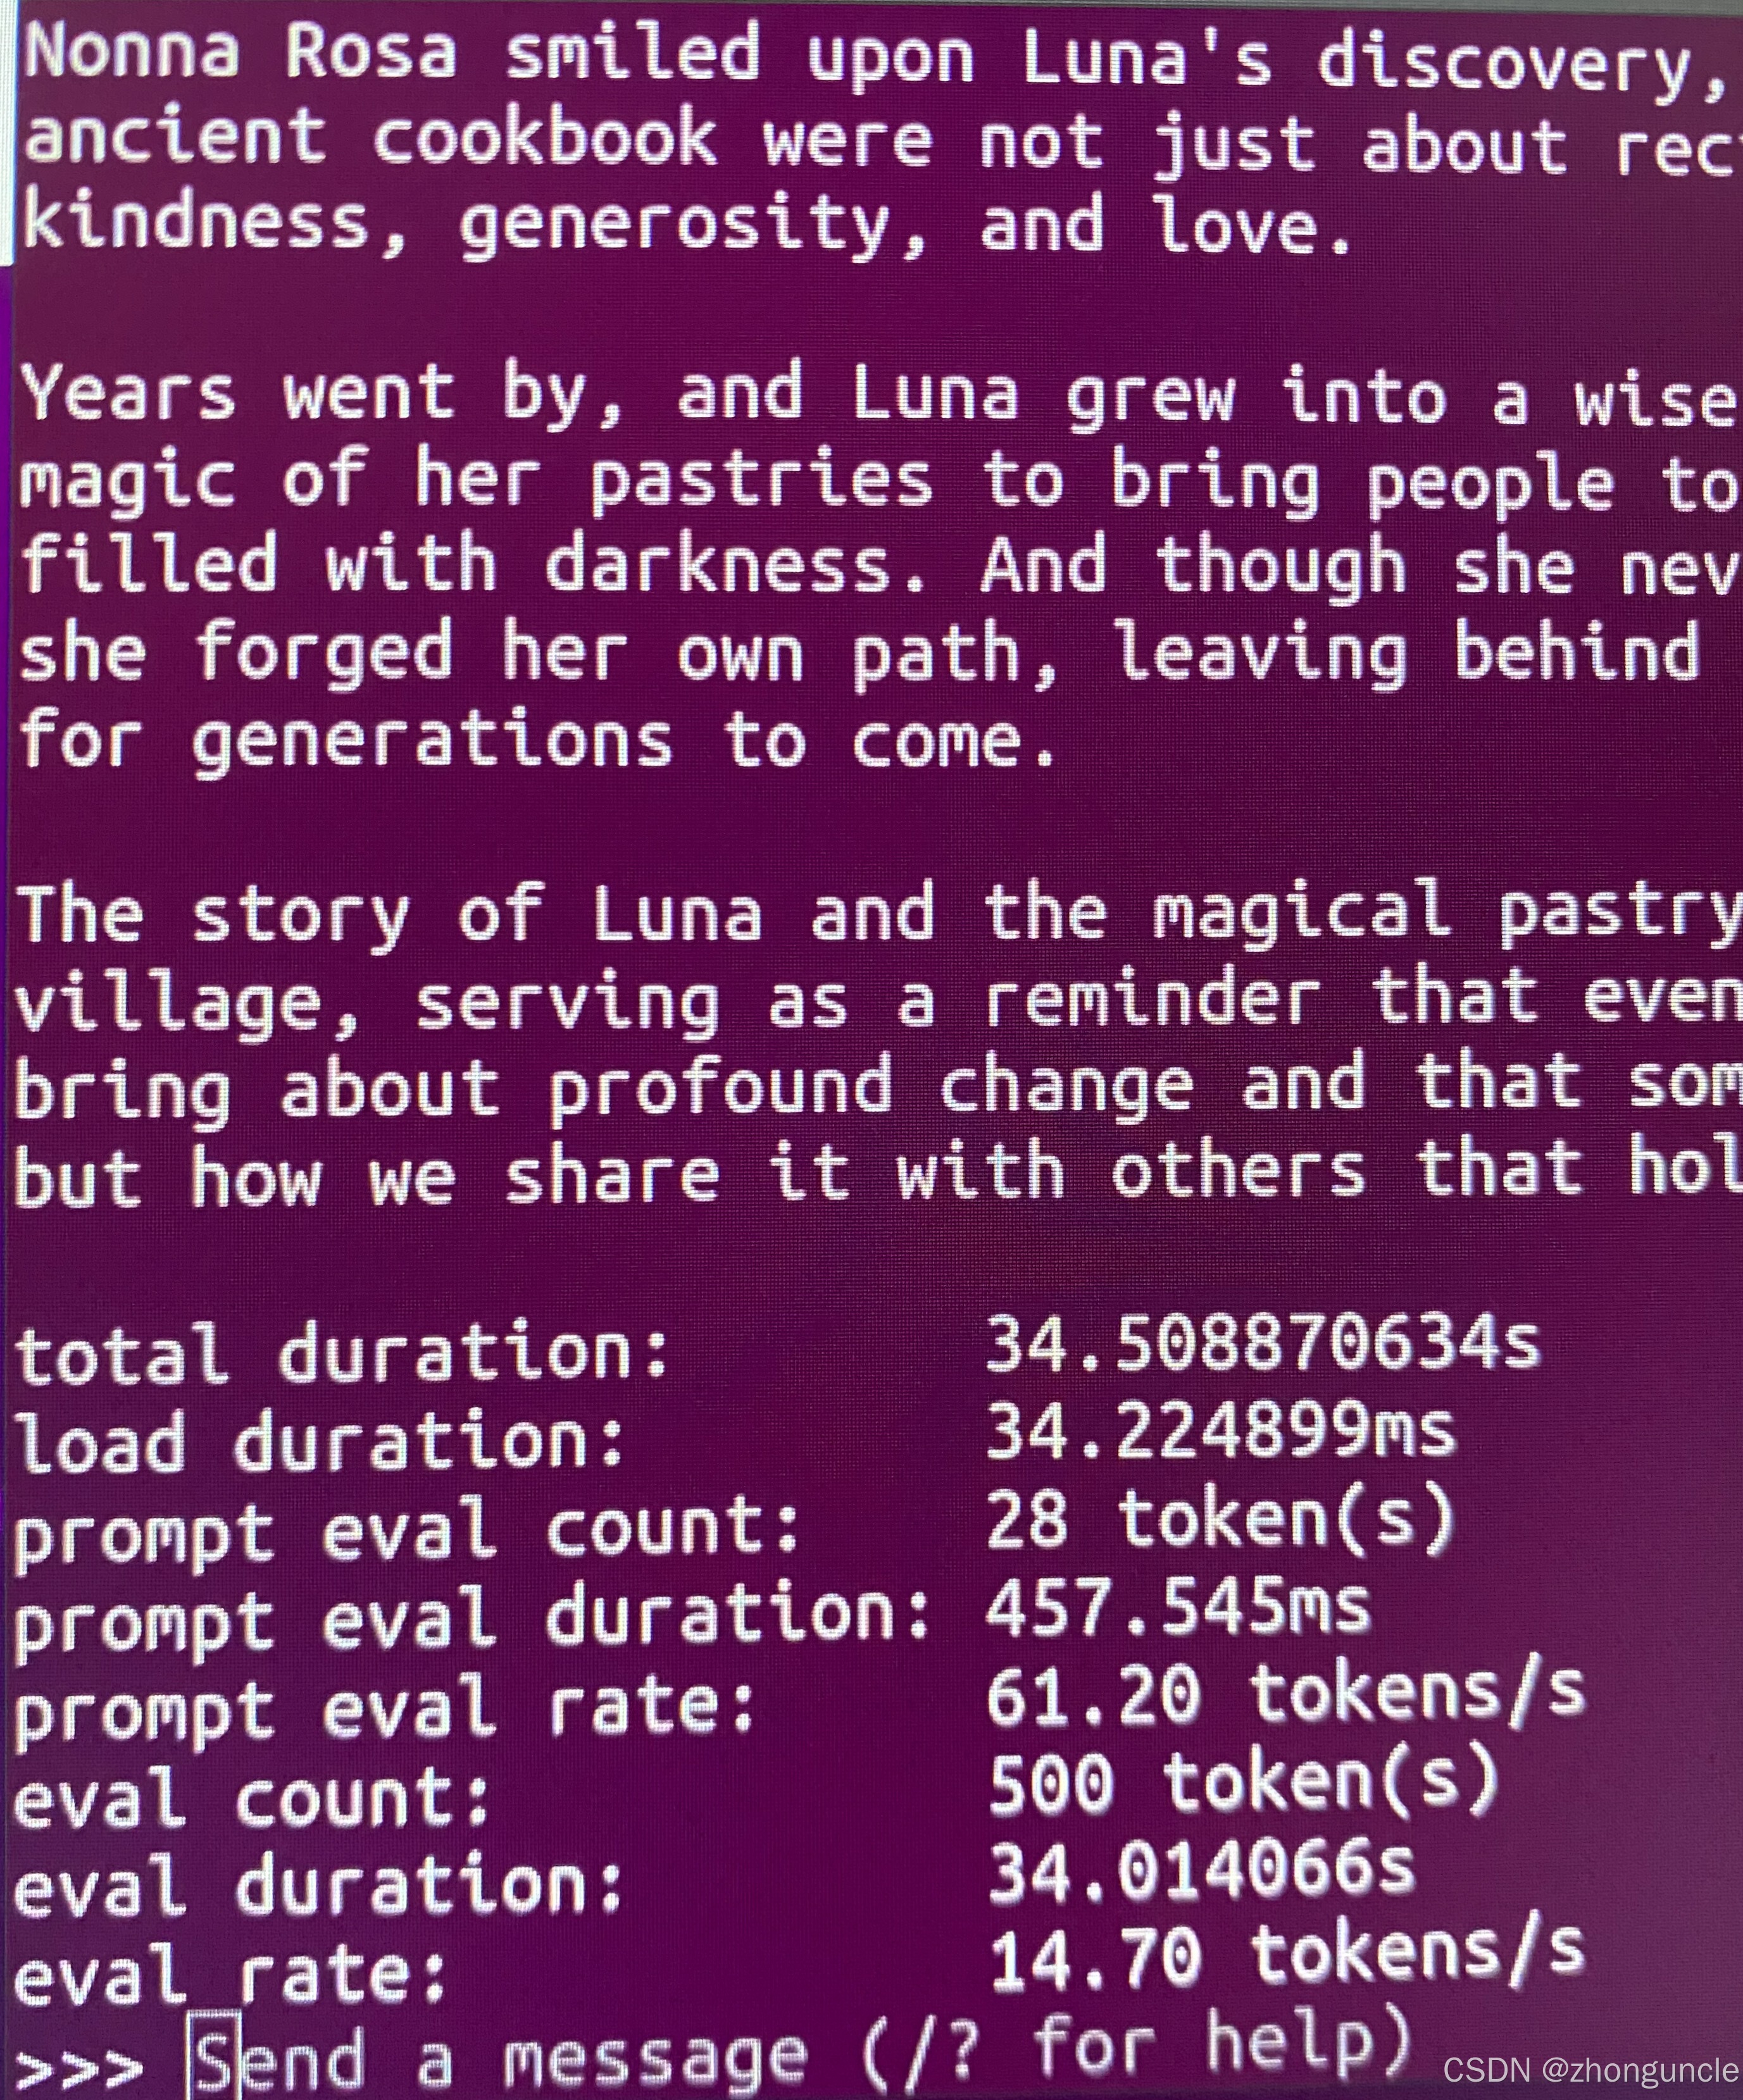
A major advantage of this CPU is its excellent floating-point performance, especially considering its low price. Floating-point performance depends only on the floating-point instruction set, clock speed, and core count (though some generations/models have different parallel channel counts, which is rare but exists)— not IPC (Instructions Per Cycle) or other factors. The theoretical base-frequency floating-point performance of the 2680 v4 is 537.6 GFLOPS, which is comparable to the Intel Core i5-13500 or i7-12800H. Currently, I’m only using dual-channel RAM because I wasn’t sure if quad-channel would work. With quad-channel, the bandwidth is similar to dual-channel DDR5 4800MHz. Why mention this? Because I initially used Ollama with a 3B model without realizing it was running on the CPU— and the speed was surprisingly acceptable. If you want better performance, you can get the 2698 v4 (704 GFLOPS), which is on par with the Core i7-12700K’s floating-point performance.
I don’t recommend the 2699 v4 (774.4 GFLOPS) or 2699A v4 (844.8 GFLOPS), even though their floating-point performance matches the Core i7-13700K or i5-14600K. At 920 yuan, they offer poor value for money (the 2698 v4 is also not very cost-effective). While they provide significant improvements over the 2680 v4, they’re not worth it for beginners.
This speed is more than sufficient for simple tasks.
GPU
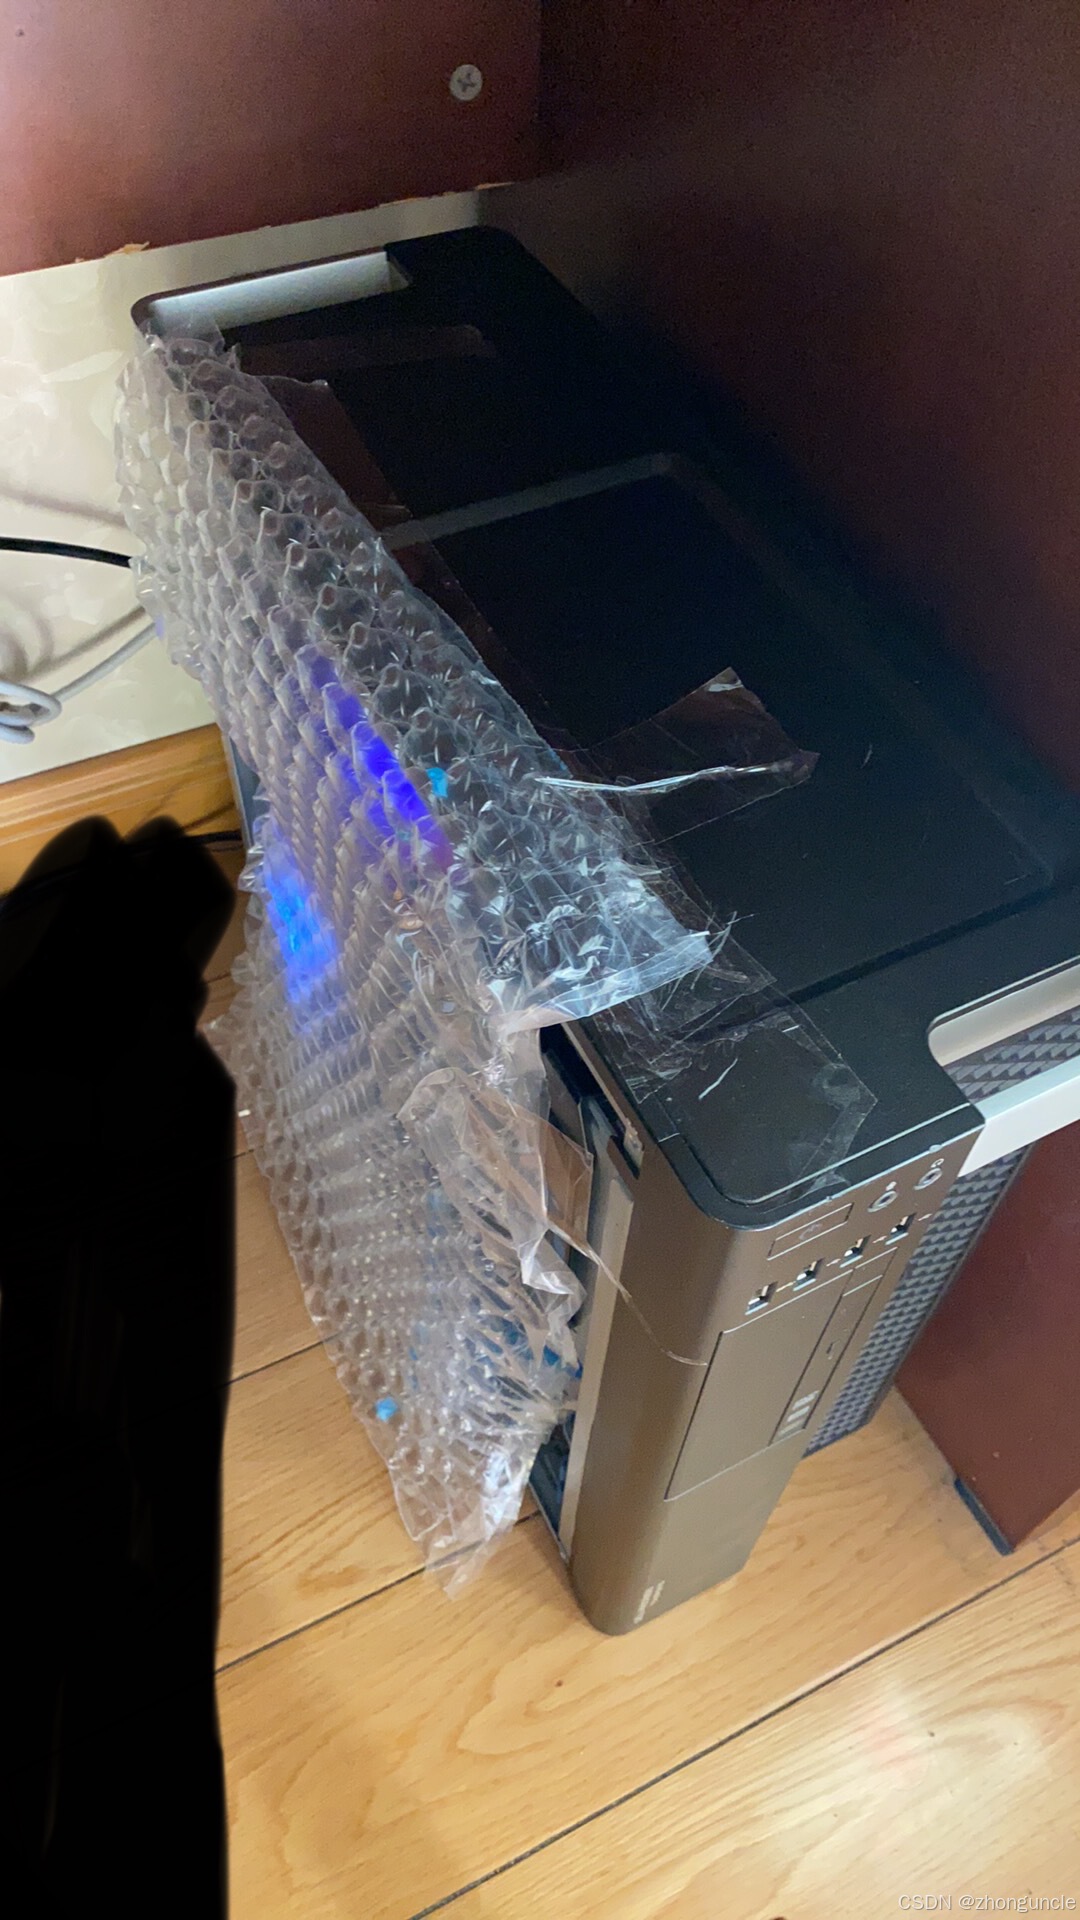
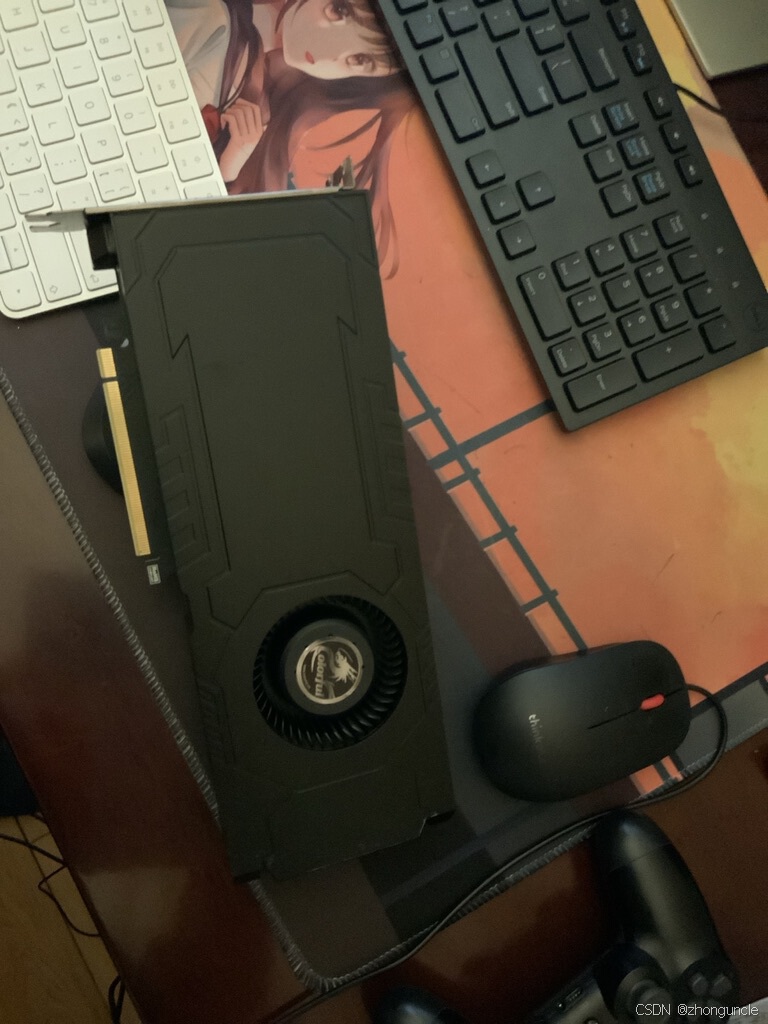
Note that the Dell T5810 and T5820 cases can fit very long GPUs but not very tall ones— otherwise, the side panel won’t close. For example, the 3060 I bought is quite tall, so I had to place it like this. However, this setup offers good heat dissipation. I even unplugged the front fan, and the system remains extremely quiet under full load:
2080Ti 22GB
The 2080Ti 22GB delivers excellent performance. However, due to repeated issues with accessories, I never got to properly test it before returning it— only testing a few games.
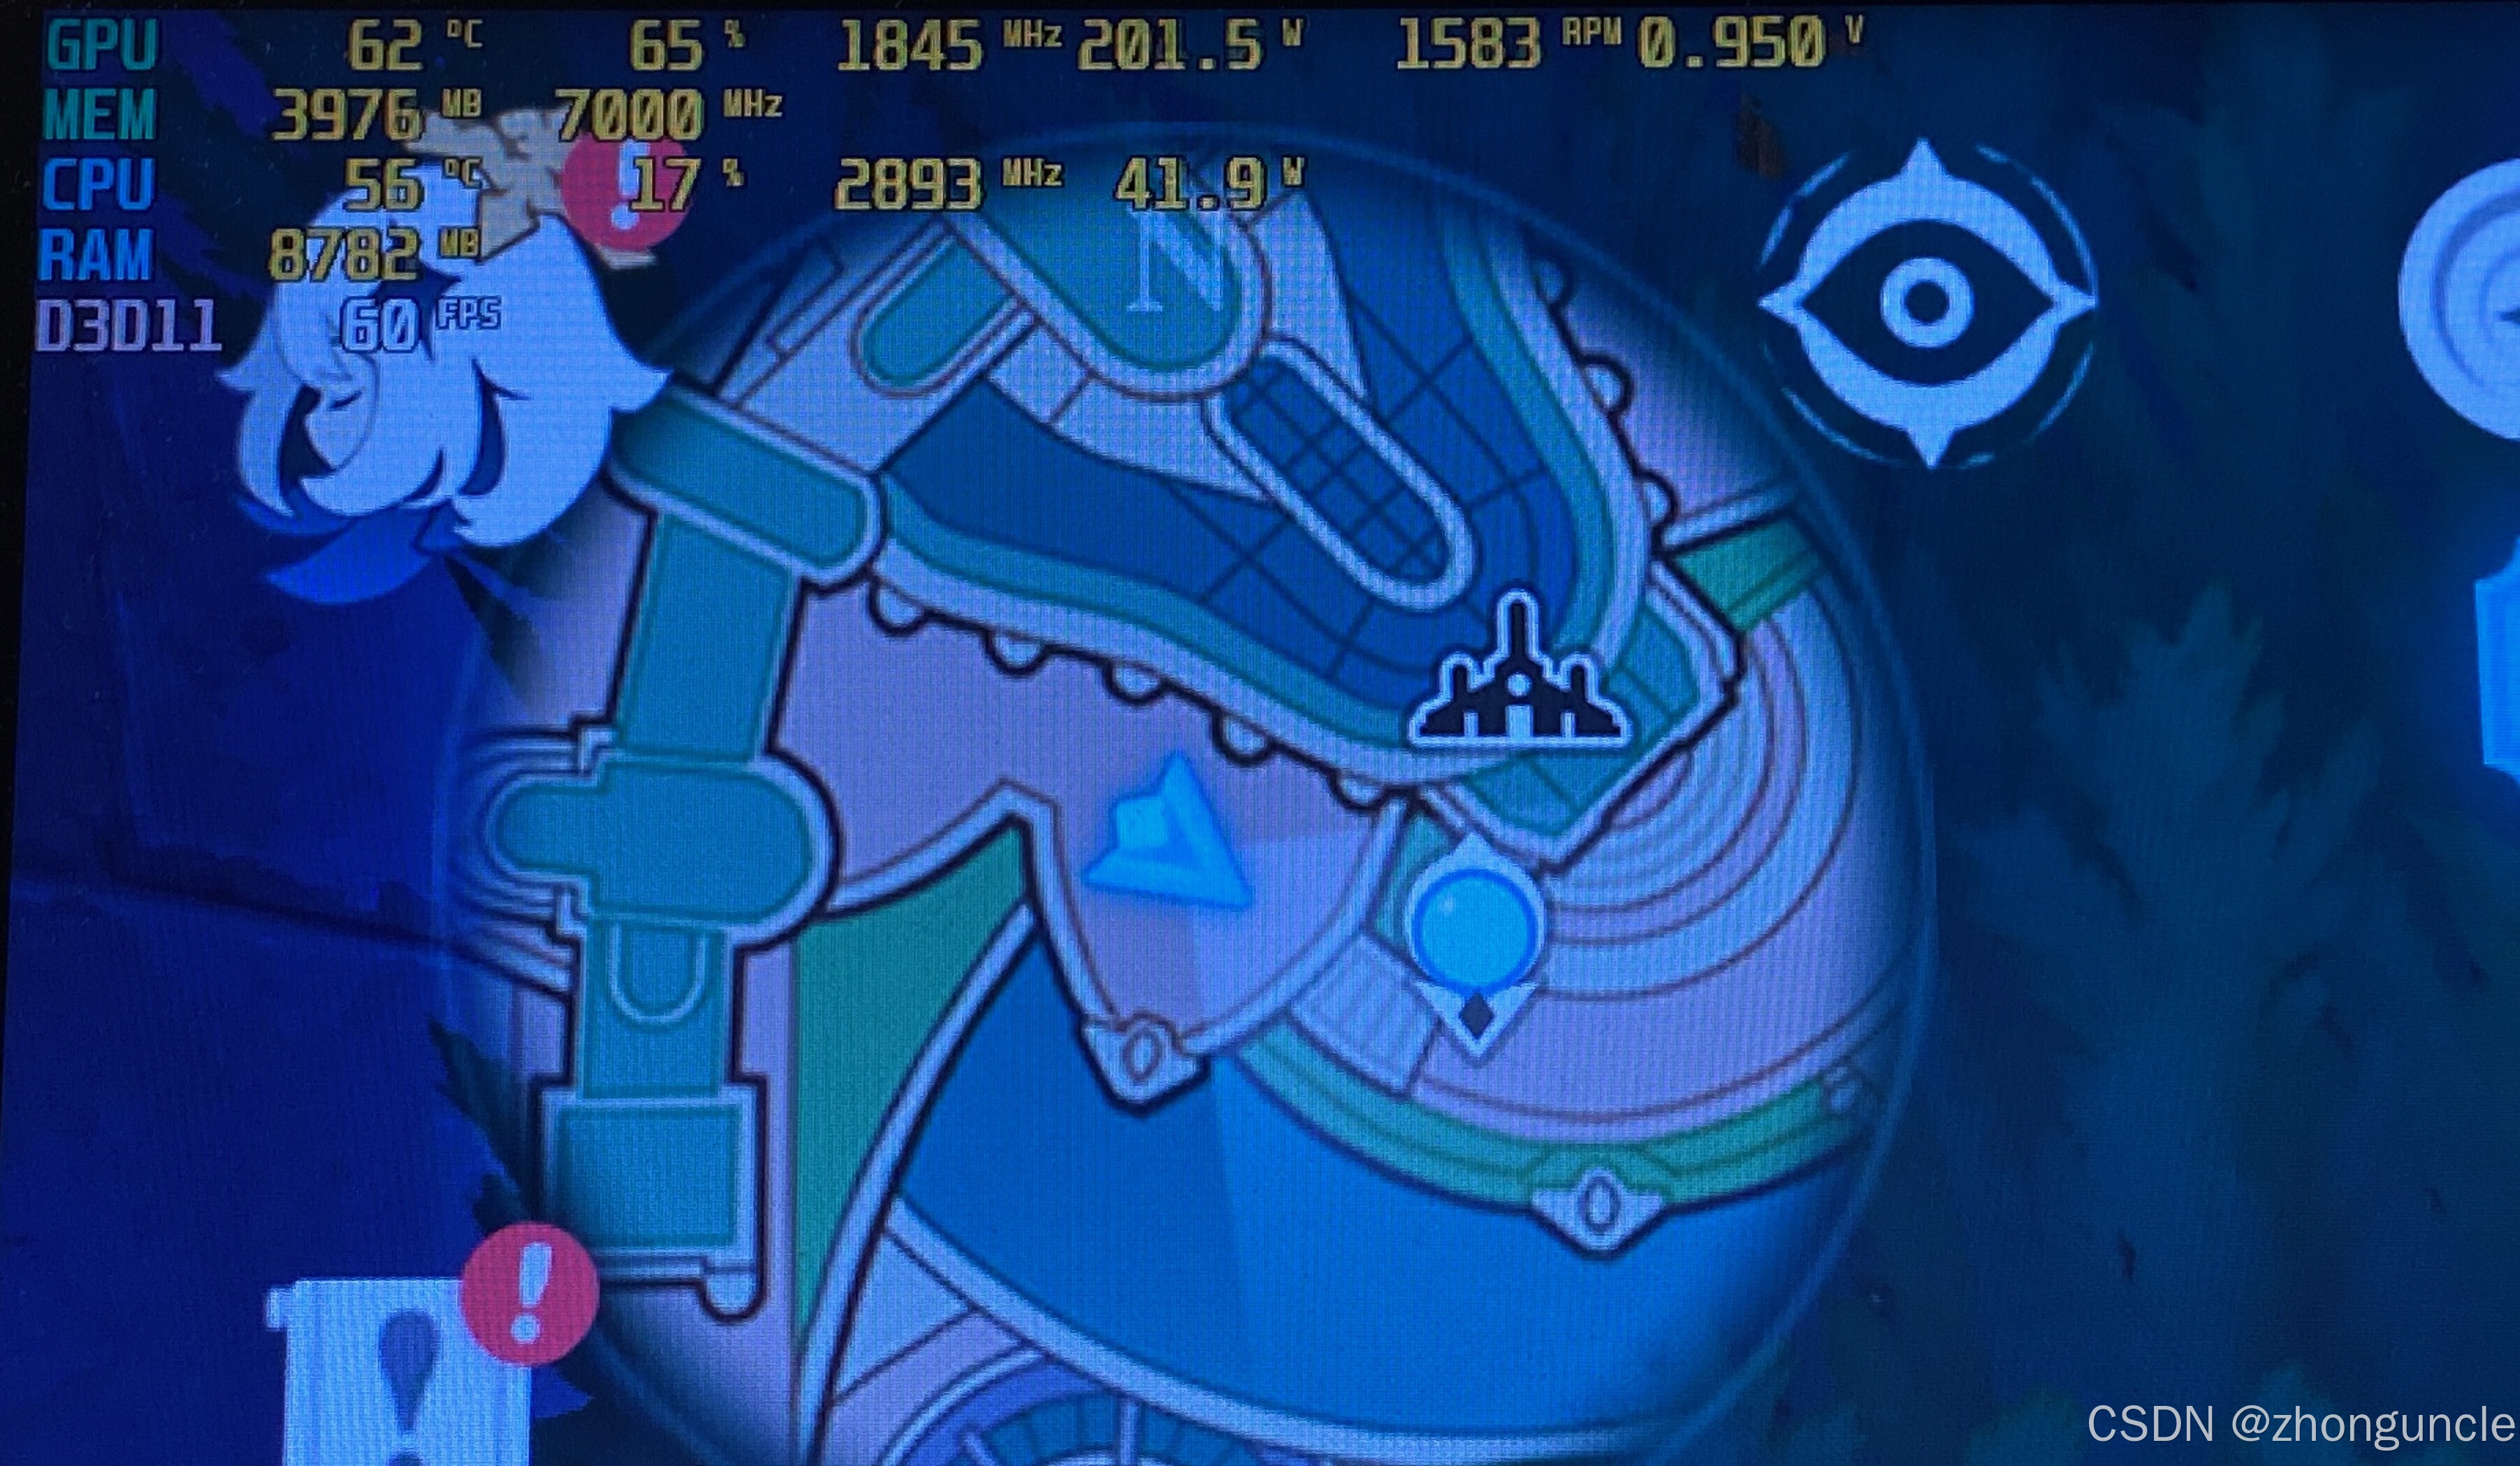
Most games run stably at 4K 60fps. After undervolting, it consumes less than 200W under full load. This allows the CPU + GPU to draw around 300W total.
Test results for “Tomb Raider 10” at 4K maximum settings:
Performance in “Genshin Impact” at 4K (miHoYo games run at maximum frequency, so power consumption is very high):
Running both “Genshin Impact” and “Honkai: Star Rail” simultaneously (I undervolted and overclocked the GPU here, so power consumption exceeded 200W):

The large VRAM is really nice— I could max out the textures (8GB) in “Resident Evil 3”. (No screenshot here.)
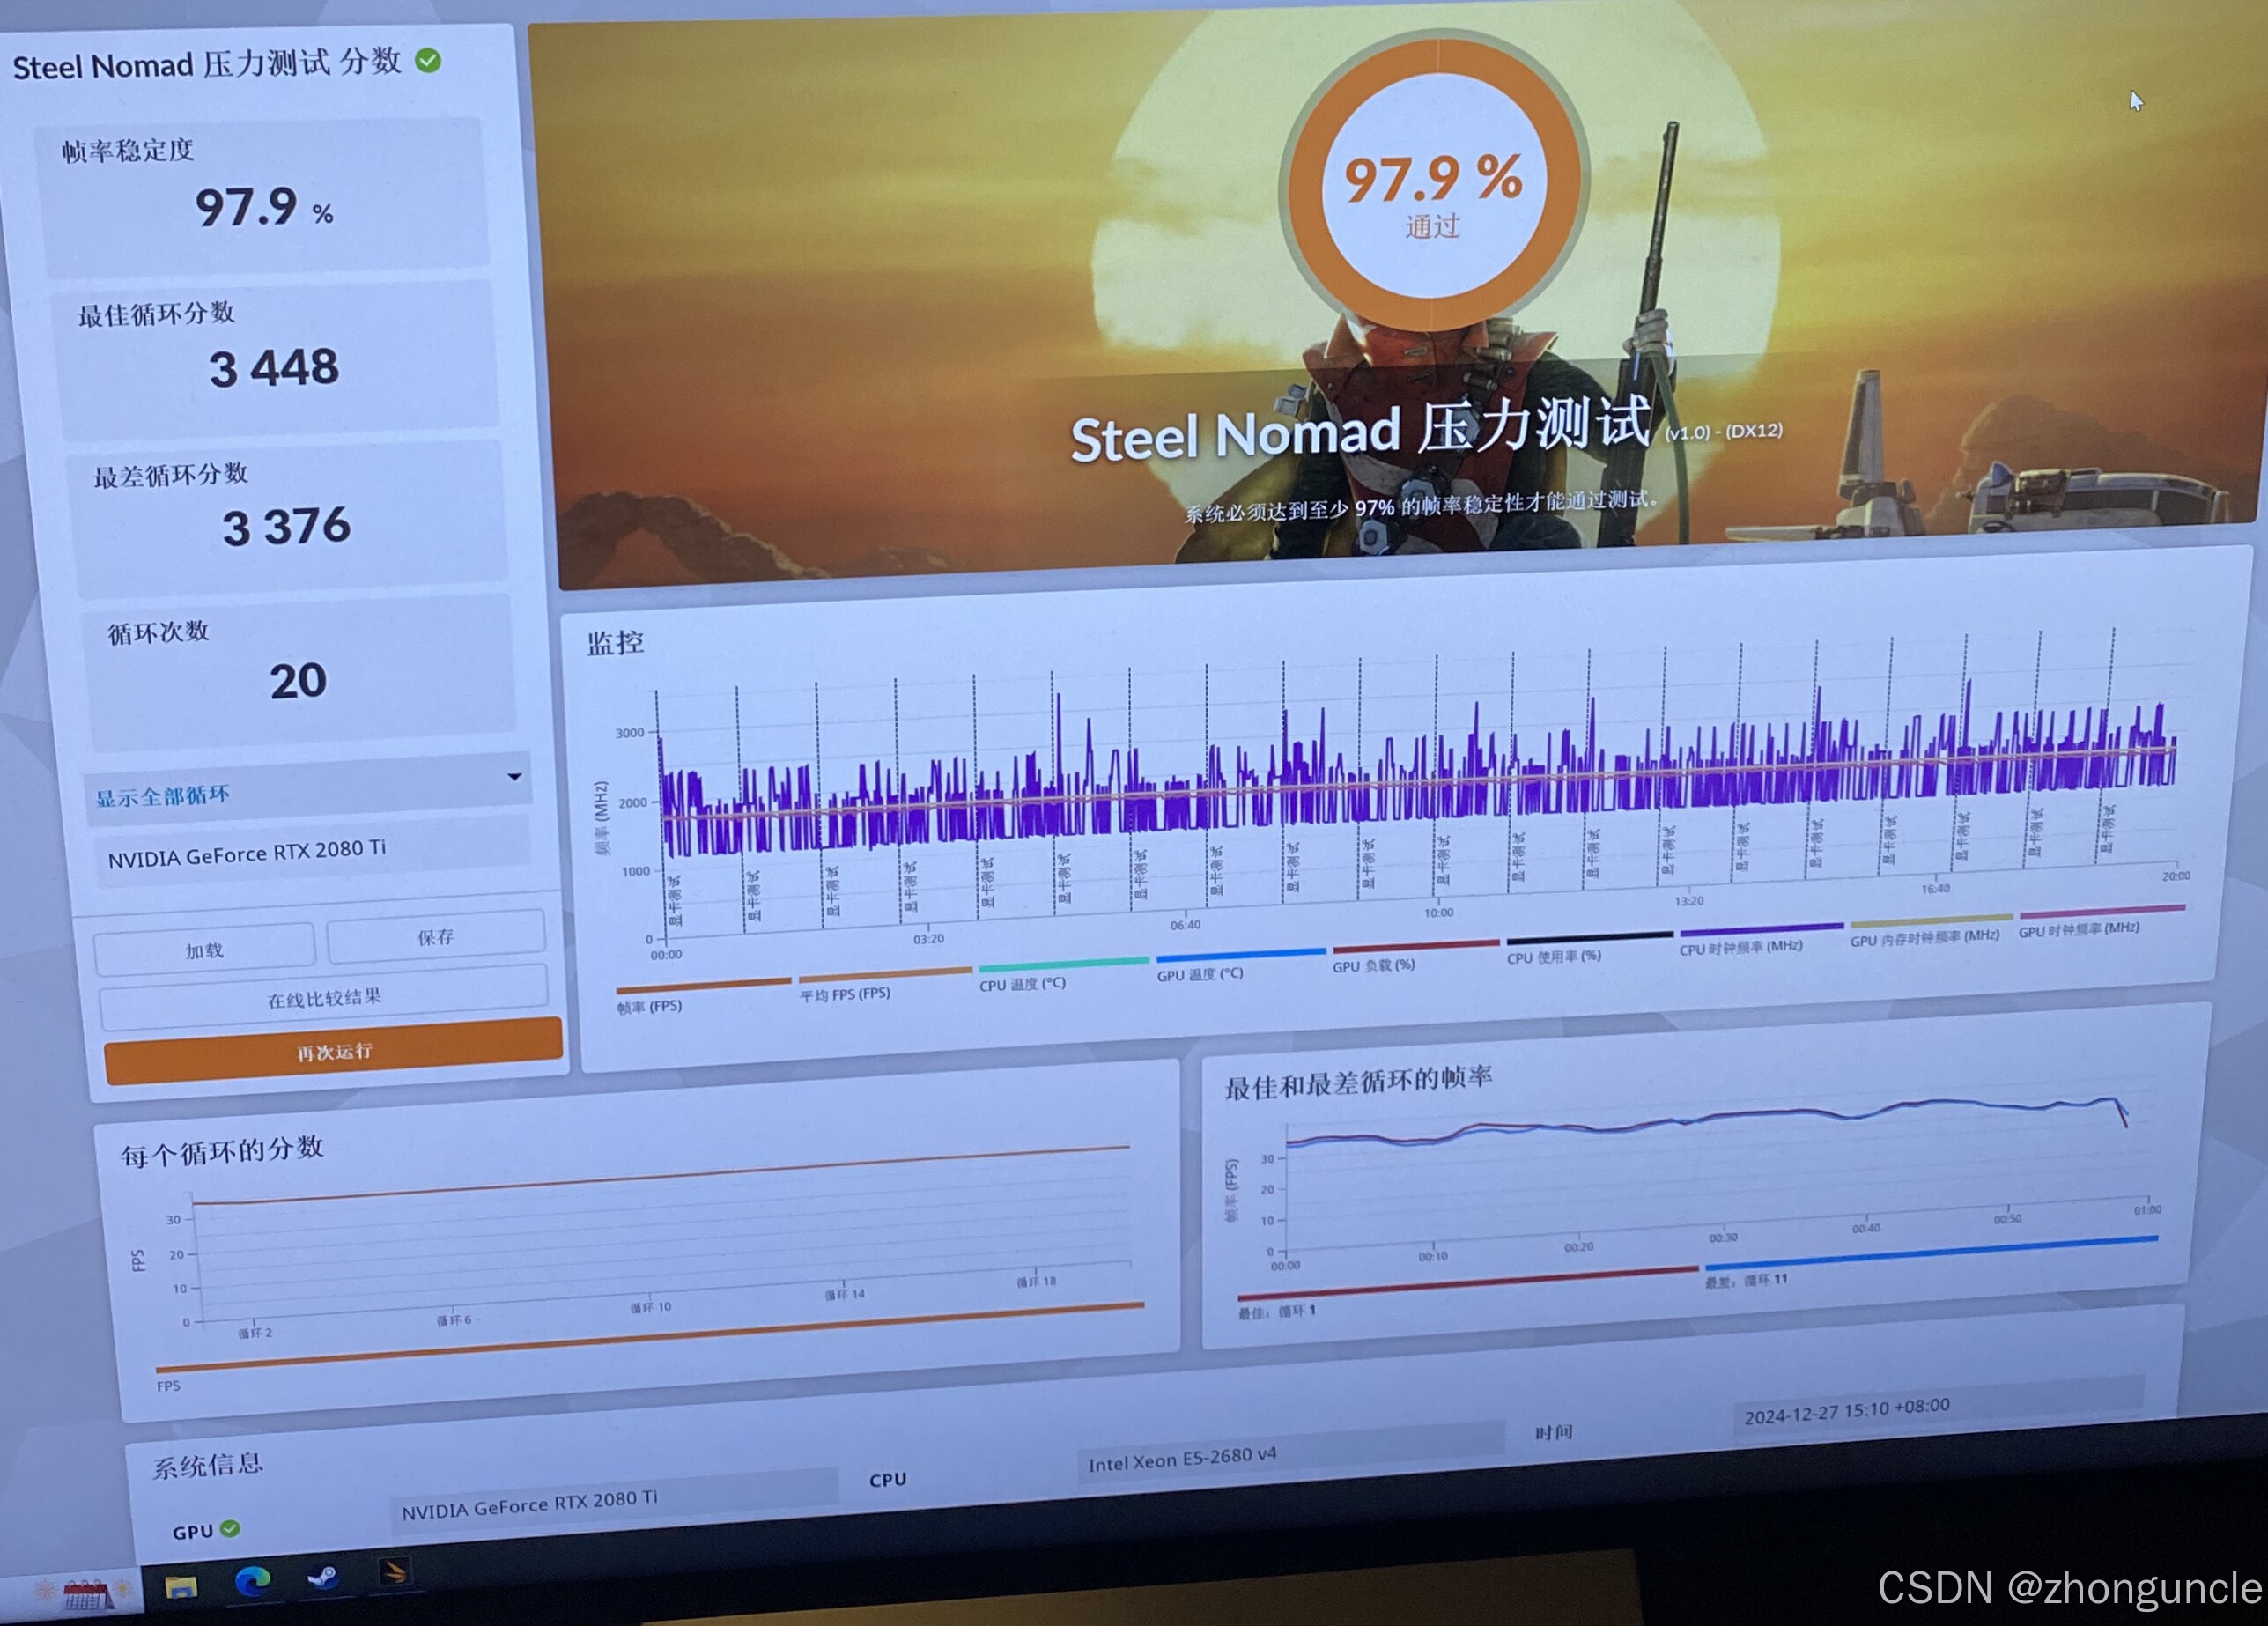
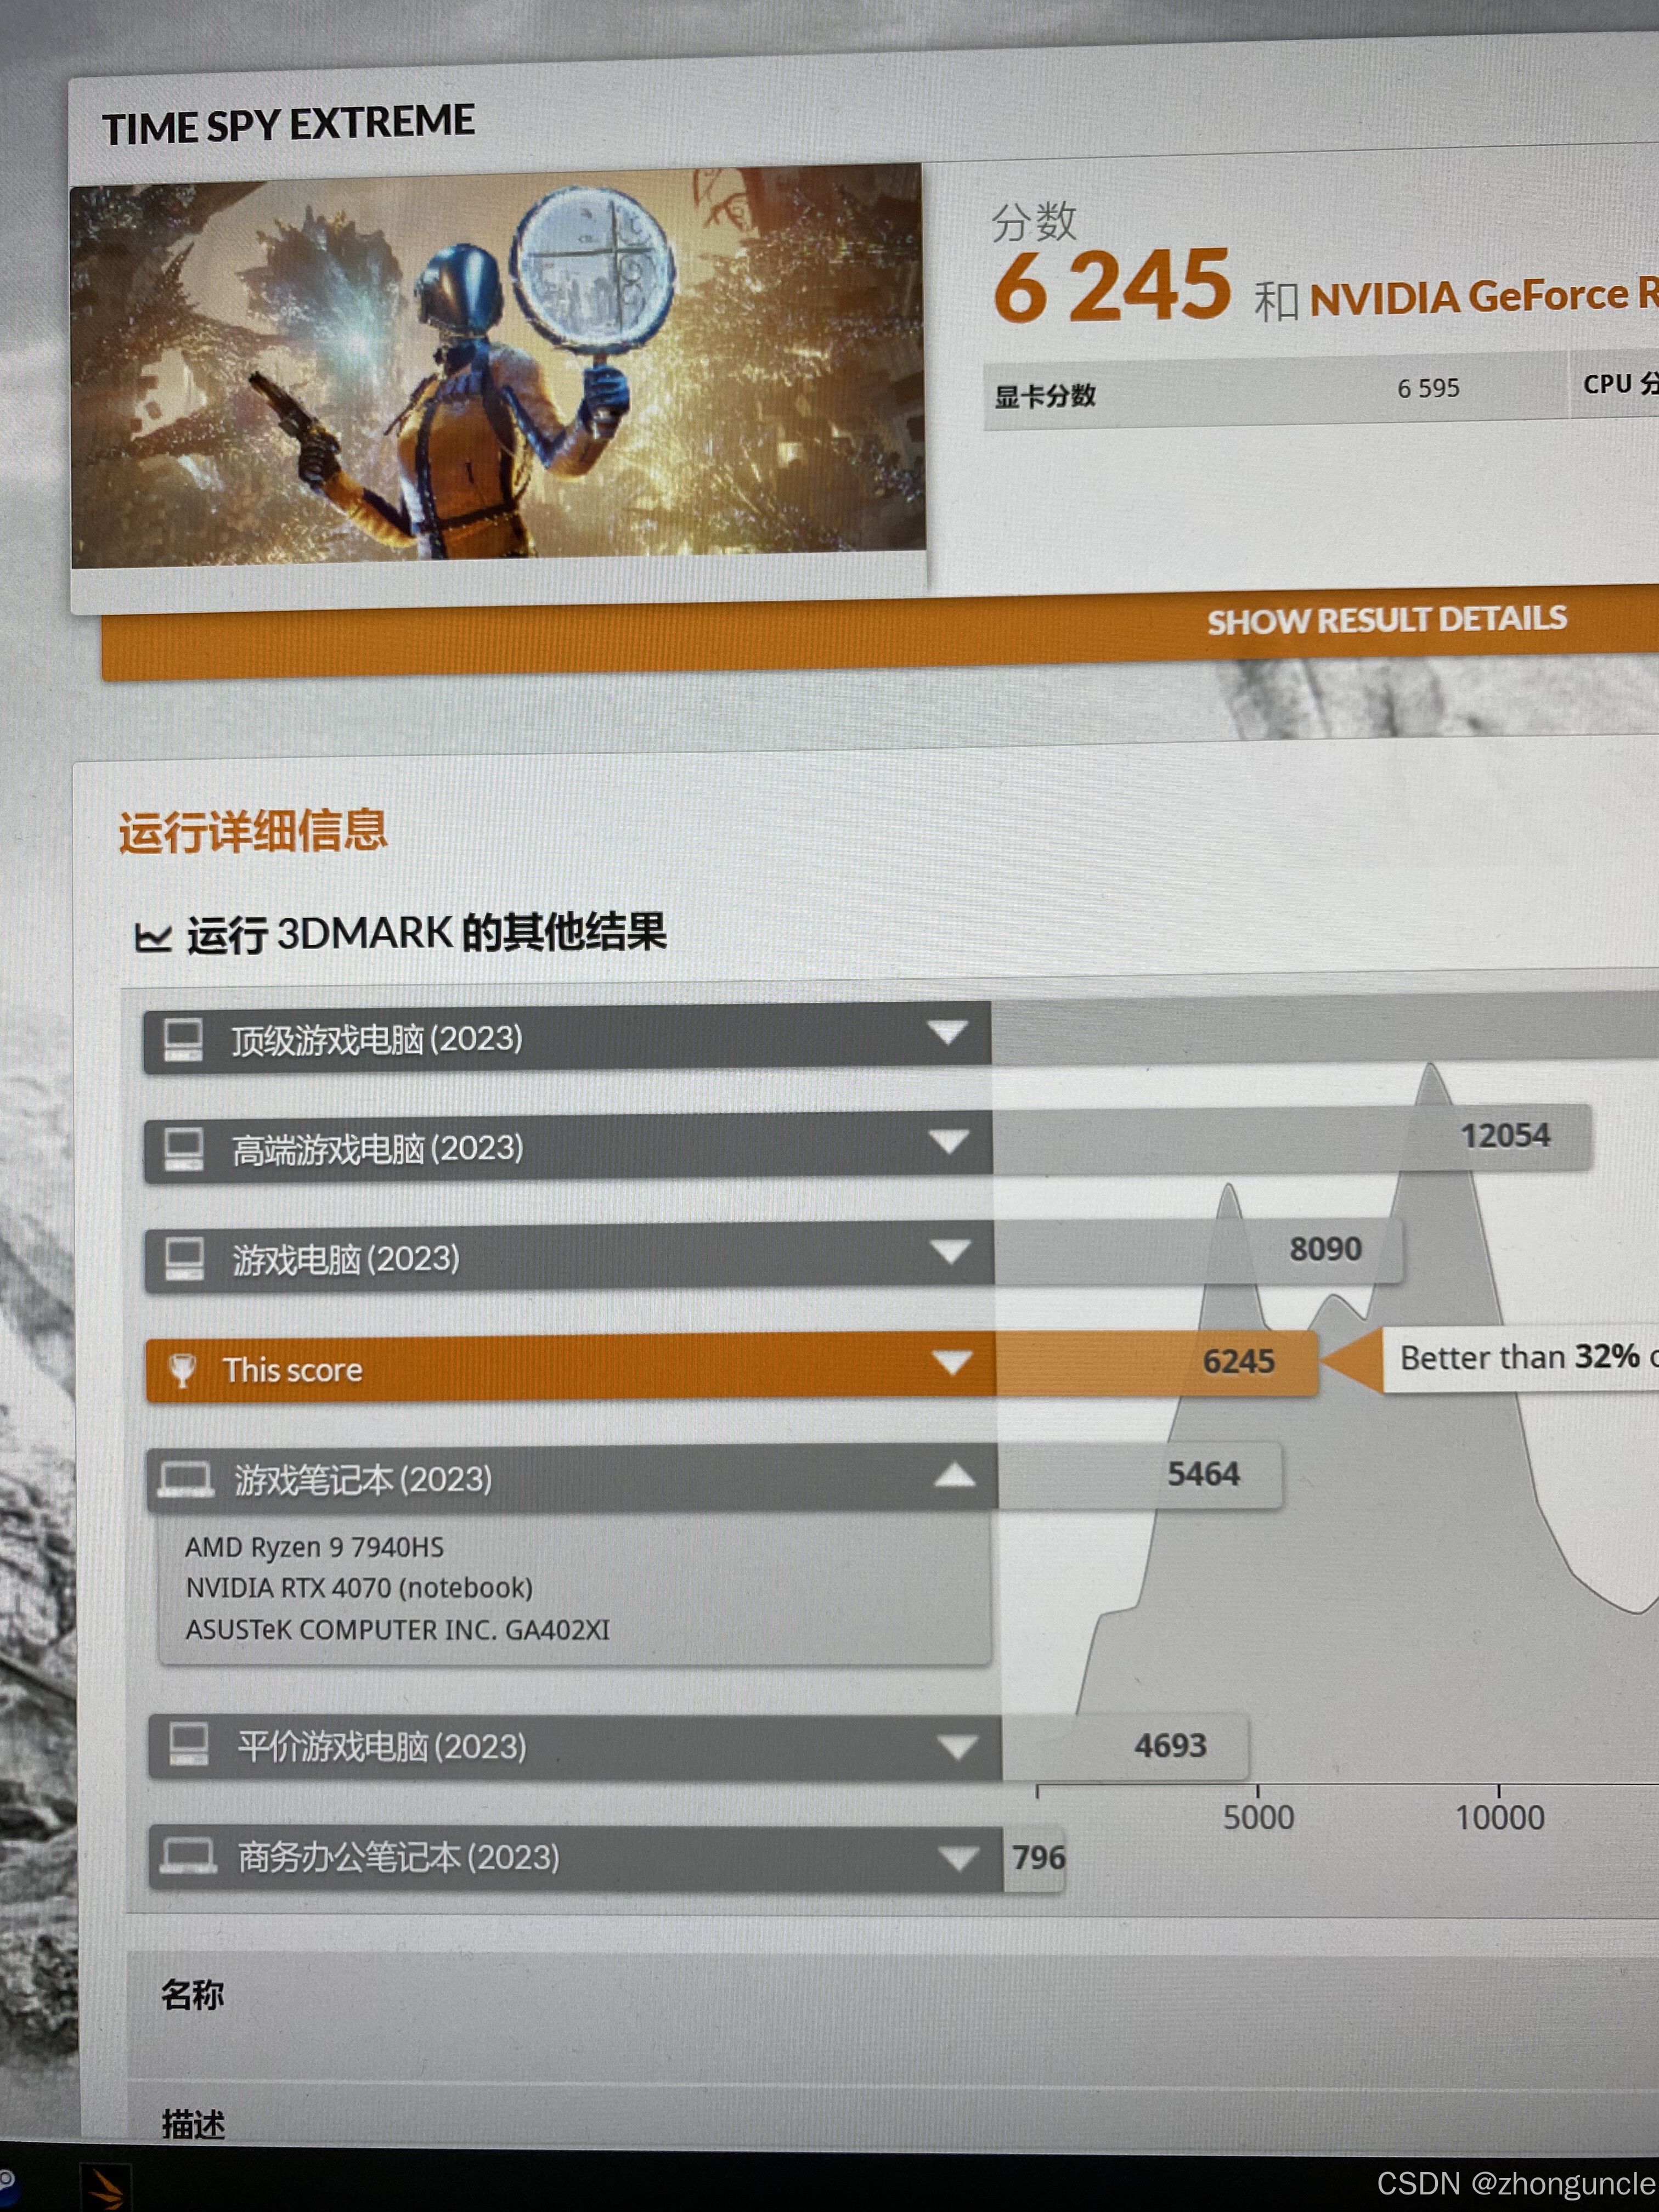
3DMark test results:
Unfortunately, the blower fan produced a sharp coil whine that gave me a headache— it took me several days to recover. I was so annoyed that I didn’t want to spend more money or effort on it. The 2080Ti 22GB is second only to the 3090 and 4090 (among consumer GPUs) for machine learning and offers excellent value. If you plan to buy one, I recommend getting the triple-fan version (around 2800 yuan).
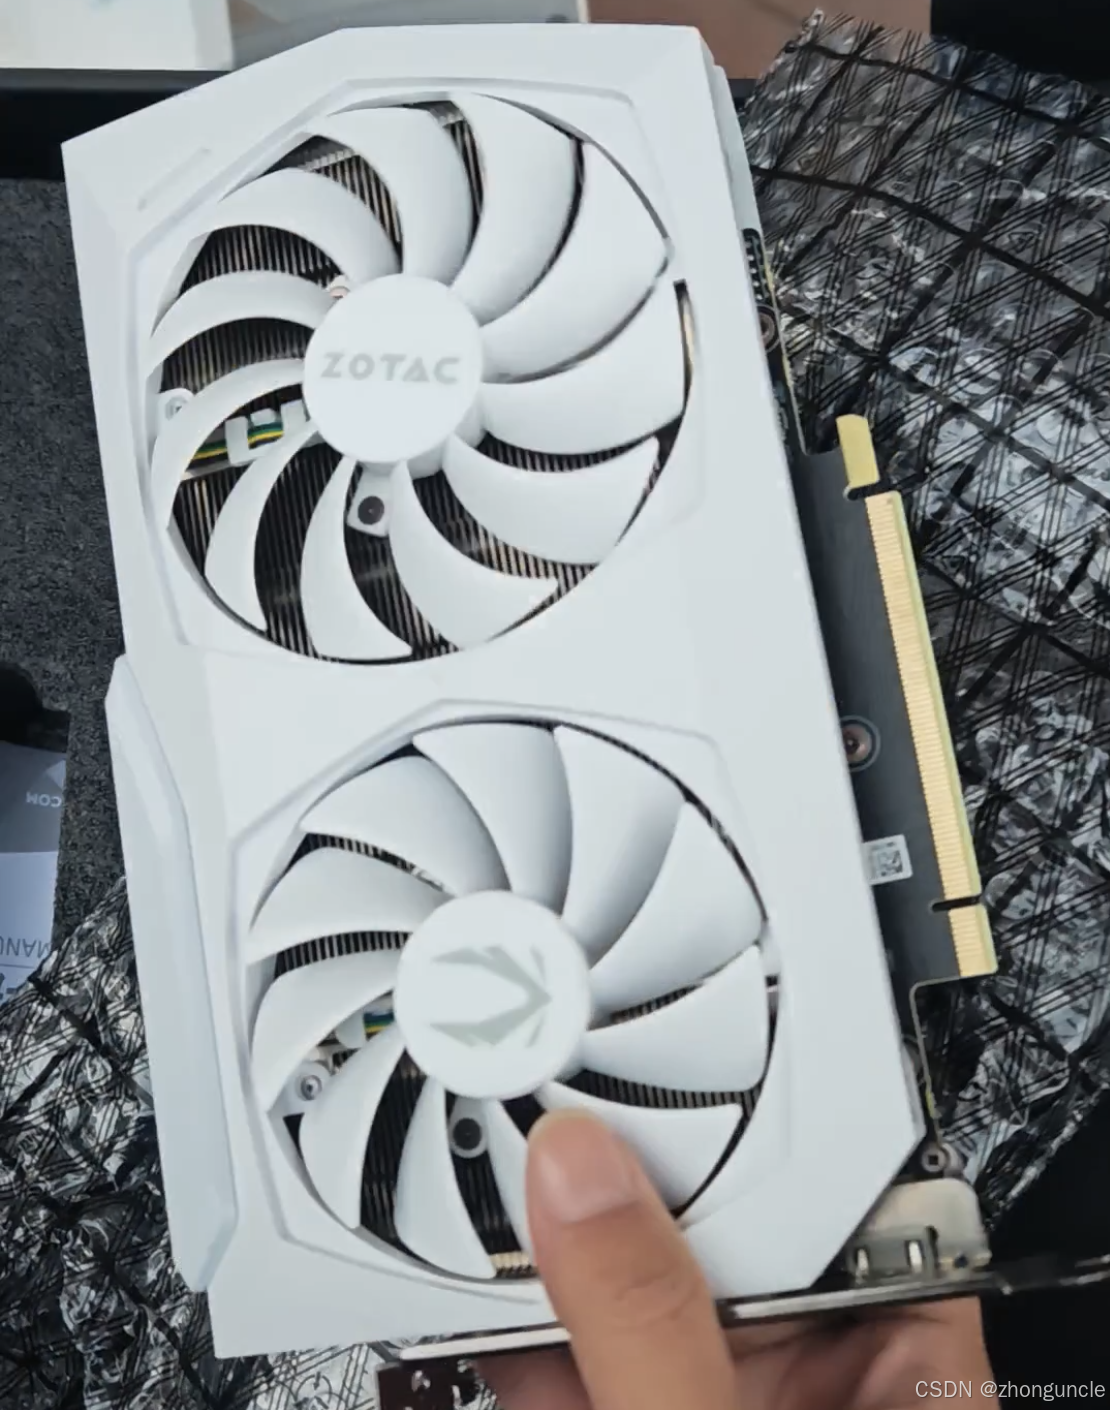
3060 12GB
After returning the 2080Ti 22GB, I found a used 3060 12GB with remaining warranty on Xianyu for only 1500 yuan— brand-new models cost around 1900 yuan on JD.com and other platforms, and they’re usually basic versions.
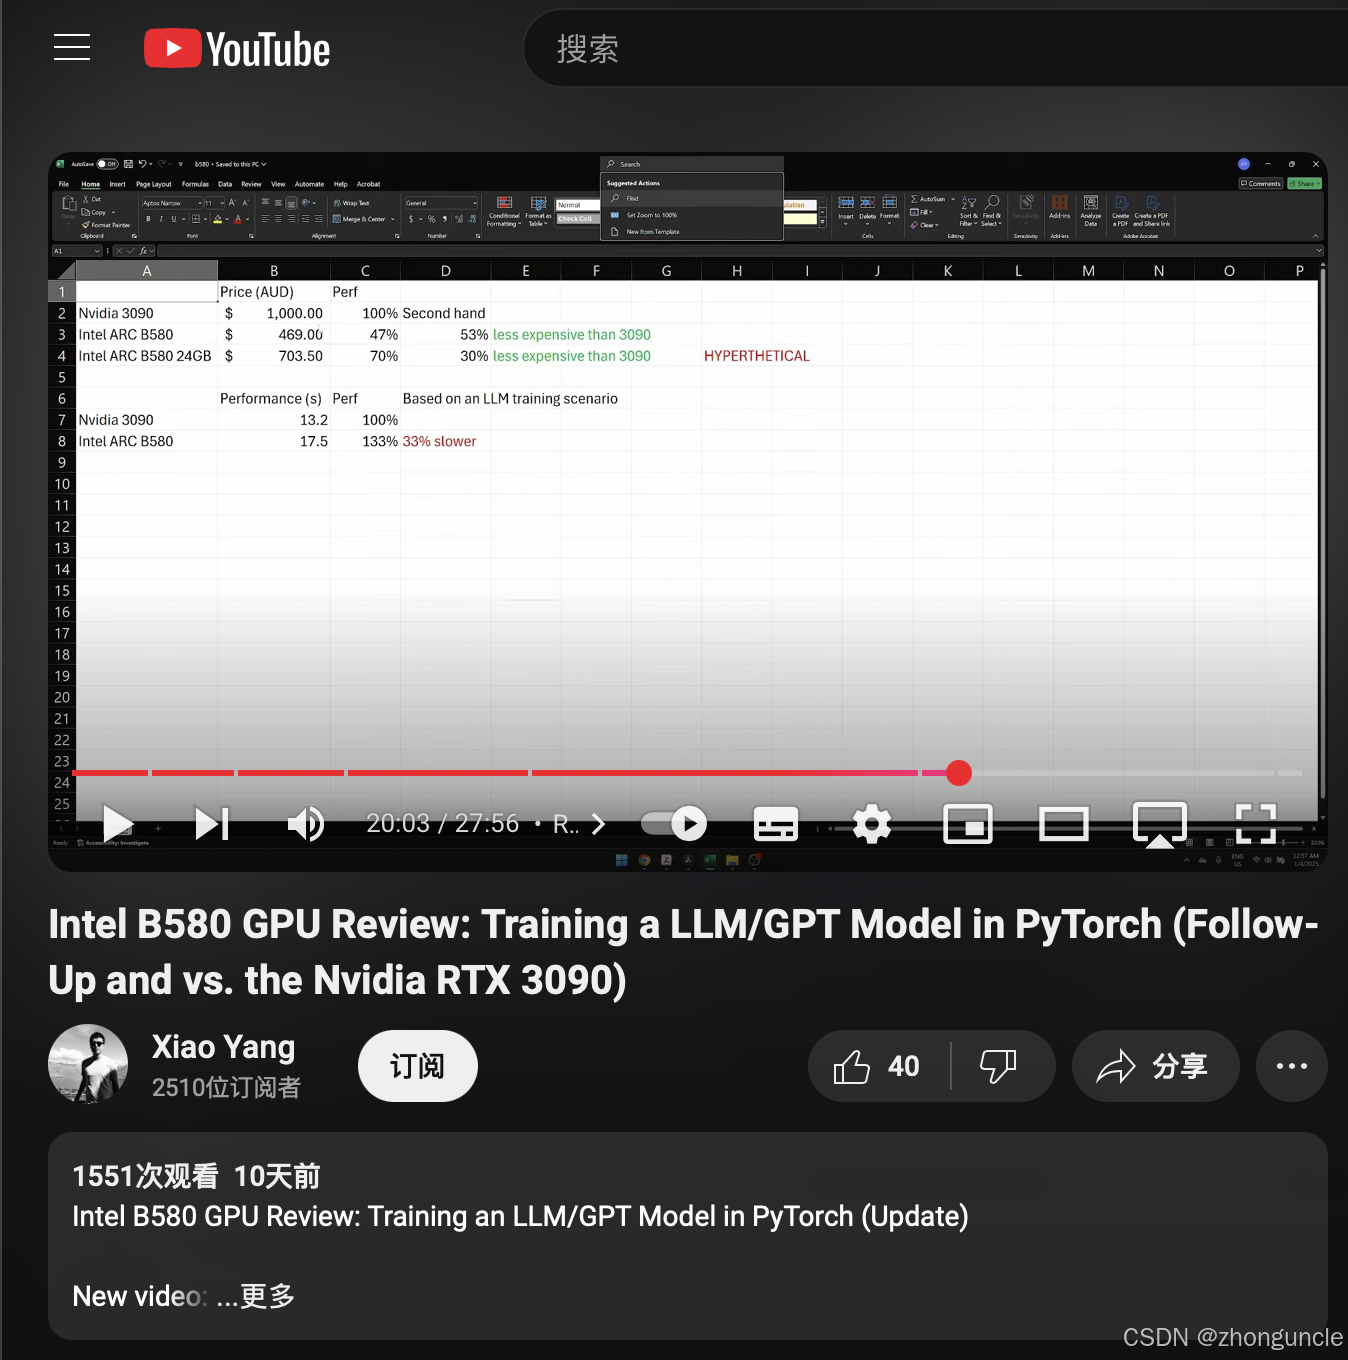
If your goal is machine learning (not parallel programming), consider the Intel A770 16GB or B580 12GB. I still want to learn CUDA programming, so I chose an Nvidia card. I saw a YouTube video showing that the B580 12GB trains GPT-2 at 2/3 the speed of the 3090, offering great value for money. There are also rumors of a 24GB version. If it’s released at a reasonable price, it would be a perfect replacement for the 2080Ti 22GB— especially since it comes with official warranty. If I progress well and decide to upgrade later, this will be a top contender, as Nvidia’s 50-series GPUs with large VRAM are very expensive.
Gaming
Unsurprisingly, the 3060 12GB’s gaming performance is inferior to the 2080Ti. Combined with the CPU’s low clock speed, many games don’t run smoothly— adjusting graphics settings doesn’t help much, as the issue lies with the low frequency.
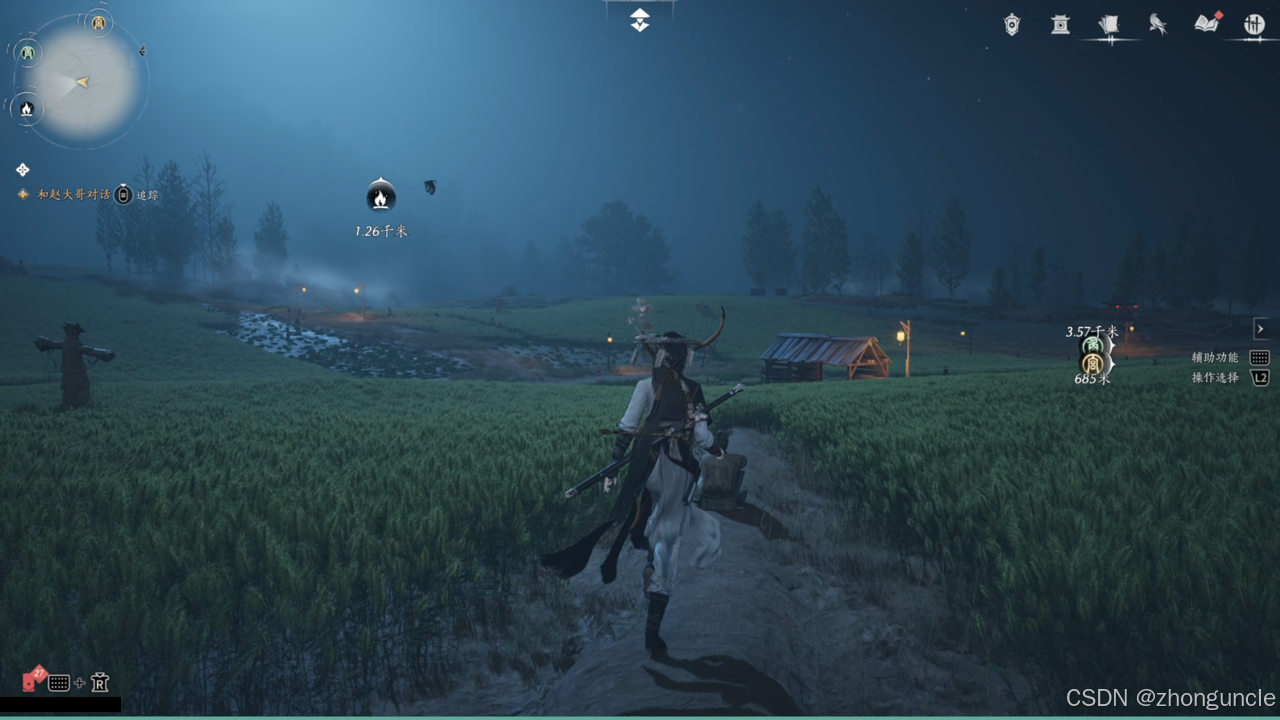
“Yan Yun Shi Liu Sheng” runs smoothly in the Qinghe area but struggles in Kaifeng. The funniest part is that frame rates are similar at 2K and 4K (this is the example I mentioned earlier). This is likely due to poor optimization in the new game— I remember this wasn’t an issue in the initial version, so I’ll wait for updates.
Encoding
For details on encoding, see my other blog: 《How to Use CUDA Hardware Decoding, Encoding, and Transcoding Acceleration with FFmpeg on Ubuntu - ZhongUncle’s CSDN》.
FFmpeg hardware-accelerated transcoding at 6000K bitrate and 30fps reaches around 16x speed— really fast.
When playing “Yan Yun Shi Liu Sheng”, recording with OBS using NVENC encoding at 8000K bitrate produces similar quality to software encoding. At 40Mbps, the quality is slightly worse but still acceptable. I’ll write a separate blog about this. Previously, I used an Nvidia MX250 GPU, whose encoding speed and quality were much worse than QSV, so I wasn’t familiar with NVENC. This was a good opportunity to learn. Here are some quick screenshots:
Hardware encoders have a supported bitrate range— excessively high or low bitrates will result in significant quality loss or encoding issues. I set the bitrate based on personal habits, not Nvidia’s recommendations.
Scenes with dense objects (like wheat fields) are ideal for checking bitrate loss (you can also use colorful scenes for more obvious results). As shown below, while individual wheat ears are indistinguishable, the overall image isn’t blurry from a distance (the images below are re-compressed but still show acceptable loss):


Machine Learning
This card is perfect for beginners in machine learning.
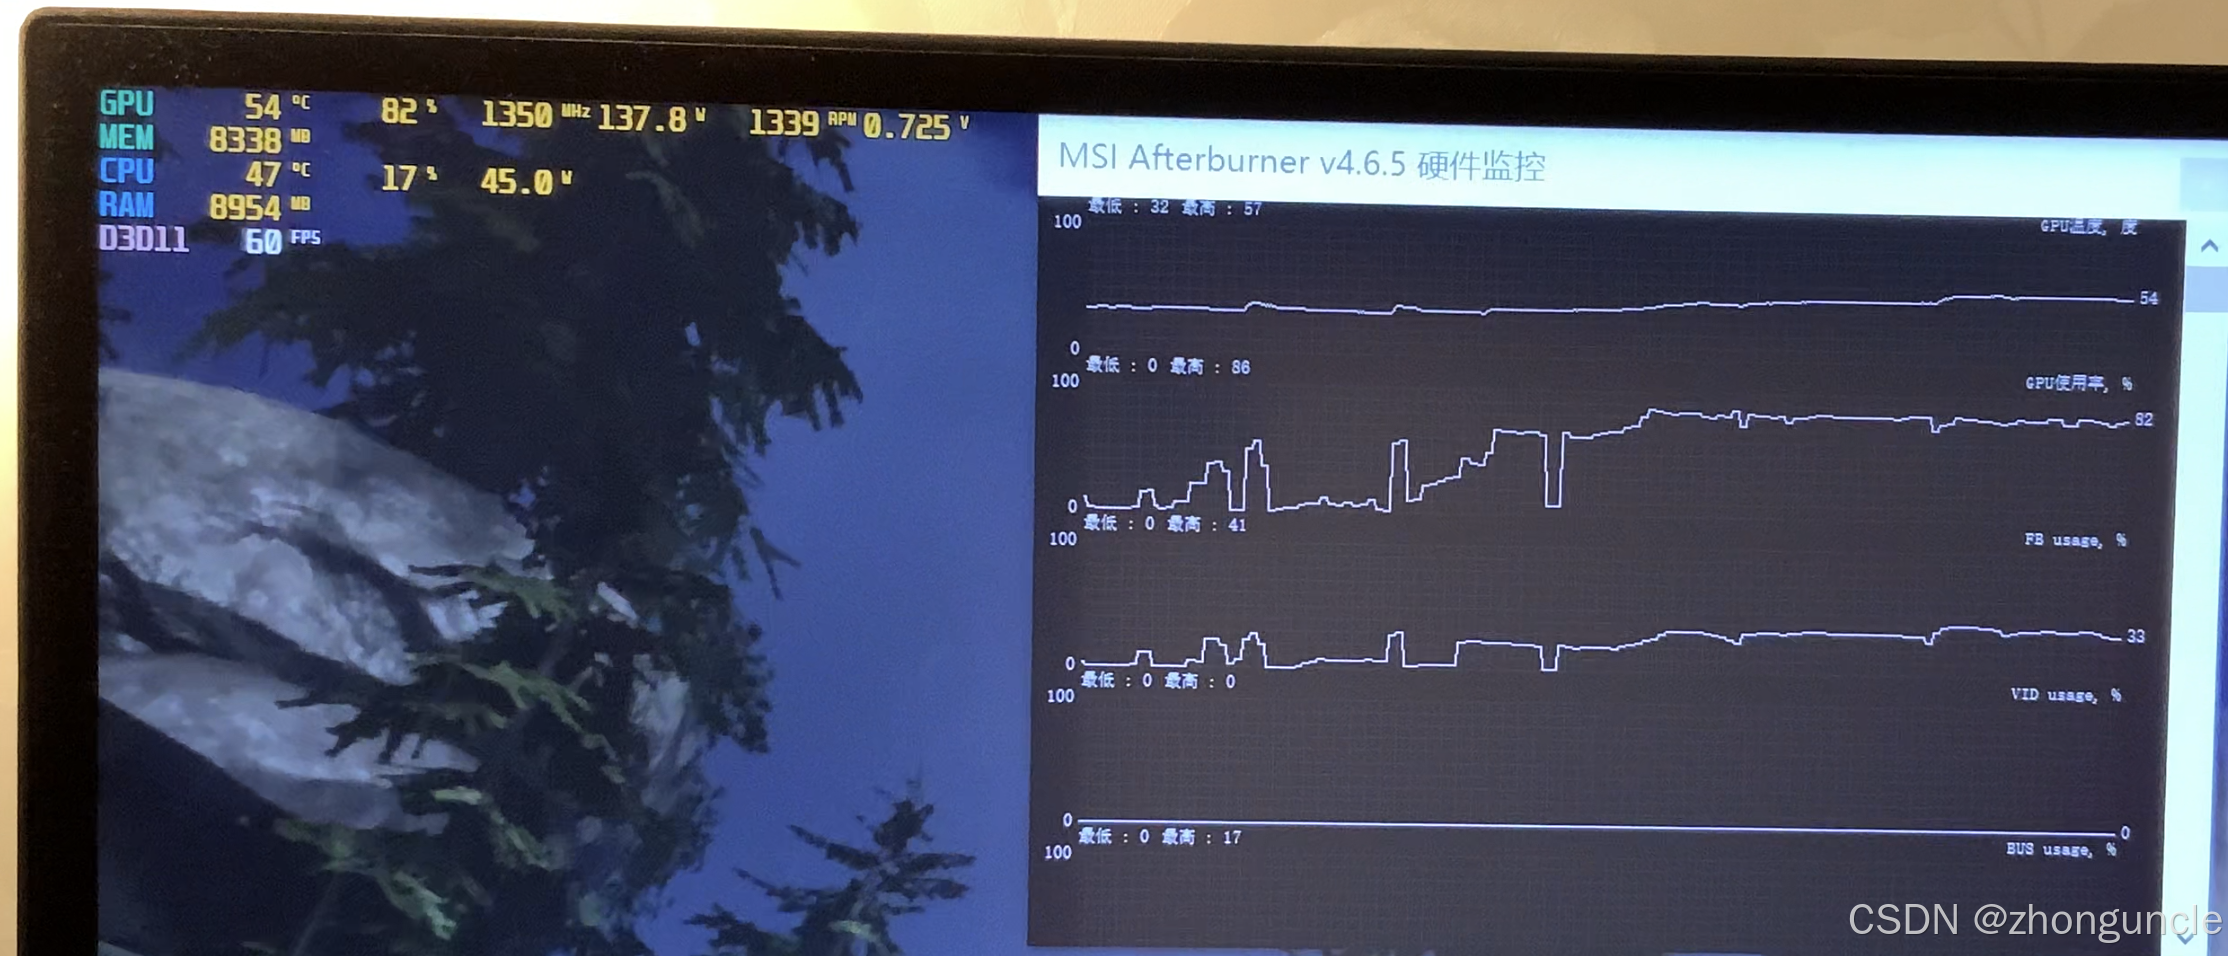
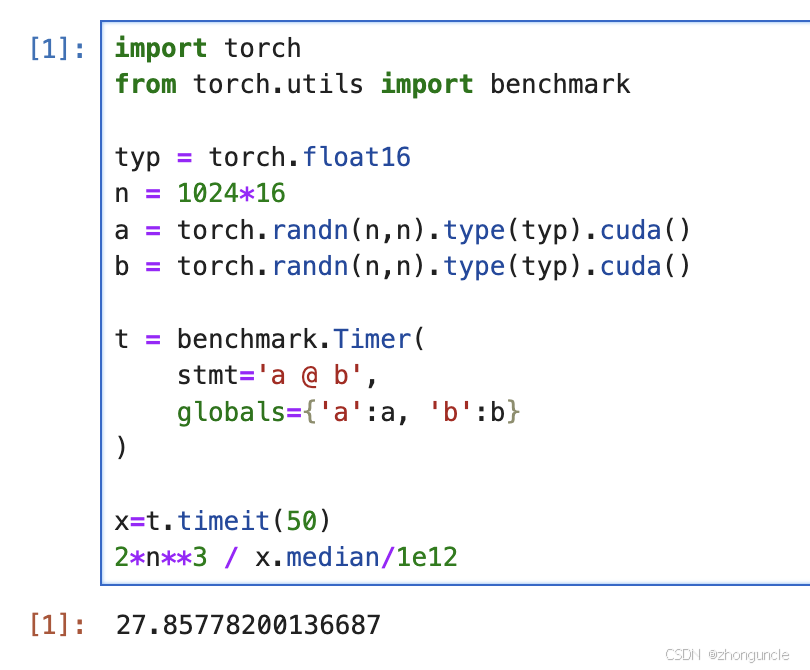
Its actual half-precision floating-point performance tested at 27.8 TFlops:
For details on running Ollama, see my blog: 《How to Run Ollama Models on GPU in Linux - ZhongUncle’s CSDN》.
I haven’t finished writing the blog about Whisper yet— I’ll link it here once it’s done.
Regarding model fine-tuning: fine-tuning Llama3.2 1B took about 52 minutes for 2 epochs:
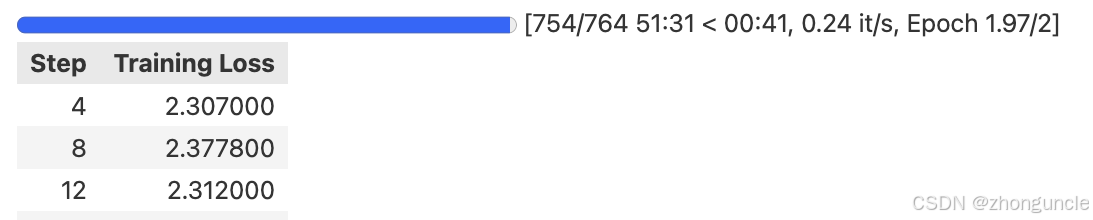
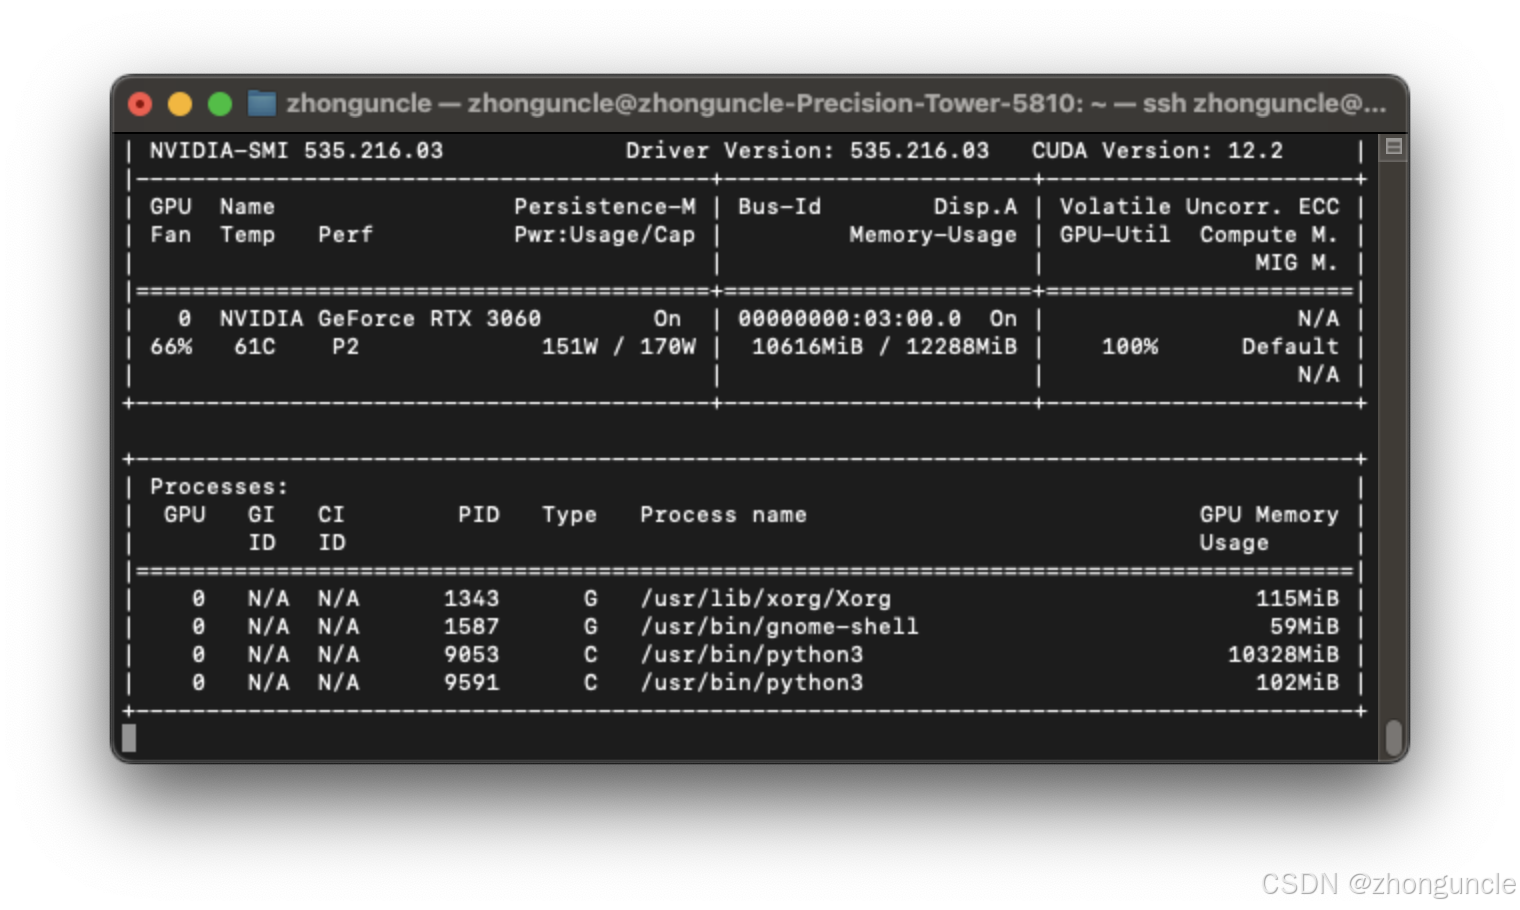
I didn’t run the 3B model because I’m not very familiar with the process— it resulted in an OOM (Out of Memory) error. As you can see from the screenshot above, the 1B model already uses 10GB of VRAM. I’ll explore this further once I gain more experience— the code here definitely has issues.
Dell T5810 Details
I originally wanted to buy the Dell T5820 but found the T5810 more cost-effective. However, since the T5810 was released in early 2015 (when AMD was struggling financially and Nvidia had just launched the 980Ti), it uses first-generation 14nm CPUs (same as the 5th-gen Core series— the short-lived 14nm generation between the 4th and 6th gen). As a result, its design differs from modern workstations— for example, no built-in Wi-Fi/Bluetooth or M.2 slots. If you need more ports and slot options, consider the T5820, which is more versatile.
CPU Compatibility
The T5810 supports both v3 and v4 Xeon CPUs, but older BIOS versions don’t support v4. To confirm compatibility, check the seller’s bundle— if they’re selling a v4 CPU, the BIOS should support it.
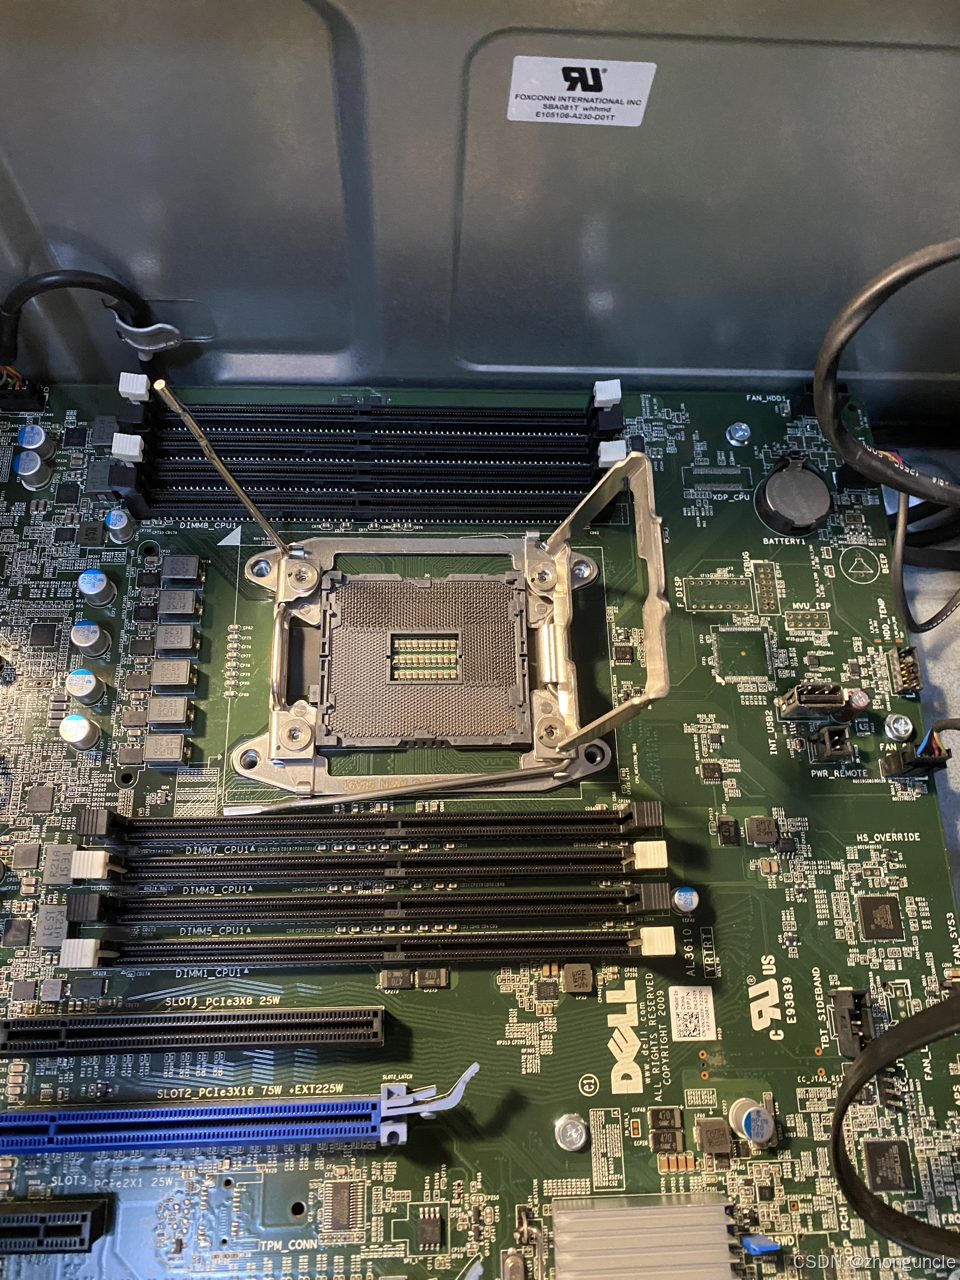
RAM
The T5810 only supports 2400MHz RAM. While this is low by today’s standards, it supports quad-channel, which provides similar bandwidth to dual-channel DDR5 4800MHz.
Additionally, DDR4 ECC 2400MHz RAM is cheaper than non-ECC RAM. However, note the following: Do not mix 2RX4 and 4RX4 RAM modules. For example, if I currently have two 16GB 2RX4 modules, any future upgrades must also use 2RX4 modules.
2RX4 modules offer higher frequencies for large capacities, but since the T5810 only supports up to 2400MHz, high-frequency modules would be a waste of money. For large-capacity RAM, 4RX4 modules are more cost-effective.
It has 8 RAM slots— even with 16GB modules, you can install up to 128GB, which is sufficient even for dual-GPU setups (since the T5810 has limited dual-GPU support— more on this in the next section. The maximum recommended RAM is twice the VRAM capacity, and even dual 3090s only have 48GB of combined VRAM). For extreme memory needs, 64GB modules are available, allowing up to 512GB of total RAM.
RAM installation order: Insert modules into the white slots first, then the black slots once the white ones are full. This isn’t documented— I had to ask the seller.
GPU Power Cables
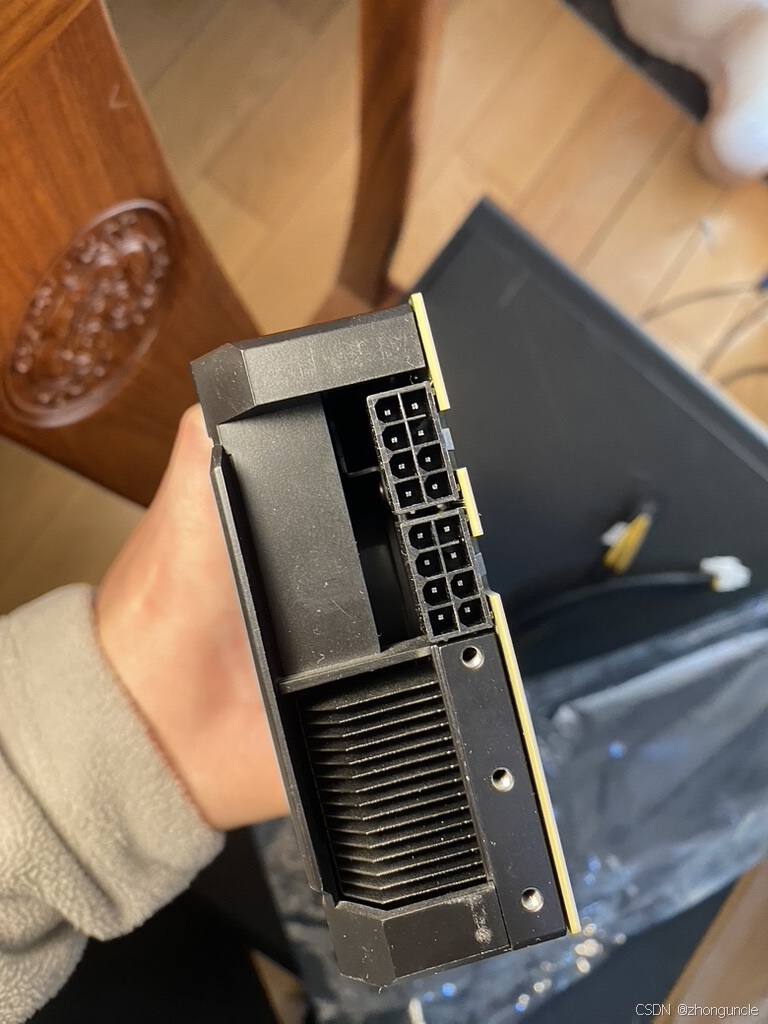
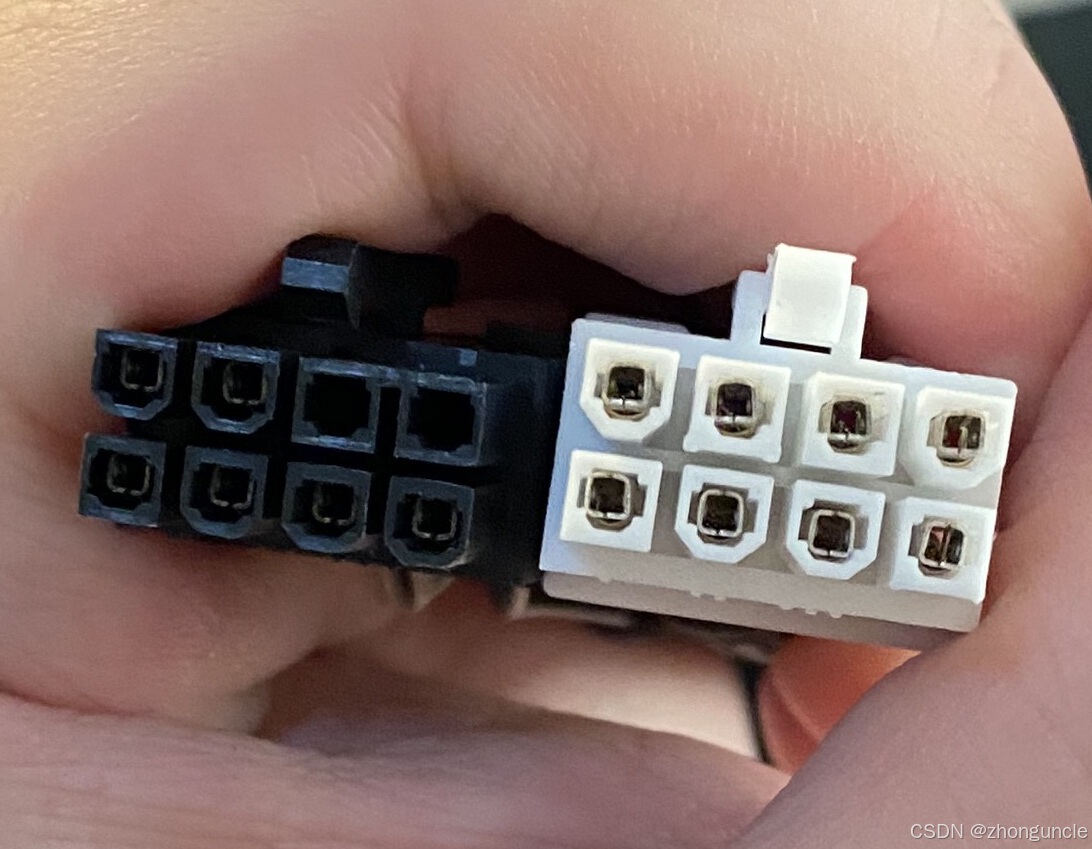
The T5810’s GPU power cable is an 8Pin-to-dual-6Pin adapter. However, most modern GPUs no longer use 6Pin connectors, so you’ll need to buy an 8Pin-to-single or dual-8Pin adapter.
Why do you need an adapter even for single-8Pin GPUs? Because the power supply’s GPU connector is the same as the one on the GPU itself— in other words, both ends of the cable are identical:
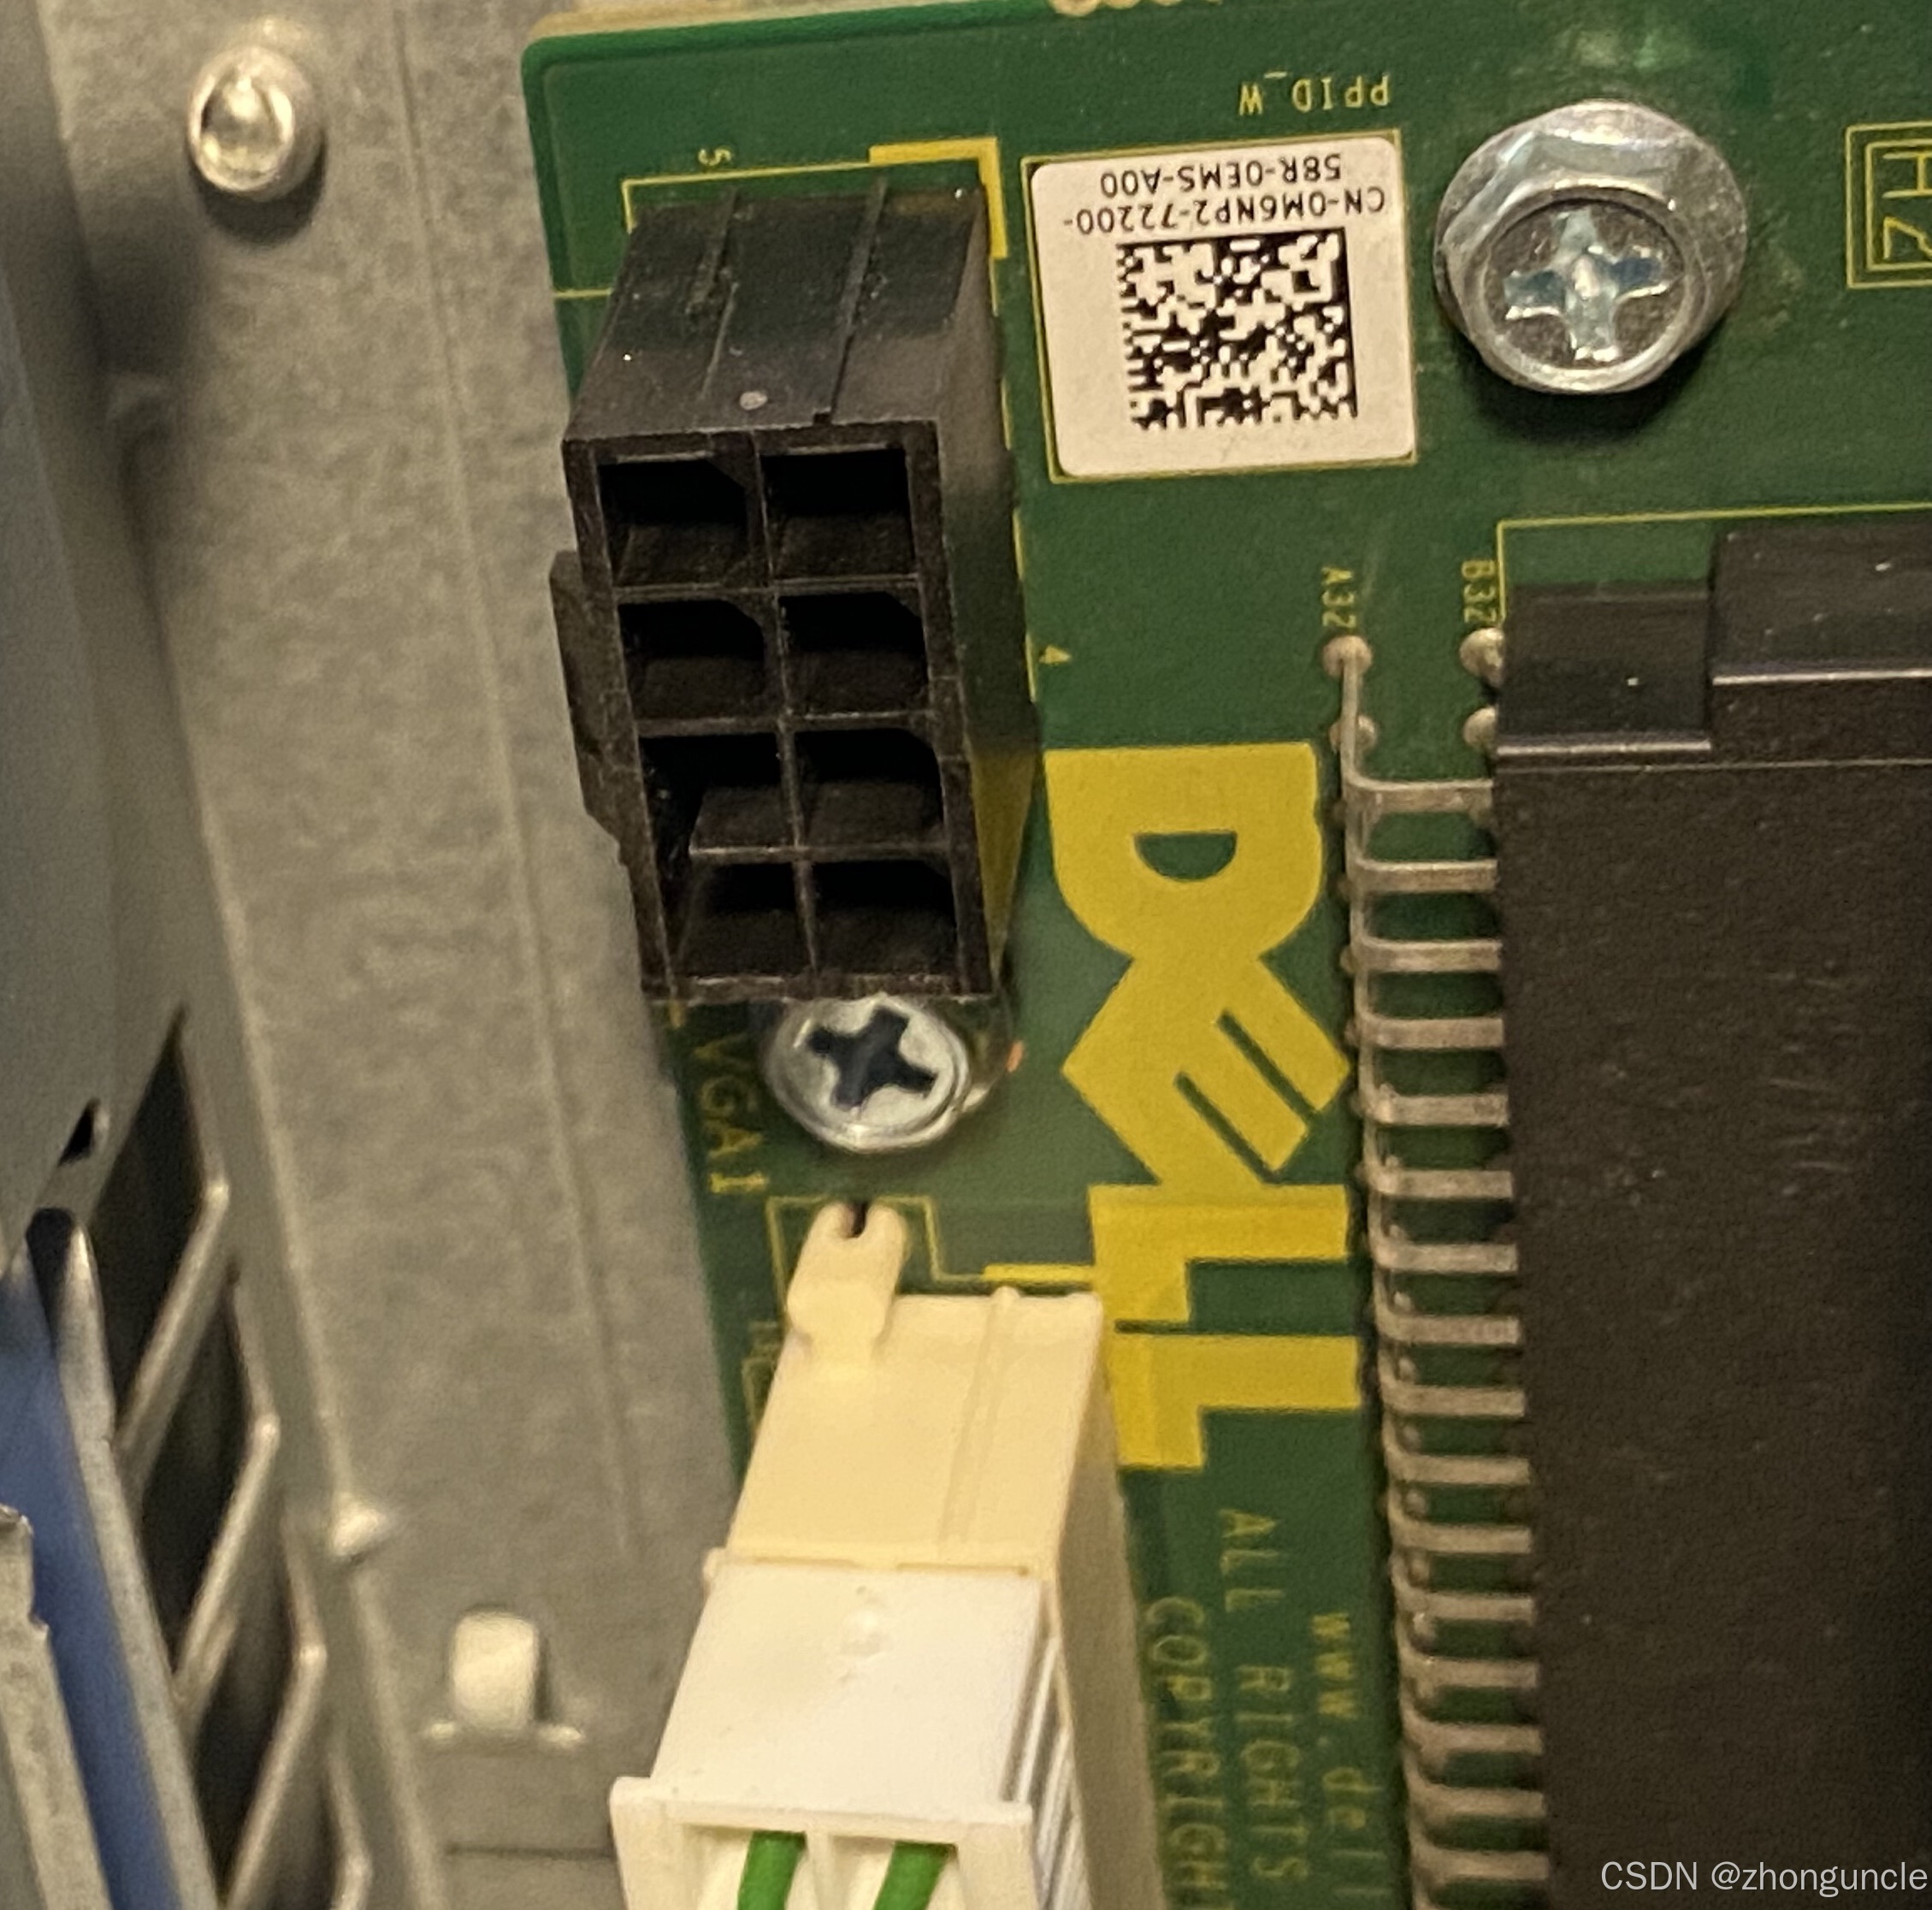
In the image below: Left = T5810’s original connector; Right = standard connector used by modern power supplies:
Expansion Slots
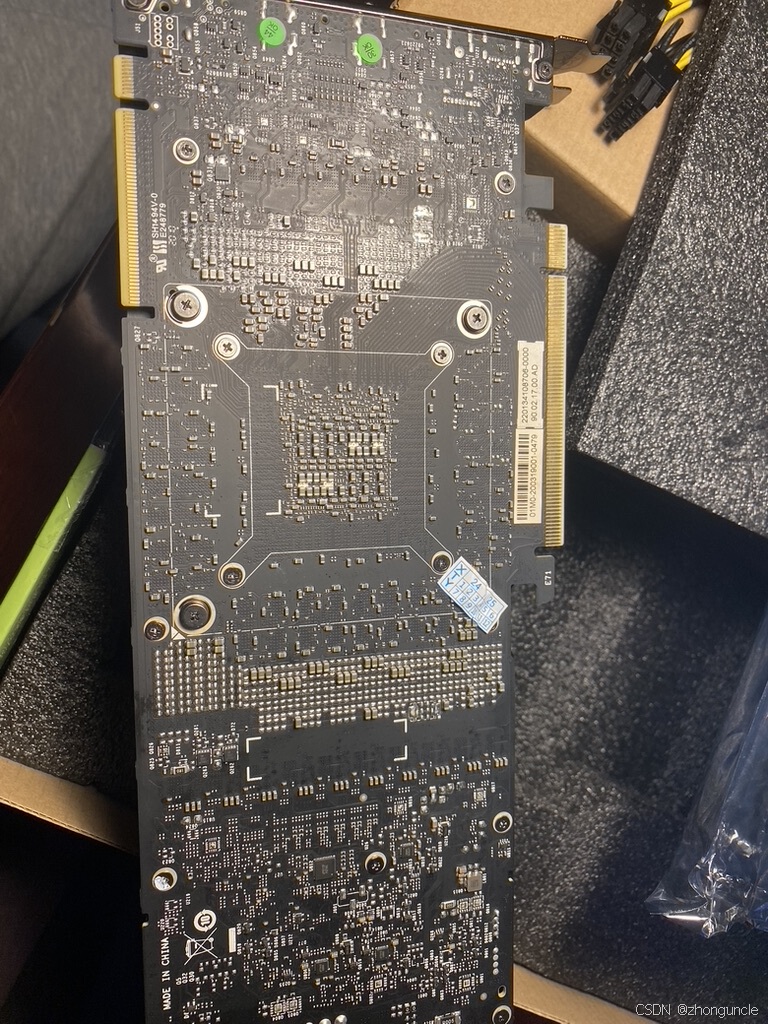
T5810 motherboard details:
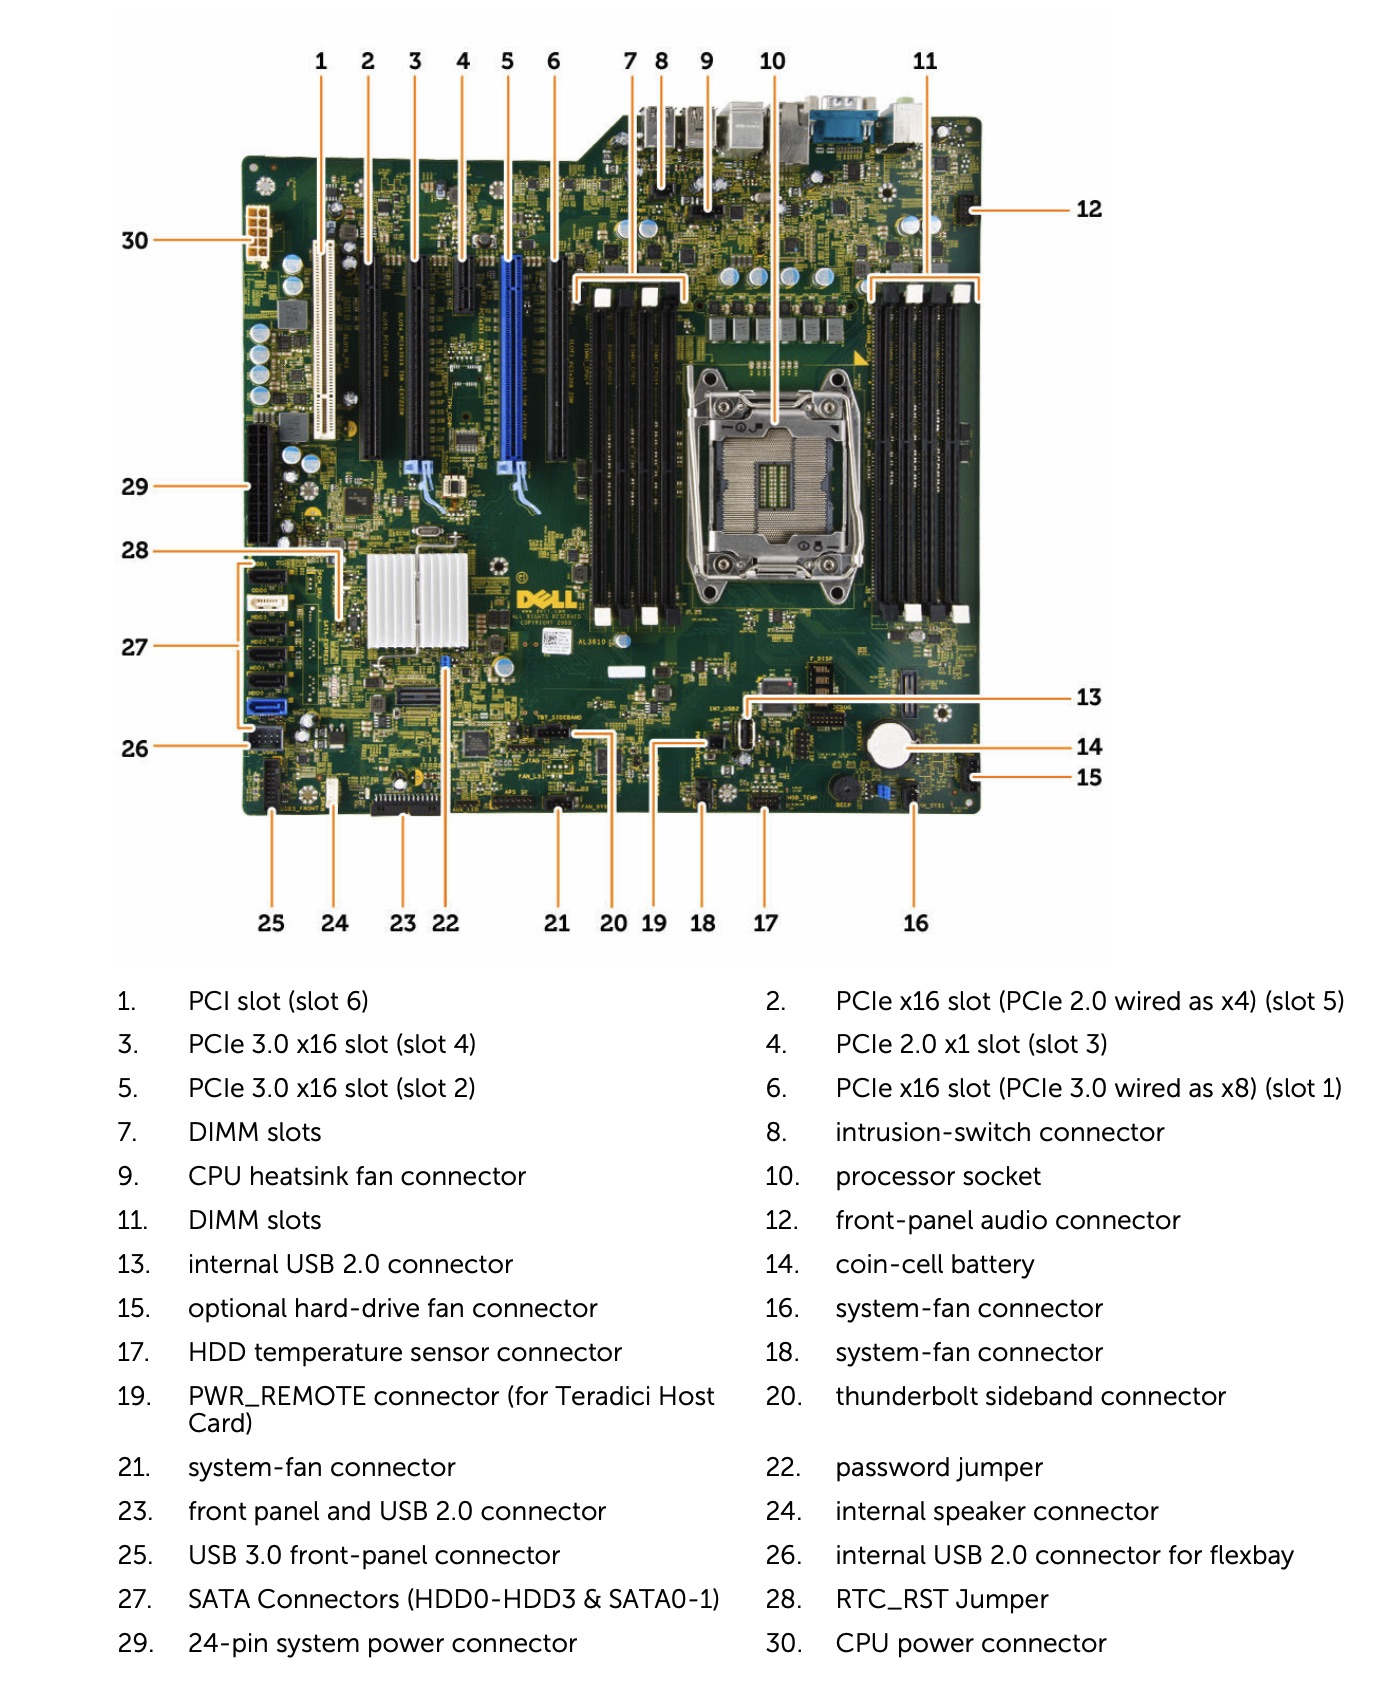
There are two slots for GPUs (the ones with blue retention clips). I installed my GPU in slot “3” (as labeled in the image) because the power cable is short.
While the slot is rated for a maximum of 225W, a single 350W GPU works fine— dual GPUs are risky. The original 6Pin connectors were designed for 225W total. Power cables typically use wires that can handle 1500W each— calculate the capacity for 8Pin connectors yourself. I asked an experienced technician at a cable factory (who previously worked in Shanghai’s Xujiahui area) about this. When I asked if a 1-to-2 adapter could handle the load, he explained the above details.
So even though there are two slots, installing two 3090s (700W total) with dual 8Pin connectors would require a 1-to-4 adapter. Excluding the 75W provided by the PCIe slot, each 8Pin connector would need to handle 550W— this is very risky, even though the T5810 supports up to 1300W power supplies.
According to the design, two 225W GPUs should work, but you’ll need to find single-8Pin models. The most cost-effective option is the Tesla P100, but many Tesla cards with single 8Pin connectors are expensive. A newer single-8Pin GPU is the 4070 Super (available from some manufacturers), which has a TDP of 220W. However, this card doesn’t support NVLink. This is just a note for future reference.
I installed the M.2-to-PCIe adapter in slot “6”. According to the documentation, this slot supports bifurcation, so you can use a 1-to-2 adapter for multiple M.2 SSDs. However, I opted for a cheaper single-slot adapter (only 10 yuan on Xianyu, with free shipping). I may need to add a heatsink for the SSD later— it runs at 50°C idle (with dual systems, I installed Ubuntu, but Windows shows 50°C even when idle).
The Wi-Fi card is installed in slot “4”. While it only uses one PCIe 2.0 lane, the bandwidth (500 MB/s, equivalent to 4 Gbps) is more than sufficient for internet use.
Wi-Fi & Bluetooth
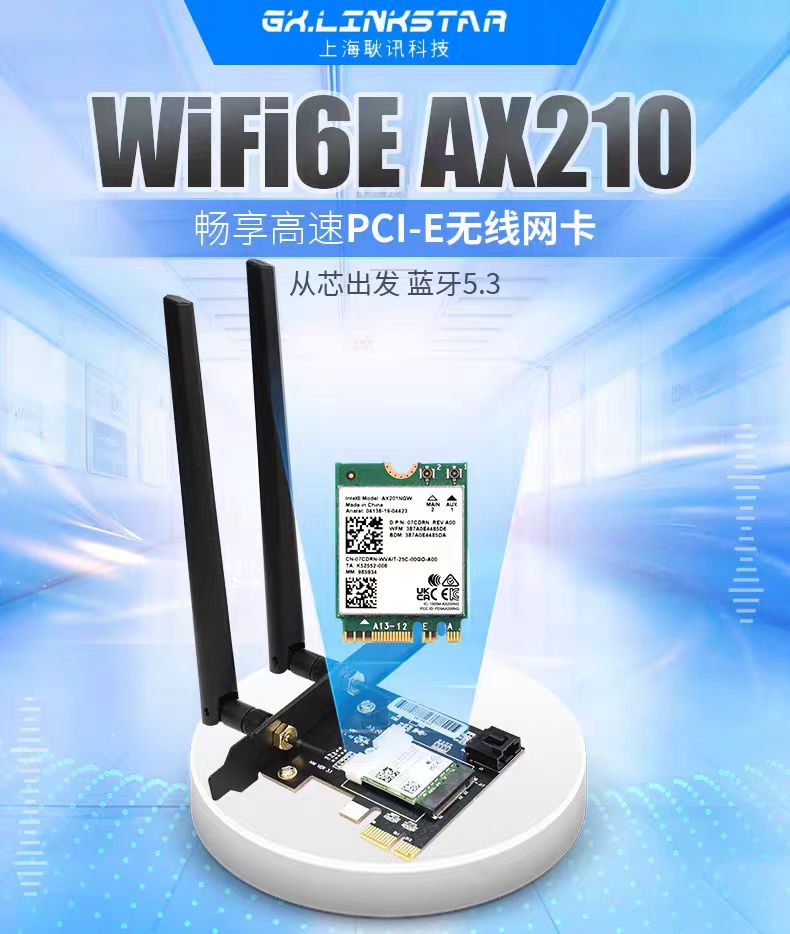
I initially wanted to buy the Realtek RTL8852BE (only 43 yuan, very cheap) but found many reports of compatibility issues. After researching, I found an AX210 adapter for 88 yuan— I went with it since it’s more stable and supports future upgrades:
For Linux users: It works plug-and-play. For Windows users: Download the drivers in advance from Intel’s official website: Intel® Wi-Fi 6E AX210 Latest Drivers & Software. Note that Wi-Fi and Bluetooth require separate drivers— install both.
Hard Drives
I’m using one M.2 SSD (via PCIe adapter) and one SATA SSD— both solid-state. I originally tried installing a 10TB HDD, but it caused strange issues and frequent disconnections. I eventually gave up and switched to an all-SSD setup with external DAS (Direct-Attached Storage).
Dual-Boot Installation
I hadn’t installed a dual-boot system in a long time and ran into a problem with Windows: It doesn’t display hard drive names, only “Disk 0” and “Disk 1”. Since both my drives are 1TB, I couldn’t tell them apart. My recommendation: Install Windows first, then unplug the Windows drive, plug in the other drive, and install Ubuntu.
I hope these will help someone in need~