How to Handle Push Notifications in SwiftUI
There are many situations need developers to push notifications, but not many people talk about push notifications in SwiftUI. Here is some relevant content, So I write this blog. On the one hand, I can refer to it in future, on the other hand, I also want to help people in need.
This article will cover:
- Basic push notification (the most common notification)
- Scheduled push (such as alarm clock, anniversary)
Before go deep into the specific operations, you need know: notifications cannot appear when the app is open. When use the simulator or real machine to test, must make app in background after press the button.
Basic push notification
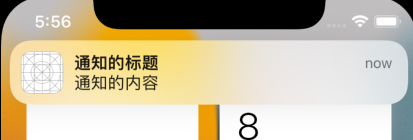
First, let’s talk about the most Basic push notification, which is also the most commonly used. The style is as follows:
Code like:
import SwiftUI
import UserNotifications

// Ask the user whether to permit the app to send push notification
// Since there are many push style in the notification system, you can go to "Settings" to see them.
// .alert indicates whether pop-ups are allowed;
// .sound indicates whether prompt sounds are allowed;
// .badge indicates the small image in the notification pop-up window.
func setNotification(){
    UNUserNotificationCenter.current().requestAuthorization(options: [.alert, .sound, .badge]){ (granted, _) in
        if granted {
            // User permit to push
            print("用户同意我们推送通知")
        }else{
            // User not permit to push
            print("用户不同意")
        }
    }
}

// Push notification
func makeNotification(){
    // Set trigger: push after 5 seconds (this kind notification cannot repeat push)
    let trigger = UNTimeIntervalNotificationTrigger(timeInterval: 5, repeats: false)

    // Content of notification
    let content = UNMutableNotificationContent()
    content.title = "通知的标题"
    content.body = "通知的内容"

    /* Set notification Sound, the default is like "ding~", which is the sound of iMessage. The defaultCritical is the sound of general app push notifications */
    content.sound = UNNotificationSound.default

    // Finish notification settings
    let request = UNNotificationRequest(identifier: "通知名称", content: content, trigger: trigger)
    // Add our notification to the queue pushed by UNUserNotificationCenter
    UNUserNotificationCenter.current().add(request, withCompletionHandler: nil)
}

struct ContentView: View {
    var body: some View {
        VStack {
            Button(action: {
                setNotification()
            }) {
                Text("获取推送权限")
                    .padding()
            }
            Button(action: {
                makeNotification()
            }) {
                Text("推送通知")
                    .padding()
            }
        }
    }
}
Scheduled push notifications
Sometimes alarm clocks or To-Do applications need to push notifications in some time. The style is similar to the basic version, except that the settings of trigger and sound are a little different (It should be noted that this custom sound cannot exceed 30 seconds, otherwise the system will Play the default sound), the code is as follows:
import SwiftUI
import UserNotifications

func setNotification(){
    UNUserNotificationCenter.current().requestAuthorization(options: [.alert, .sound, .badge]){ (granted, _) in
        if granted {
            // User permit to push
            print("用户同意我们推送通知")
        }else{
            // User not permit to push
            print("用户不同意")
        }
    }
}

// Push notification
func makeNotification(){
    // Set push time: 6:30
    var dateComponents = DateComponents()
    dateComponents.hour = 6
    dateComponents.minute = 30
    //'repeats: true' means push notification in 6:30 every day
    let trigger = UNCalendarNotificationTrigger(dateMatching: dateComponents, repeats: true)

    // Content of notification
    let content = UNMutableNotificationContent()
    content.title = "通知的标题"
    content.body = "通知的内容"
    /* The defaultCritical is the sound of general app push notifications */
    content.sound = UNNotificationSound.init(named: UNNotificationSoundName("ring.m4a"))

    // Finish notification settings
    let request = UNNotificationRequest(identifier: "通知名称", content: content, trigger: trigger)
    // Add our notification to the queue pushed by UNUserNotificationCenter
    UNUserNotificationCenter.current().add(request, withCompletionHandler: nil)
}

struct ContentView: View {
    var body: some View {
        VStack {
            Button(action: {
                setNotification()
            }) {
                Text("获取推送权限")
                    .padding()
            }
            Button(action: {
                makeNotification()
            }) {
                Text("推送通知")
                    .padding()
            }
        }
    }
}
You also can custom volume or other properties at the same method.
I hope these will help someone in need~