Use gcc to learn C compilation process
Recently, I suddenly discovered something when I was learning about clang/llvm: gcc is a collection of tools that includes or calls all tools that convert source code into executable program, not just a simple compiler. This helped me gain a deeper understanding of “compilers”, so I wrote this article as a record.
More details about the principles and mechanisms of “compiler” are in another article: “What is the differences between gcc and Clang/LLVM?”
Complete process of converting source code into executable program
The complete process of converting source code into an executable program, which is what we usually call the “compilation process”, is actually as follows (rounded brackets represent code, square brackets represent various processors):

From source code to executable program, it has to go through preprocessor, compiler, assembler, linker or loader. The compiler is only responsible for converting the source code into corresponding assembly code.
Next, use gcc to show the process above.
gcc and cpp, as, ld
Except the compiler and assembler, the other three programs above are rarely used or even heard. Let’s use the most classic C language and gcc to introduce this process. gcc contains the preprocessor cpp, and also calls the assembler as and the connector ld.
I thought
asandldwere also included ingcc. But the GNU development team told me thatgcconly contains the preprocessor and compiler. The assembler and linker are not part of the GCC project and must be provided separately (in many systems, it is provided by the binutils project) (verified, Ubuntu is in this way)
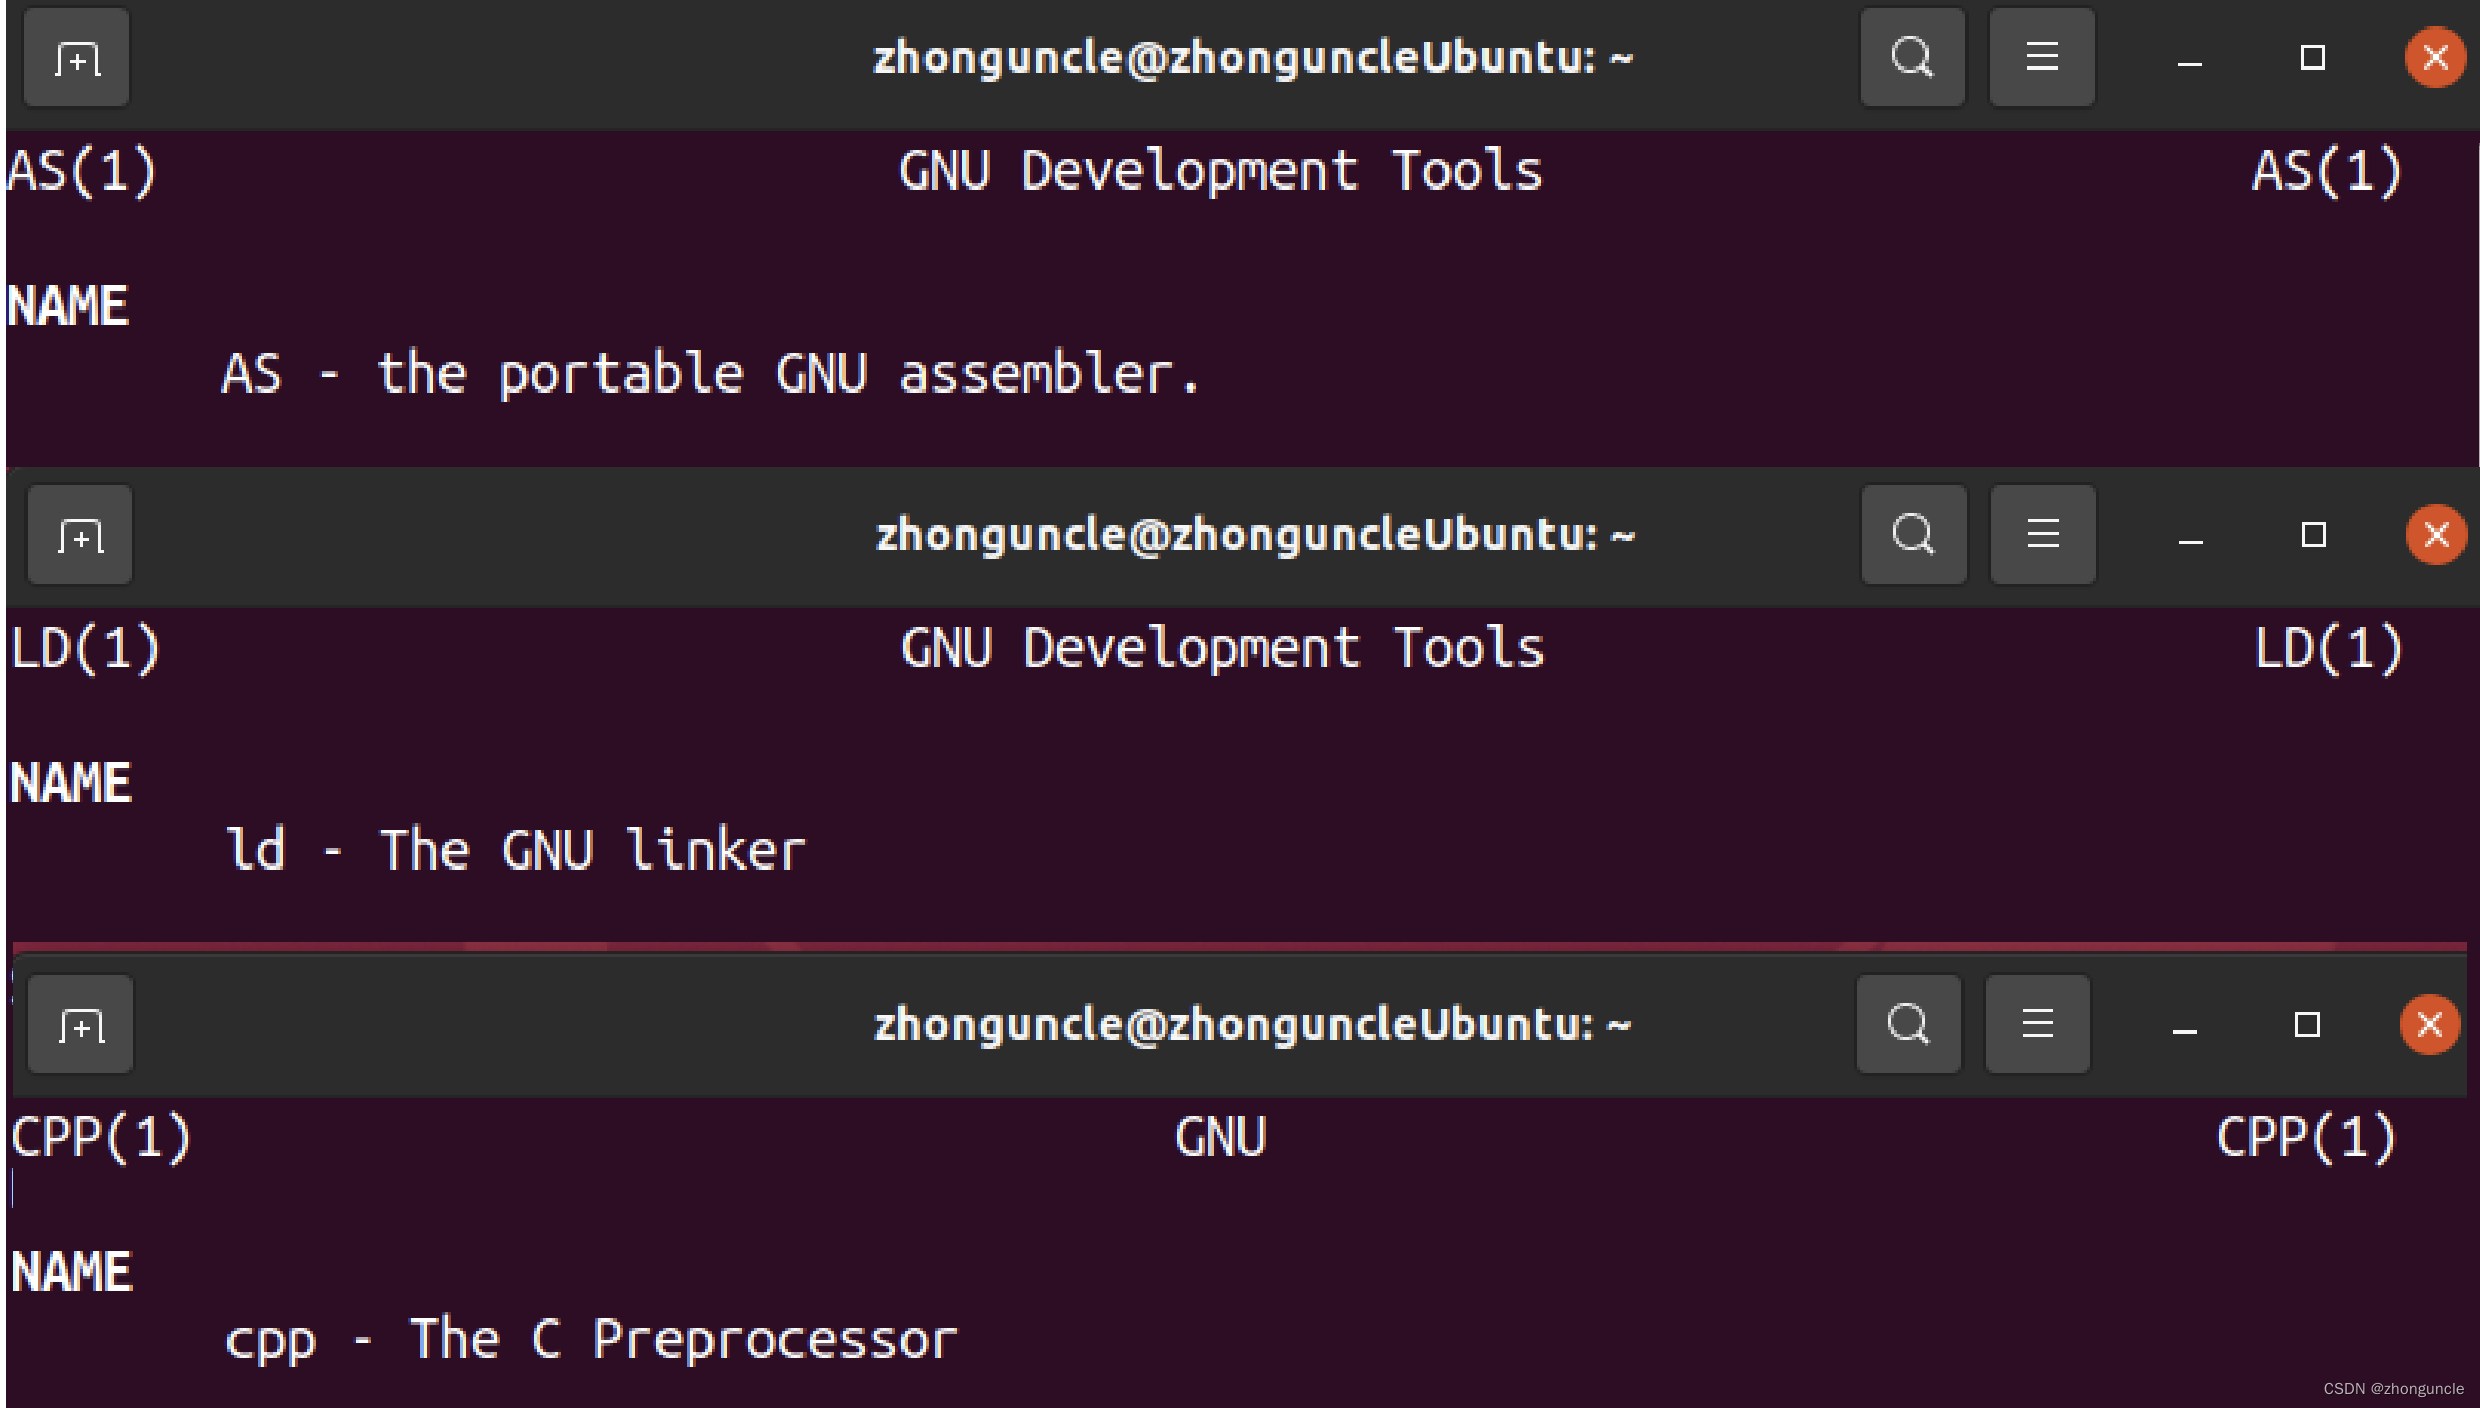
The manuals of gcc, as, ld are as follows:
As an annoyance, although the gcc command is called “compiler”, it includes a preprocessor and automatically calls other processing programs. So on the surface, gcc converts the source code to executable program by itself completely.
Since it is composed of multiple tools, you can also decide which step to proceed to, you can see it below.
Preparation of demonstration
In order to facilitate readers to understand the process of compilation, I will use an sample program to demonstrate. The sample program will calculate 12*13*14 and when the value is less than 1000, outputing the value. Otherwise output the value exceeded the limit (In here, it will definitely exceed the limit).
We need three files and a blank directory build.
The empty directory build is for processing generated files conveniently. Just clear this folder after testing. Otherwise the two tests might make a mess. Use command below to generate build:
mkdir build
Three files are main.c、calc.c和calc.h. The code are:
//main.c
#include <stdio.h>
#include "calc.h"

#define MAXNUM 1000

int main()
{
    int a = calc(12, 13, 14);

    if (a >= MAXNUM)
        printf("Over Limit!\n");
    else
        printf("Result: %d", a);

    return 0;
}
//calc.c
#include <stdio.h>
#include "calc.h"

int calc(int a, int b, int c)
{
	return a*b*c;
}
//calc.h
int calc(int, int, int);
Use gcc to demonstrate the compilation process step by step
gcc supports stopping at a specified step, it is also can be thought as set the end point. When you operate it manually in sequence, it means only performing a certain step. We will use this mechanism to show the entire compilation process.
The usages of most programs is almost equivalent to gcc options, except for some small details. The only large difference is the linker.
So this section is just to let you understand the process. Next section will explain the details of each processor.
Preprocess
The first is to preprocess the source code. If you need to stop after preprocessing, you need to use the option -E (it is also mean just use preprocessor):
$ gcc -E ../calc.c -o calc.i
$ gcc -E ../main.c -o main.i
Use -o to specify the output file name here. Because preprocessor cpp called by gcc will output processed code to standard output, instead of generating a file. The suffix of processed code files is .i, so here the suffix is changed to .i.
Use ls to view the following:
$ ls
calc.i  main.i
Compile
Next is the compilation. If you want to compile but not assemble, use the -S option:
$ gcc -S main.i calc.i
Here, the two files will be compiled and generate the assembly language file and suffix of filename is replaced with .s. Use ls to view the following:
$ ls
calc.i  calc.s  main.i  main.s
Assemble
Next is the assembly stage. The option -c compiles and assembles but does not link. The suffix is used to determine which step of the entire compilation process to start from and stop. We compiled just now, but not assembled.
Use -c here is equivalent to using only the assembler:
$ gcc -c calc.s main.s
Like the -S option, it will generate an object file. The file name uses .o to replace the .c, .i, .s and other suffixes in the source file name. At this time, use ls to view the following:
$ ls
calc.i  calc.o  calc.s  main.i  main.o  main.s
Link
The final step is linking object files. You can use -o to output directly, because the result from object files is executable program, it is the same as result from source code to executable program. These options only set terminal step. Here we set the output file name to calc:
$ gcc -o calc main.o calc.o
Use ls to view the following:
$ ls
calc  calc.i  calc.o  calc.s  main.i  main.o  main.s
Run calc:
$ ./calc
Over Limit!
Work nice!
Call cpp, gcc, as, ld individually
Except for the linker, others are almost same as using gcc plus options, so I will talk about a lot of details and extensions.
This is for demonstration and learning purposes, so I will use cpp, gcc, as, ld step by step. In actual, you don’t compile program like below usually. It just for education.
Use preprocessor cpp
The first step is to use the preprocessor cpp:
$ cpp ../calc.c -o calc.i
$ cpp ../main.c -o main.i
$ ls
calc.i main.i
Directly use cpp does not generate a file, because it directly output to standard output. If you want to save it as a file, you need to use the option -o. Due to we need use it, so must use -o. But since cpp is one-to-one, so we need use two commands.
The preprocessor will replace the referenced header files (#include), macros (#define), state controls (ifdef, etc.) in the source code. Since this step is mainly to replace macros and preprocessor, so it is also called a macro processor.
The preprocessed code will use for other tool, not just for compiler, because the preprocessor may be run more than once, or for other purposes. You can even add C macros to the assembly code, then use the preprocessor to process it, and then use the assembler to convert it into an executable program (C headers in Asm).
Let’s look at the preprocessed code (main.i). We can see that a lot of code has been generated (wc statistics are 743 lines, and the source code is only 16 lines), but much of them is replacement of #include <stdio.h>, so we only look the end part:
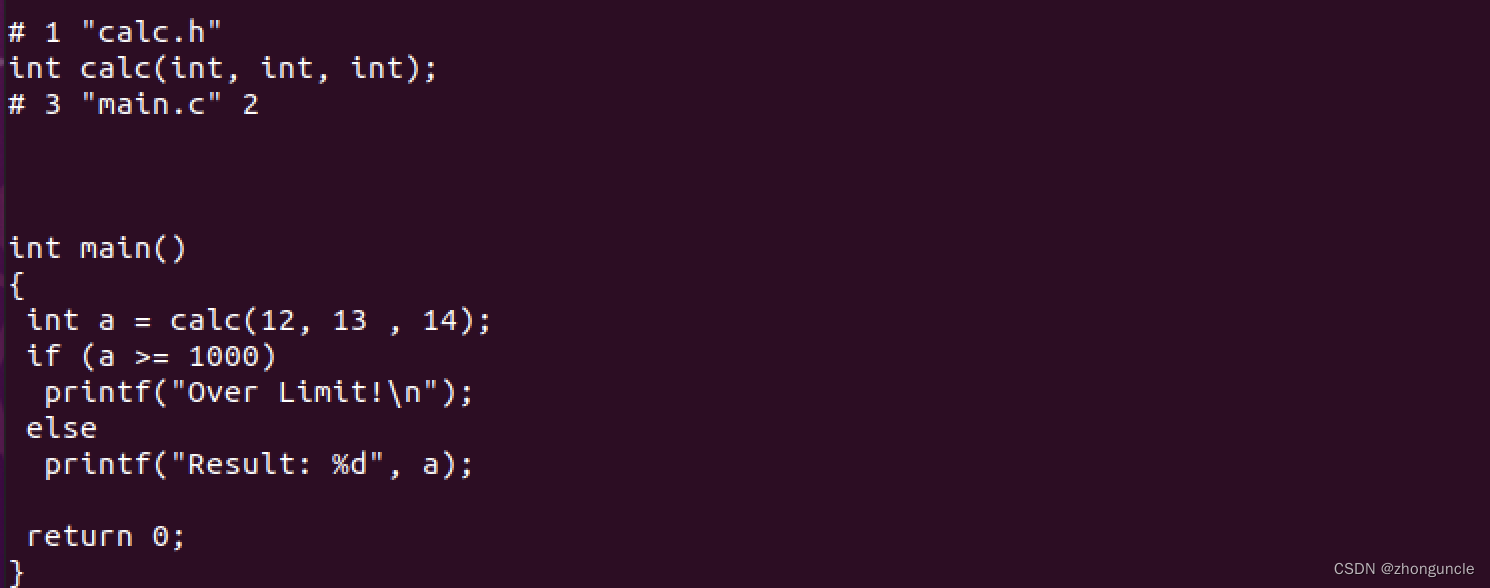
#include "calc.h" has been replaced by int calc(int, int, int);, which is in the header file, and the macro MAXNUM has also been replaced by corresponding 1000.
Use compiler gcc
Next, the preprocessed code is used by compiler. For some internal details of compiler, please see my another blog “What is the differences between gcc and Clang/LLVM?”
Since the compiler is gcc, we still need to use gcc -S to convert the preprocessed file into an assembly code file:
$ gcc -S main.i calc.i
$ ls
calc.i  calc.s  main.i  main.s
The file generated is in assembly language:
	.file	"calc.c"
	.text
	.globl	calc
	.type	calc, @function
calc:
.LFB0:
	.cfi_startproc
	endbr64
	pushq	%rbp
	.cfi_def_cfa_offset 16
	.cfi_offset 6, -16
	movq	%rsp, %rbp
	.cfi_def_cfa_register 6
	movl	%edi, -4(%rbp)
	movl	%esi, -8(%rbp)
	movl	%edx, -12(%rbp)
	movl	-4(%rbp), %eax
	imull	-8(%rbp), %eax
	imull	-12(%rbp), %eax
	popq	%rbp
	.cfi_def_cfa 7, 8
	ret
	.cfi_endproc
.LFE0:
	.size	calc, .-calc
	.ident	"GCC: (Ubuntu 11.3.0-1ubuntu1~22.04.1) 11.3.0"
	.section	.note.GNU-stack,"",@progbits
	.section	.note.gnu.property,"a"
	.align 8
	.long	1f - 0f
	.long	4f - 1f
	.long	5
0:
	.string	"GNU"
1:
	.align 8
	.long	0xc0000002
	.long	3f - 2f
2:
	.long	0x3
3:
	.align 8
4:
Notice, if you want to use assembly code generated like above, you maybe need to read my articles: 「Updating」The syntax style of Apple’s as assembler, because I know that many people learn assembly through university or textbooks, and many textbooks are base on Microsoft’s masm assembler-style assembly language (Intel syntax), which is different from the syntax of as (AT&T syntax), is in some places opposite. Although Apple wrote its own as, it is only slightly different from GNU’s as. Many syntaxes are almost the same, so you can refer to them.
However, not recommended to use the assembly code generated by gcc to learn assembly, because there are too many things hidden. You can see how many libraries are referenced in the ld part later.
Use assembler as
We will use assembler as to convert the assembly file into an object file (containing machine language), which requires as, which will automatically replace the suffix like gcc -c:
$ as calc.s -o calc.o
$ as main.s -o main.o
$ ls
a.out  calc.o calc.i  calc.s  main.i  main.o main.s
You don’t process two files at one time, otherwise happen error like:
$ as calc.s main.s
main.s: Assembler messages:
main.s:12: Error: symbol `.LFB0' is already defined
main.s:45: Error: symbol `.LFE0' is already defined
Because both files have .LFB0 and .LFE0 section, they are repeated. So you can compile them separately and the link will automatically process them later. Or you also can drop these parts manually to generate it into one object file.
Using linker ld
To be honest, ld is only used for display. Even if you are handwriting assembly code, it is recommended to use gcc for link, rather than use ld. Because the reference library of Ubuntu is very complicated now, the path accessible by ld is empty by default and so you need to set manually. The use of crt0.o mentioned in the documentation and on the Internet also not work.
How linker work
In order to introduce the linker, first need to explain how the program runs. You can read some professional books yourself for details. I just give a simple explanation: the essence of the program is a file that stores machine code. After executing, it will be put into the memory. Whether it is swap or any memory storage mechanism, logically it is continuous. There is a program counter that will record the current absolute memory address. When the memory address reaches the space of this program, it will start calling the instructions of this program to perform operations. So no matter how you jump or loop, it is actually continuous and sequential.
The file that stores instructions is object file, but the order may be wrong, or instructions of the referenced external library may not be included. So we need linker to put these instructions together in right order.
If you use file command to view the main.o, you can see it is a “relocatable” file:
$ file main.o
main.o: ELF 64-bit LSB relocatable, x86-64, version 1 (SYSV), not stripped
If you run it, it will show:
$ ./main.o
-bash: ./main.o: cannot execute binary file: Exec format error
Linker will “link” it and other object file together, allocate relative address of each section, final get an execution file. After that, if program is running, process will gengerate absolute address.
Use ld to finish
If you use ld to simply link the two object files, the following error will occur:
$ ld main.o calc.o
ld: warning: cannot find entry symbol _start; defaulting to 0000000000401000
ld: main.o: in function `main':
main.c:(.text+0x37): undefined reference to `puts'
ld: main.c:(.text+0x52): undefined reference to `printf'
There are two types of errors, let’s explain below:
- The first error
ld: warning: cannot find entry symbol _start; defaulting to 0000000000401000is because the default entry of the Ubuntu program is_startinstead of the classicmain, so it needs to be modified. - The second error is because
putsandprintfare part of the C standard library, butlddoes not automatically call and connect the C standard library and needs to be called manually.
In order to fixing these errors, the simple command is as follows (actually the program generated by this command has error):
ld main.o calc.o -o calc -I/lib64/ld-linux-x86-64.so.2 -lc -e main
ld will no longer report error, but when you run the generated executable program, you will find that although Over Limit! is output, the error Segmentation fault (core dumped) will be reported. as follows:
$ ./calc
Over Limit!
Segmentation fault (core dumped)
The Segmentation fault (core dumped) error is because the settings of link are incorrect (the library is incorrect or not enough), so generated executable program will access memory space that out of process space.
To solve this problem, the complete command will be very long.
If it’s Ubuntu 20.04:
ld -o calc -I /usr/lib/gcc/x86_64-linux-gnu/9/collect2 -plugin /usr/lib/gcc/x86_64-linux-gnu/9/liblto_plugin.so -plugin-opt=/usr/lib/gcc/x86_64-linux-gnu/9/lto-wrapper -plugin-opt=-fresolution=/tmp/ccywuOTu.res -plugin-opt=-pass-through=-lgcc -plugin-opt=-pass-through=-lgcc_s -plugin-opt=-pass-through=-lc -plugin-opt=-pass-through=-lgcc -plugin-opt=-pass-through=-lgcc_s --build-id --eh-frame-hdr -m elf_x86_64 --hash-style=gnu --as-needed -dynamic-linker /lib64/ld-linux-x86-64.so.2 -pie -z now -z relro -o main /usr/lib/gcc/x86_64-linux-gnu/9/../../../x86_64-linux-gnu/Scrt1.o /usr/lib/gcc/x86_64-linux-gnu/9/../../../x86_64-linux-gnu/crti.o /usr/lib/gcc/x86_64-linux-gnu/9/crtbeginS.o -L/usr/lib/gcc/x86_64-linux-gnu/9 -L/usr/lib/gcc/x86_64-linux-gnu/9/../../../x86_64-linux-gnu -L/usr/lib/gcc/x86_64-linux-gnu/9/../../../../lib -L/lib/x86_64-linux-gnu -L/lib/../lib -L/usr/lib/x86_64-linux-gnu -L/usr/lib/../lib -L/usr/lib/gcc/x86_64-linux-gnu/9/../../.. calc.o main.o -lgcc --push-state --as-needed -lgcc_s --pop-state -lc -lgcc --push-state --as-needed -lgcc_s --pop-state /usr/lib/gcc/x86_64-linux-gnu/9/crtendS.o /usr/lib/gcc/x86_64-linux-gnu/9/../../../x86_64-linux-gnu/crtn.o
If Ubuntu (WSL):
$ ld -o calc -I /usr/lib/gcc/x86_64-linux-gnu/11/collect2 -plugin /usr/lib/gcc/x86_64-linux-gnu/11/liblto_plugin.so -plugin-opt=/usr/lib/gcc/x86_64-linux-gnu/11/lto-wrapper -plugin-opt=-fresolution=/tmp/cc4YfMoM.res -plugin-opt=-pass-through=-lgcc -plugin-opt=-pass-through=-lgcc_s -plugin-opt=-pass-through=-lc -plugin-opt=-pass-through=-lgcc -plugin-opt=-pass-through=-lgcc_s --build-id --eh-frame-hdr -m elf_x86_64 --hash-style=gnu --as-needed -dynamic-linker /lib64/ld-linux-x86-64.so.2 -pie -z now -z relro -o calc /usr/lib/gcc/x86_64-linux-gnu/11/../../../x86_64-linux-gnu/Scrt1.o /usr/lib/gcc/x86_64-linux-gnu/11/../../../x86_64-linux-gnu/crti.o /usr/lib/gcc/x86_64-linux-gnu/11/crtbeginS.o -L/usr/lib/gcc/x86_64-linux-gnu/11 -L/usr/lib/gcc/x86_64-linux-gnu/11/../../../x86_64-linux-gnu -L/usr/lib/gcc/x86_64-linux-gnu/11/../../../../lib -L/lib/x86_64-linux-gnu -L/lib/../lib -L/usr/lib/x86_64-linux-gnu -L/usr/lib/../lib -L/usr/lib/gcc/x86_64-linux-gnu/11/../../.. main.o calc.o -lgcc --push-state --as-needed -lgcc_s --pop-state -lc -lgcc --push-state --as-needed -lgcc_s --pop-state /usr/lib/gcc/x86_64-linux-gnu/11/crtendS.o /usr/lib/gcc/x86_64-linux-gnu/11/../../../x86_64-linux-gnu/crtn.o
You can copy it to see how long this command is. When you use gcc to generate a program, gcc will call ld and above flags and options to generate. So when you need to link in actual work, you just use gcc directly.
The executable program generated in this way works perfectly, as follows:
$ ./calc
Over Limit!
I learned a lot when writing this article, I hope these will help someone in need~