How to install and use Plan 9 on Mac VM Fusion
I encountered many problems when using VM Fusion to install Plan 9 on Mac. The official documents and some foreign blogs from the past two years were not clear, and even “misleading” (some situations have changed). So I am writing this article to help others who also encounter the same problem.
If you can see this blog, it means that you probably know what kind of system Plan 9 is. I won’t go into details here and just get started.
You can follow the steps step by step. I have marked the important parts with subtitles.
Download and unzip
The download link is: https://9p.io/plan9/download/plan9.iso.bz2.
However, in order to prevent the link from becoming invalid, the official website of Plan 9 is still listed: https://plan9.io/plan9/. The page is as follows:
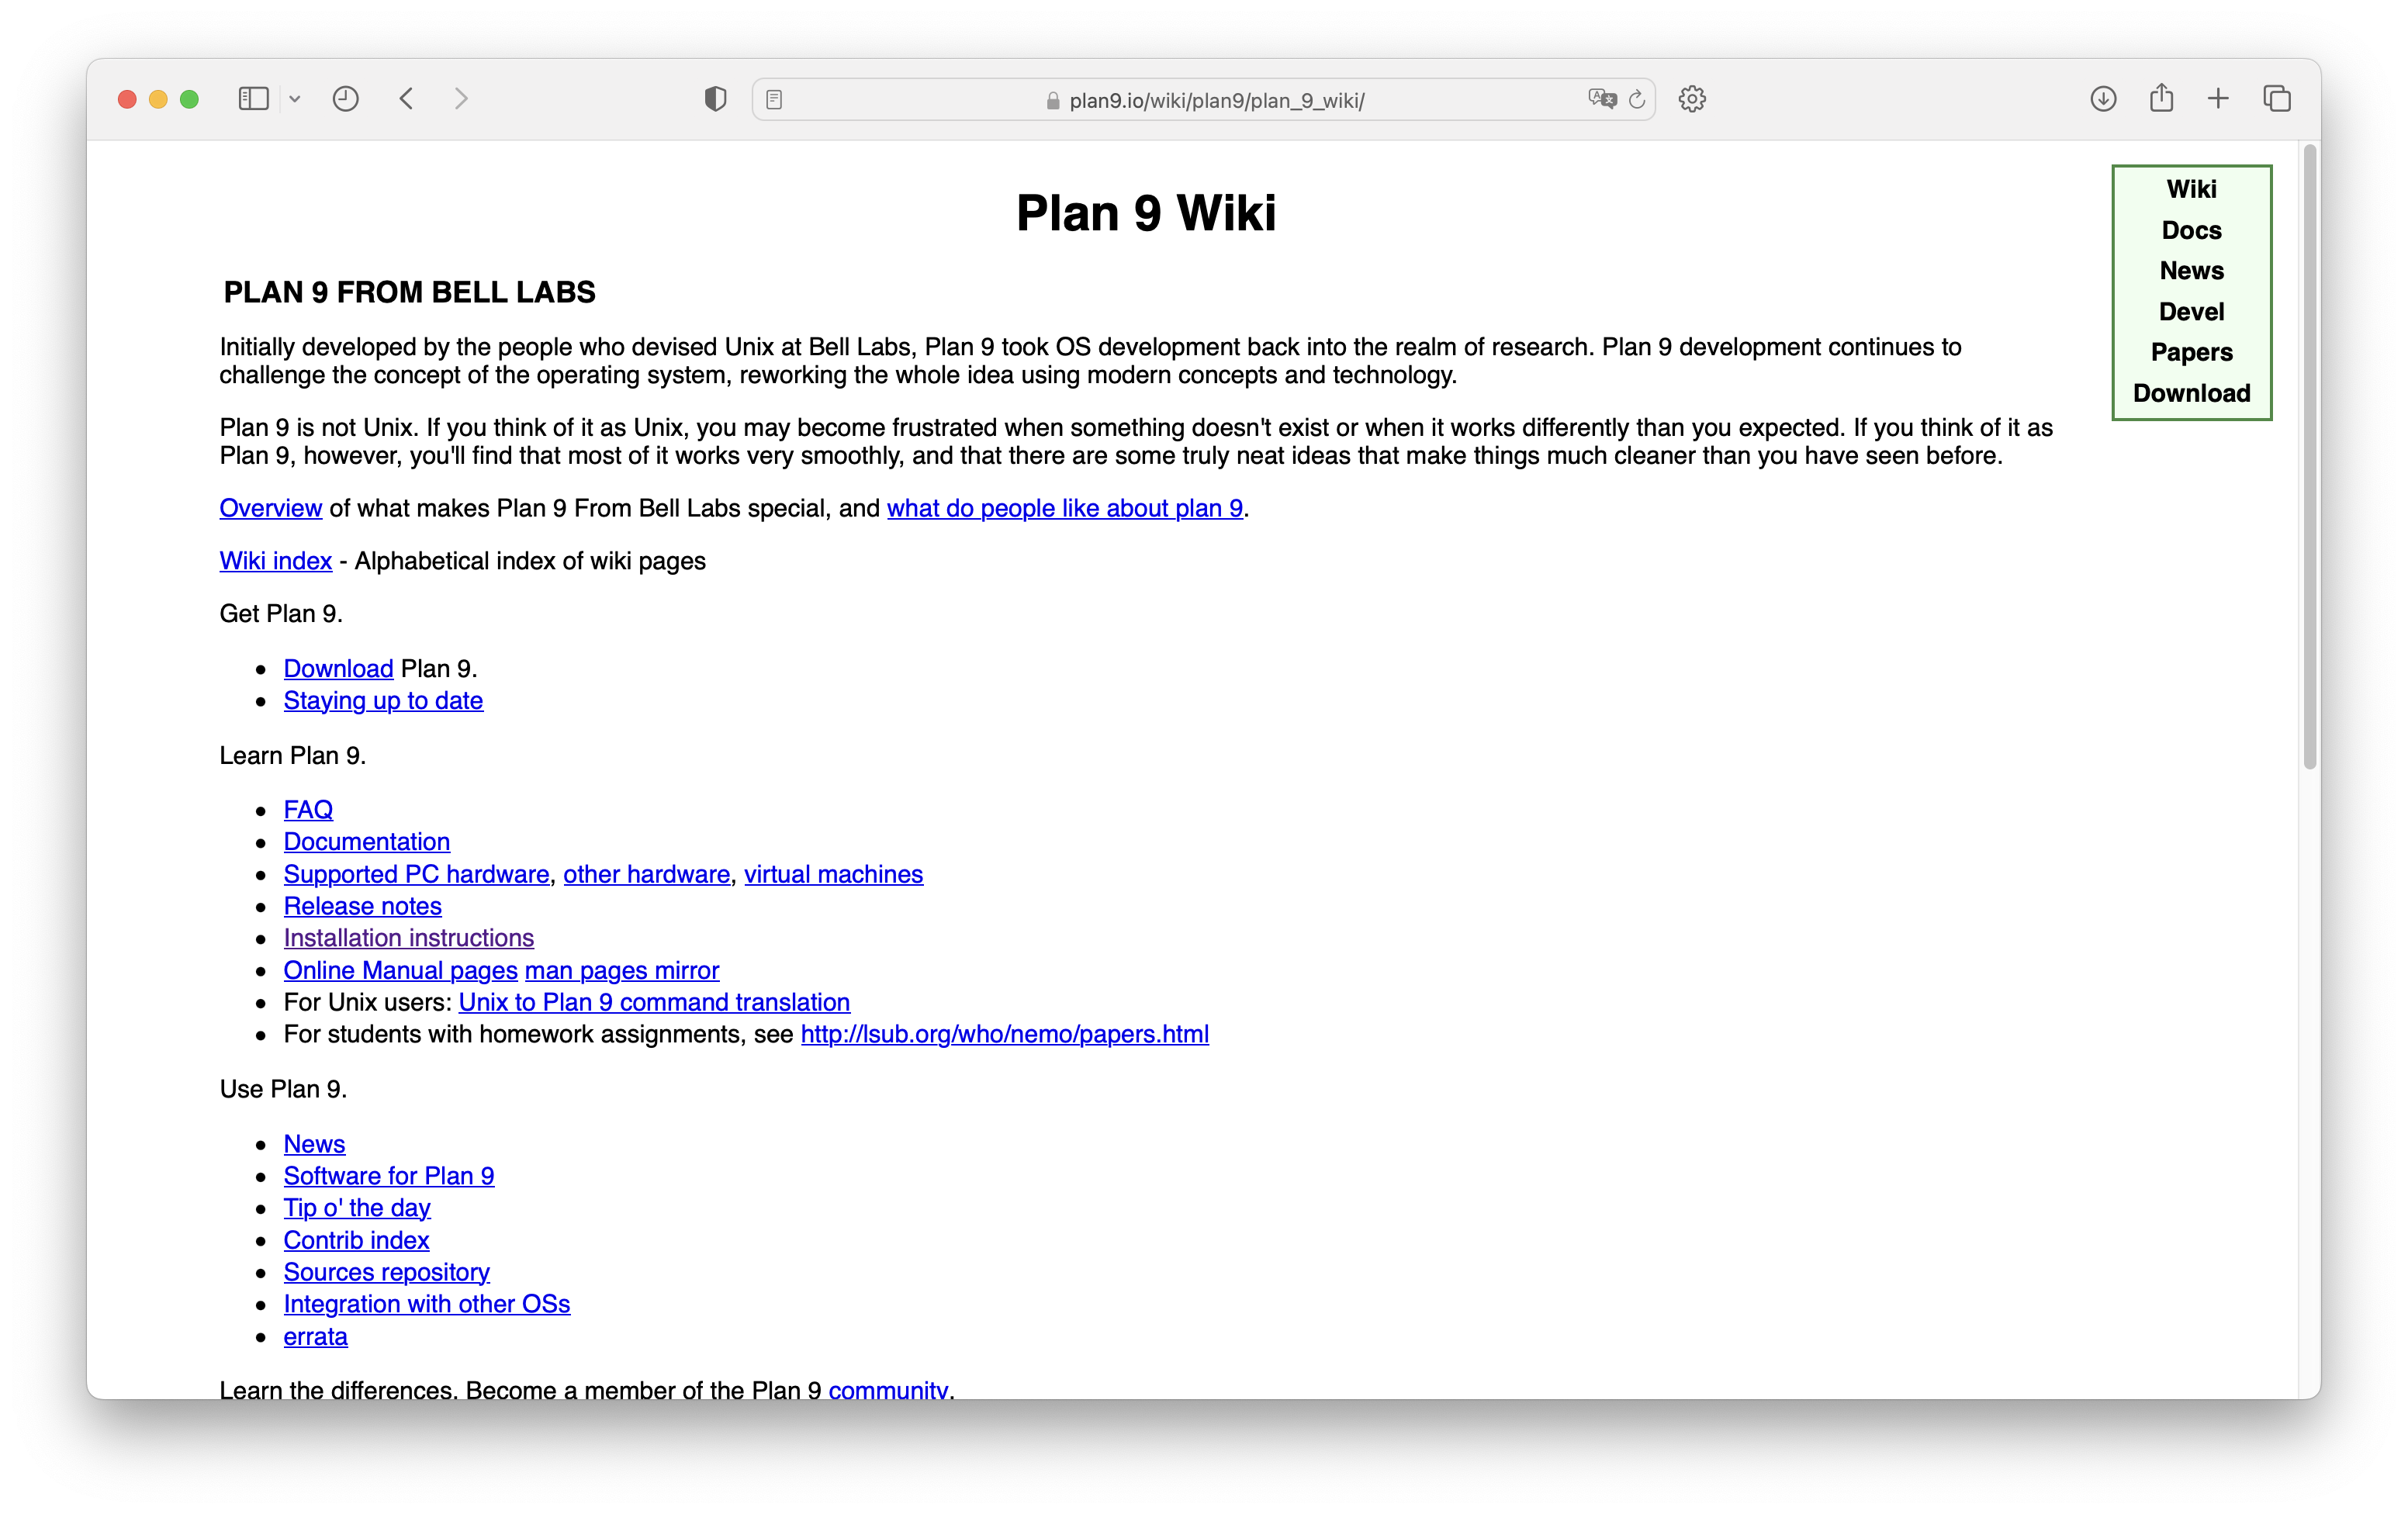
Here you can find a lot of information about Plan 9. Although some of the information is outdated, it can also tell you what the original developers of Plan 9 thought.
After downloading, use the bzip2 command in the terminal to decompress (although macOS can recognize it as a compressed package, the decompression result is empty):
bzip2 -d plan9.iso.bz2
You then get an ISO file of about 300MB.
Create a new virtual machine
**If you know how to create a new virtual machine, please skip directly to the “Notes” section. **
First click to create a new virtual machine, and then drag in the decompressed plan9.iso file. At this time, the page is as follows:
<img alt=”Create new virtual machine from “plan9.iso”” src=”/assets/images/cb9e3e58e8ff419cb7345dd19dde44d9.png” style=”box-shadow: 0px 0px 0px 0px”>
Then when selecting the operating system, select “Others-Others” and click “Continue”:
<img alt=”When selecting the operating system, select “Others-Others” and click “Continue”” src=”/assets/images/1a532eebc606499eaaa8637d394e829d.png” style=”box-shadow: 0px 0px 0px 0px”>
Select “Legacy BIOS” and click “Continue”:
<img alt=”Select “Legacy BIOS”” src=”/assets/images/79043377c1f540a3bdc99981eba6d6fc.png” style=”box-shadow: 0px 0px 0px 0px”>
Precautions
Please follow the following content, it is the key point. **In the following interface, please click “Customize Settings”. ** If you click “Continue”, the virtual machine will start automatically, and you need to shut down and adjust again:
<img alt=”Select “Legacy BIOS” and click “Continue”” src=”/assets/images/b8376cc0a44347669e430de4c34aef0d.png” style=”box-shadow: 0px 0px 0px 0px”>
I named this virtual machine “Plan 9”:
<img alt=”Name this virtual machine “Plan 9”” src=”/assets/images/a8c427488b004c3e9ae0a5702640f2b6.png” style=”box-shadow: 0px 0px 0px 0px”>
Then change the hard disk and CD/DVD (framed in the picture below) from IDE to SCSI respectively, as follows:
<img alt=”Select “Change hard drive and CD/DVD from IDE to SCSI respectively” src=”/assets/images/7a090b60f8fc44bdb0b28b52b5e86793.png” style=”box-shadow: 0px 0px 0px 0px”>
After modification, please remember to click “Apply”.
<img alt=”After modifying the hard disk, please remember to click “Apply”” src=”/assets/images/180d837a8b9243f1b7304990fc4fea5e.png” style=”box-shadow: 0px 0px 0px 0px”>
<img alt=”After modifying the CD/DVD, please remember to click “Apply”” src=”/assets/images/385f7b9a33d8409cb3f5fdd07db13166.png” style=”box-shadow: 0px 0px 0px 0px”>
Then adjust the configuration according to personal needs and you can start it.
If you don’t modify the IDE to SCSI, your keyboard input will be invalid in some cases, causing the boot to fail and be much slower.
Boot interface
Due to the virtual machine, only the text boot interface can be used.
After starting the virtual machine, the interface is as follows. At this time we enter 1:
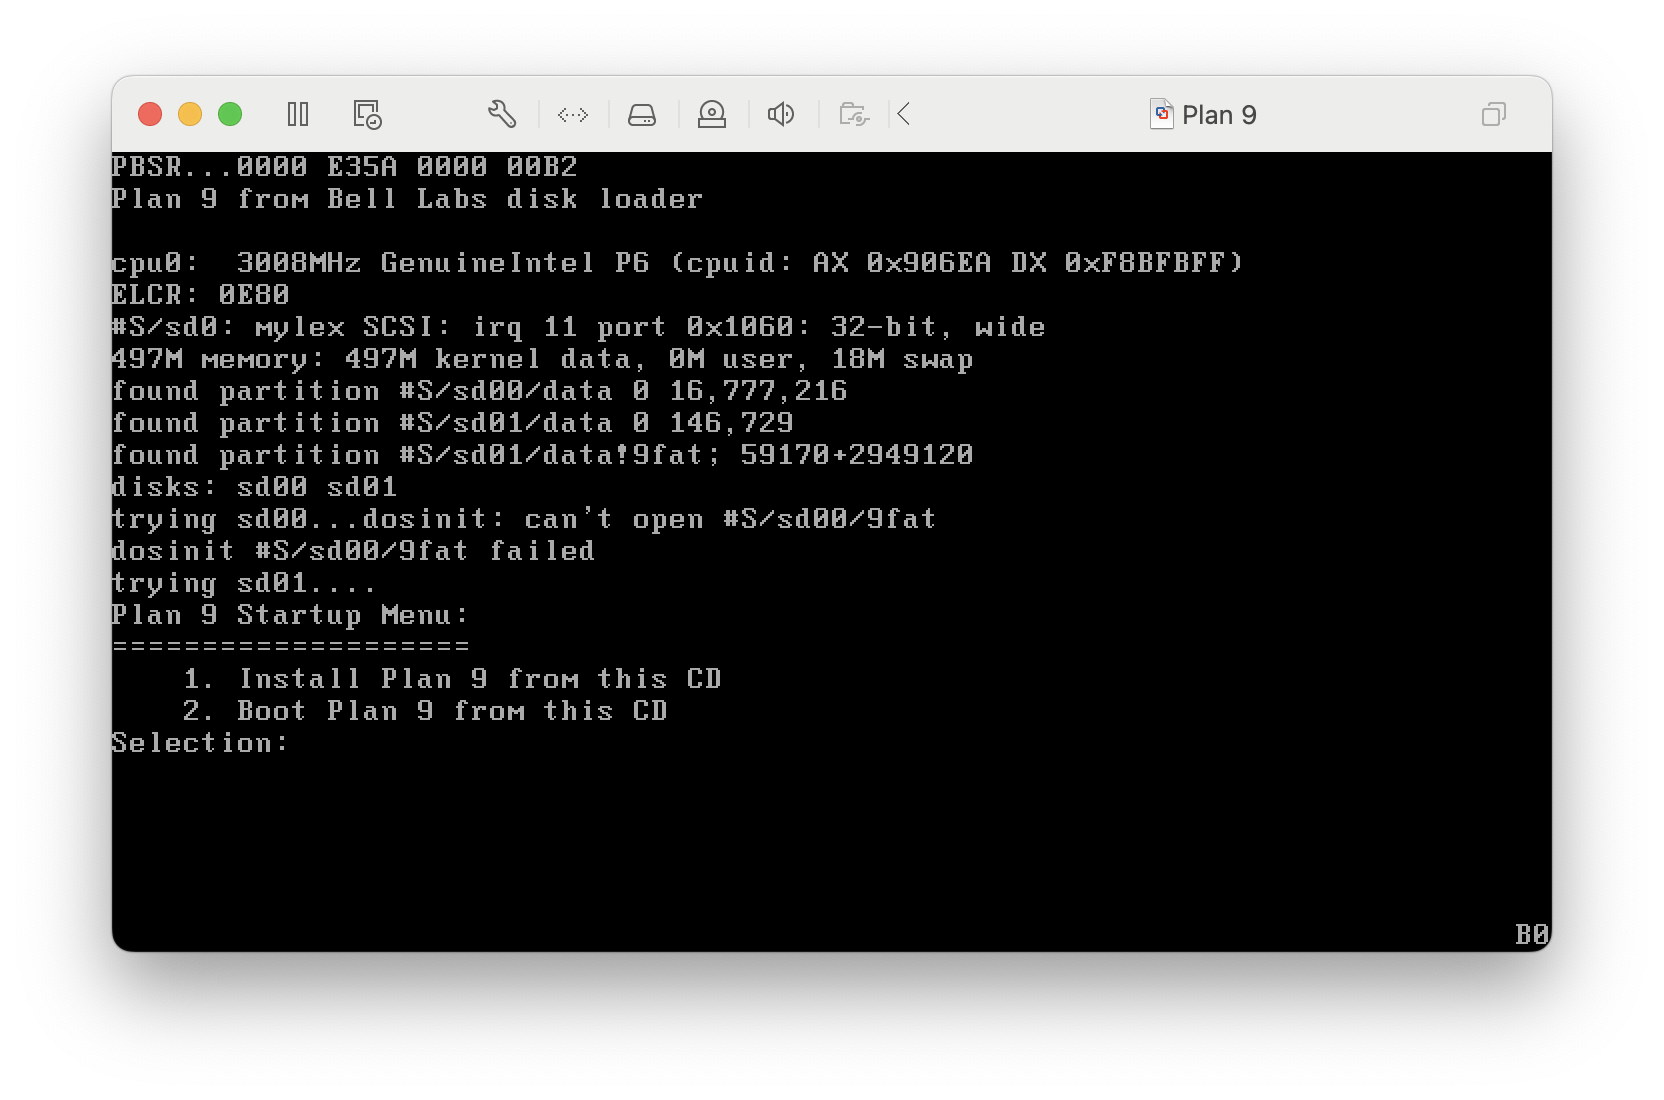
Then please enter the following content in sequence:
yes, use DMA for IDE devices (although we are not using IDE, but for historical reasons this is IDE);ps2is a mouse. I believe many people still remember the PS2 interface on old computers;1024x768x32means the resolution is 1024x768 (this resolution is the most stable, although you can set it yourself, but it will not be able to enter the system if it is too large, and changing vesa will not work), and the color depth is 32 bits (Plan 9 supports 8, 16, 24, 32 bit)xgaindicates that the monitor has an XGA interface (the same as IDE for historical reasons)
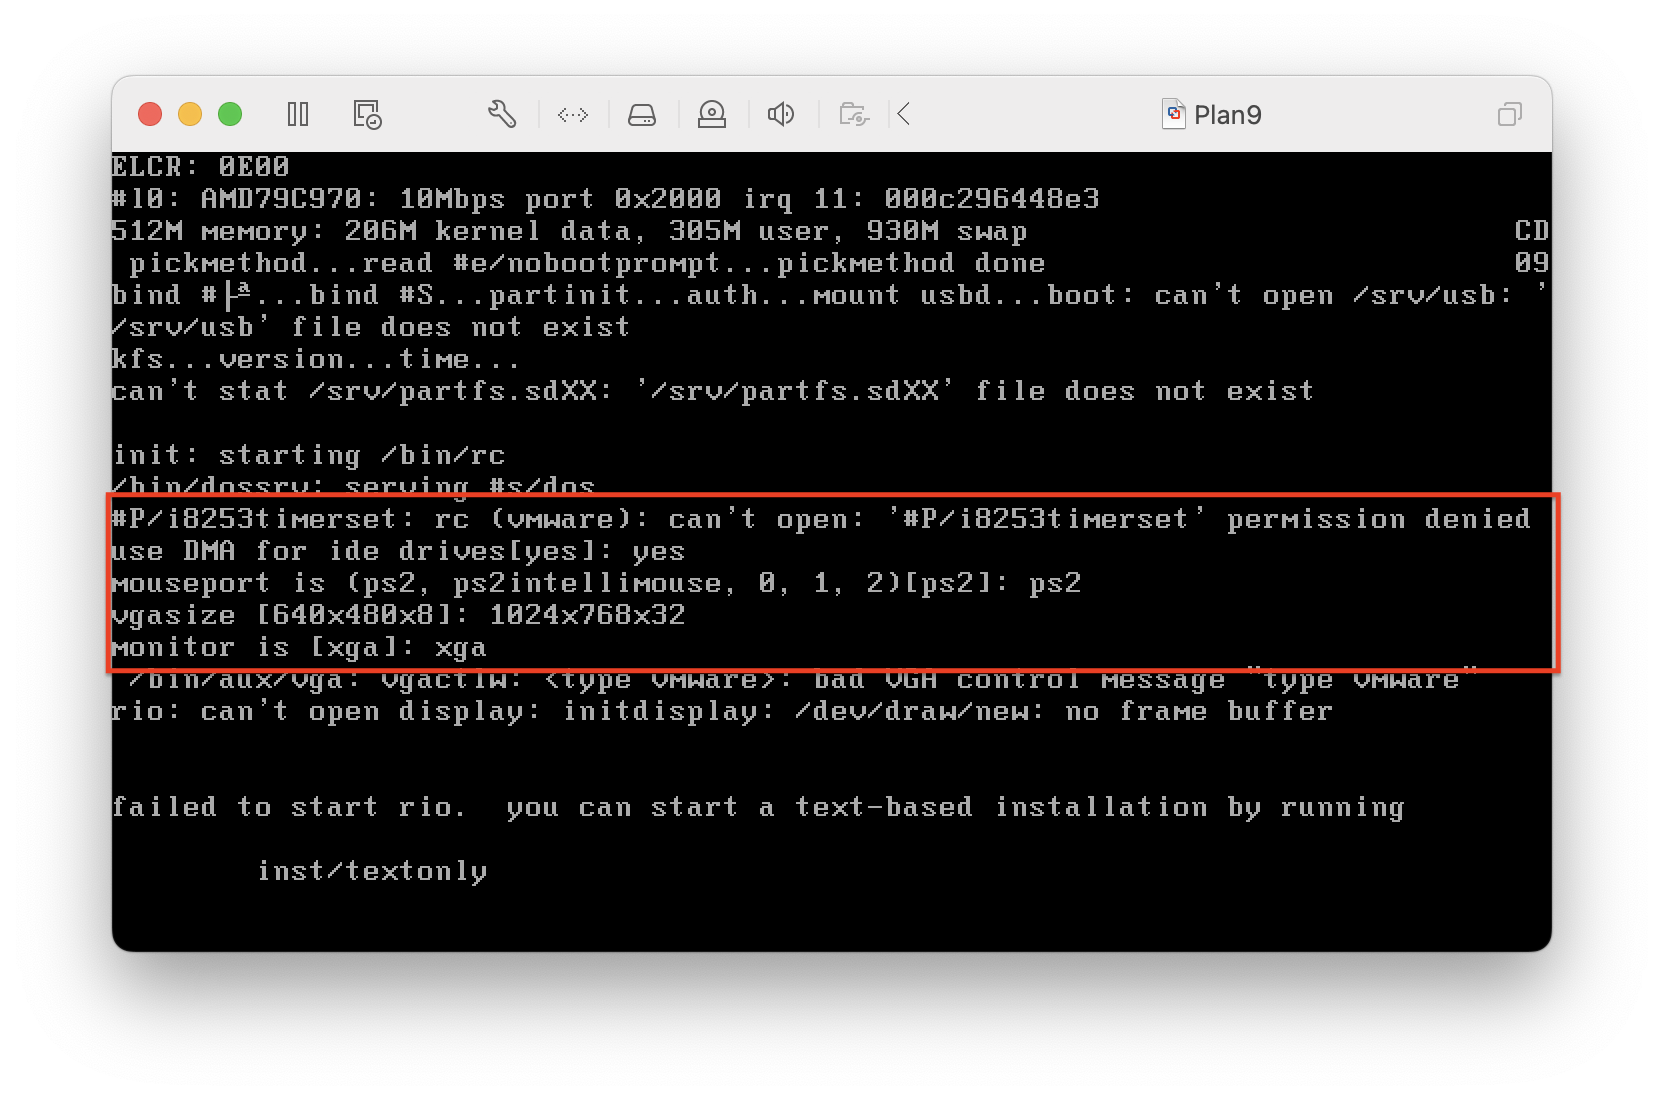
After inputting, the following interface will appear:
That is to say, if an error is encountered, the text interactive interface can only be used. At this time we need to manually enter inst/textonly (cannot copy), and then press the Enter key.
Next, I will explain this situation, focusing on the four or five lines at the bottom of the picture:
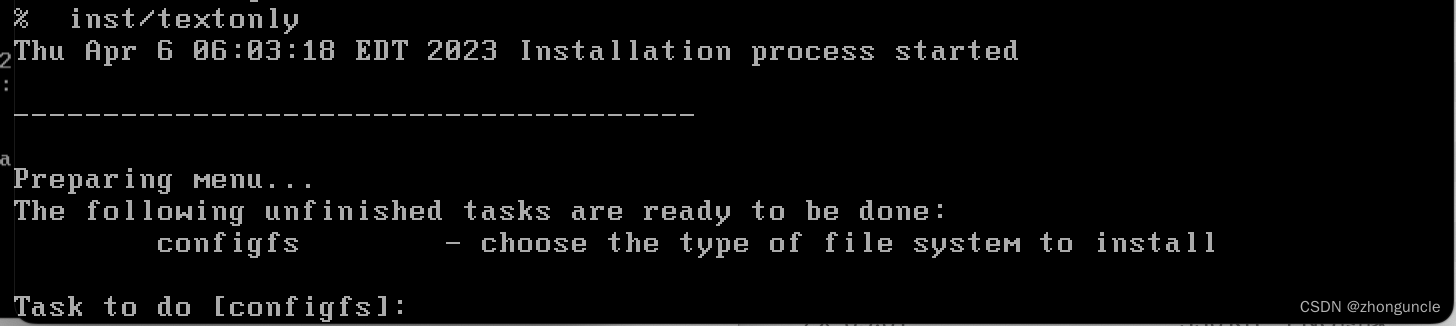
Preparing menumeans regenerating the following content;The following unfinished tasks are ready to be done:indicates what the next task is (here is what to do next). There will also be a section for completed tasks starting from the second one.- The key point is the
Task to do [xxxx]part, where we need to enter the task to be done, andxxxxin the square brackets represents the default value. Simply press the Enter key to enter the default value.
So here we just keep pressing the Enter key. The content is roughly creating a file system. There is an introduction after each task in the list, so I won’t go into details here.
Please also read each task carefully if you need to adjust some settings.
Need to remember
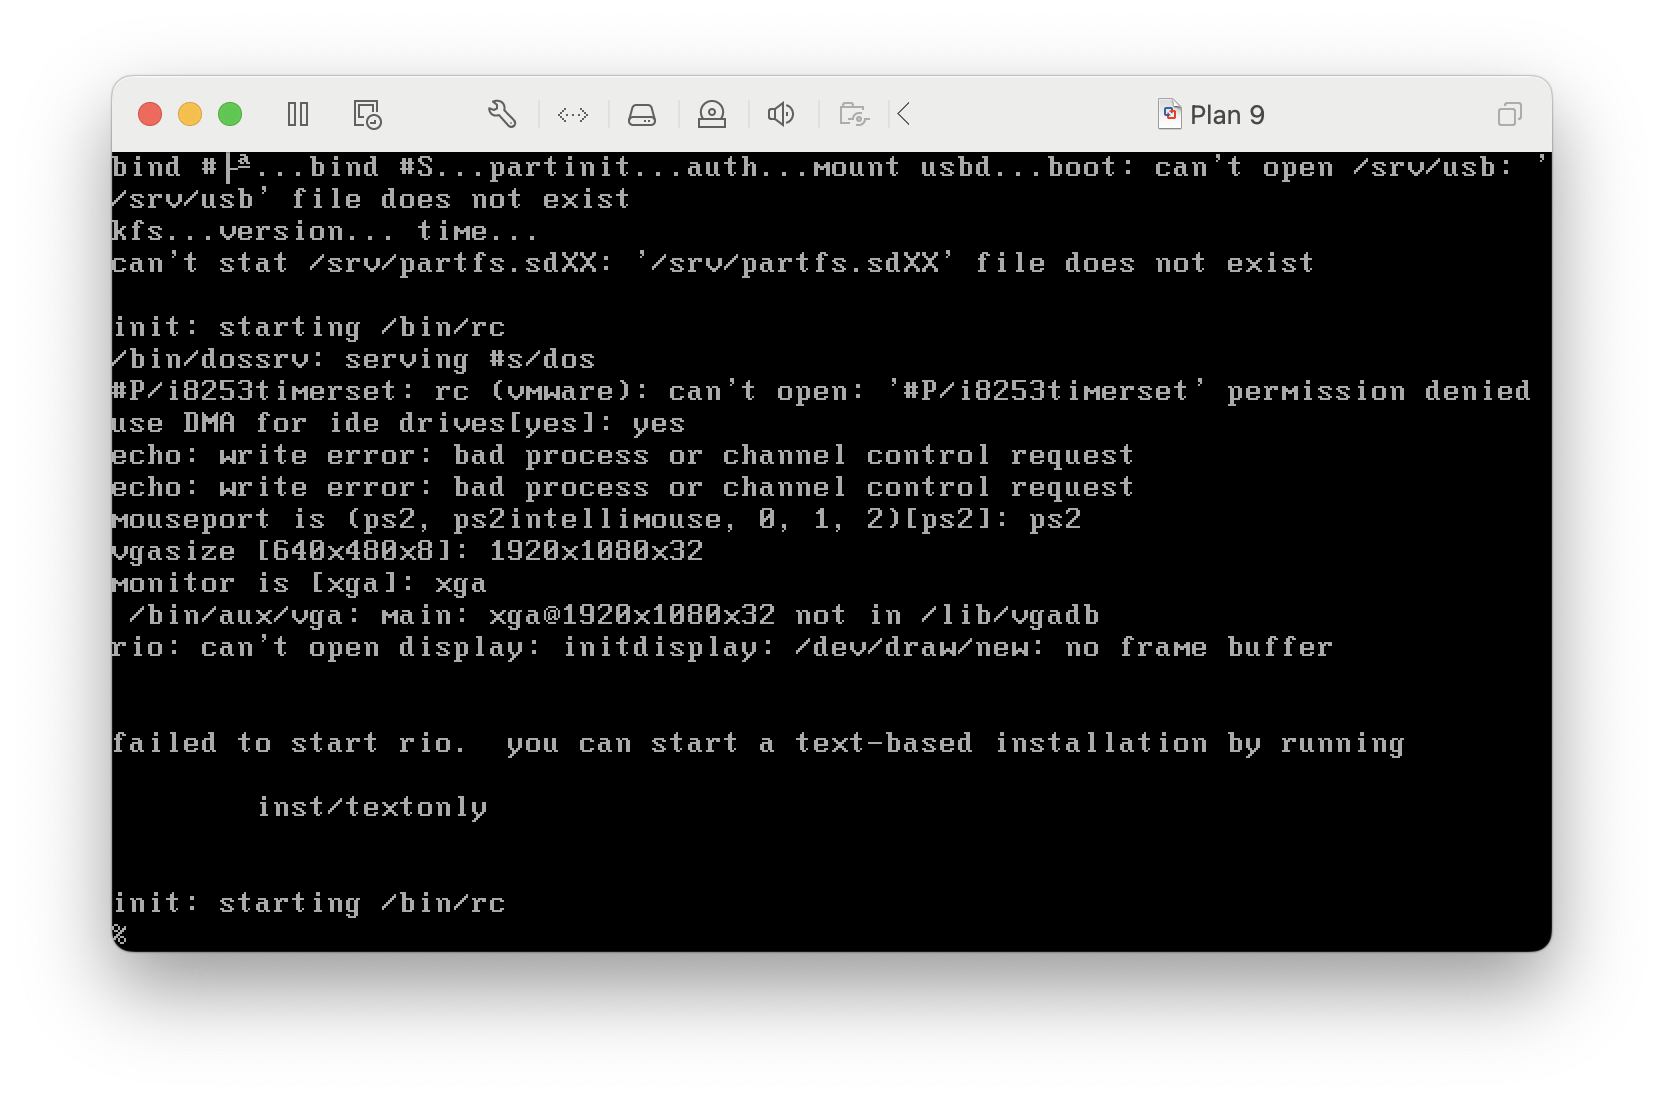
Keep pressing Enter until no default appears. In this case, pressing Enter will not cause any operation, so don’t worry about pressing it too much.
There is something very important here that we need to remember. It is best to take a photo or take notes, which is the content in the red box in the picture below, because everyone’s value may be different: sd00 represents the virtual machine generated by the VM. Hard disk, and sd01 represents the virtual optical drive of plan9.iso.
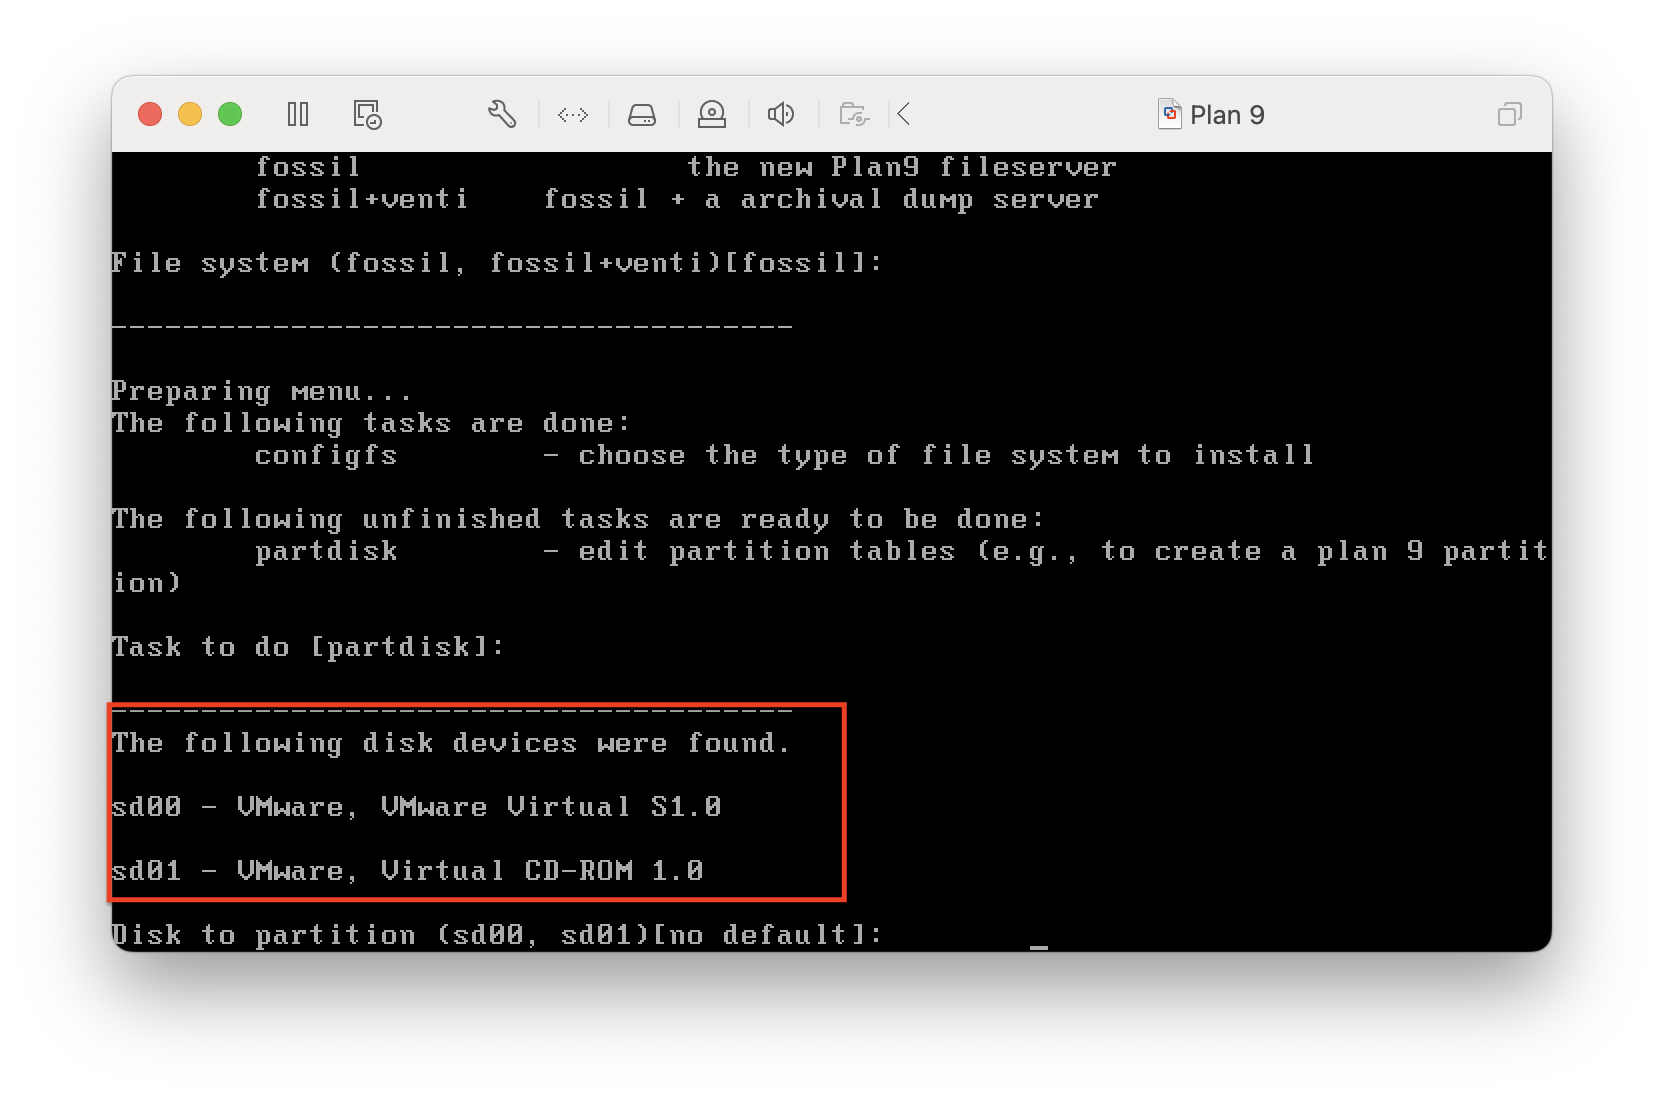
Here we are asked which device we want to put Plan 9 into, of course it is the virtual hard disk. So we enter sd00.
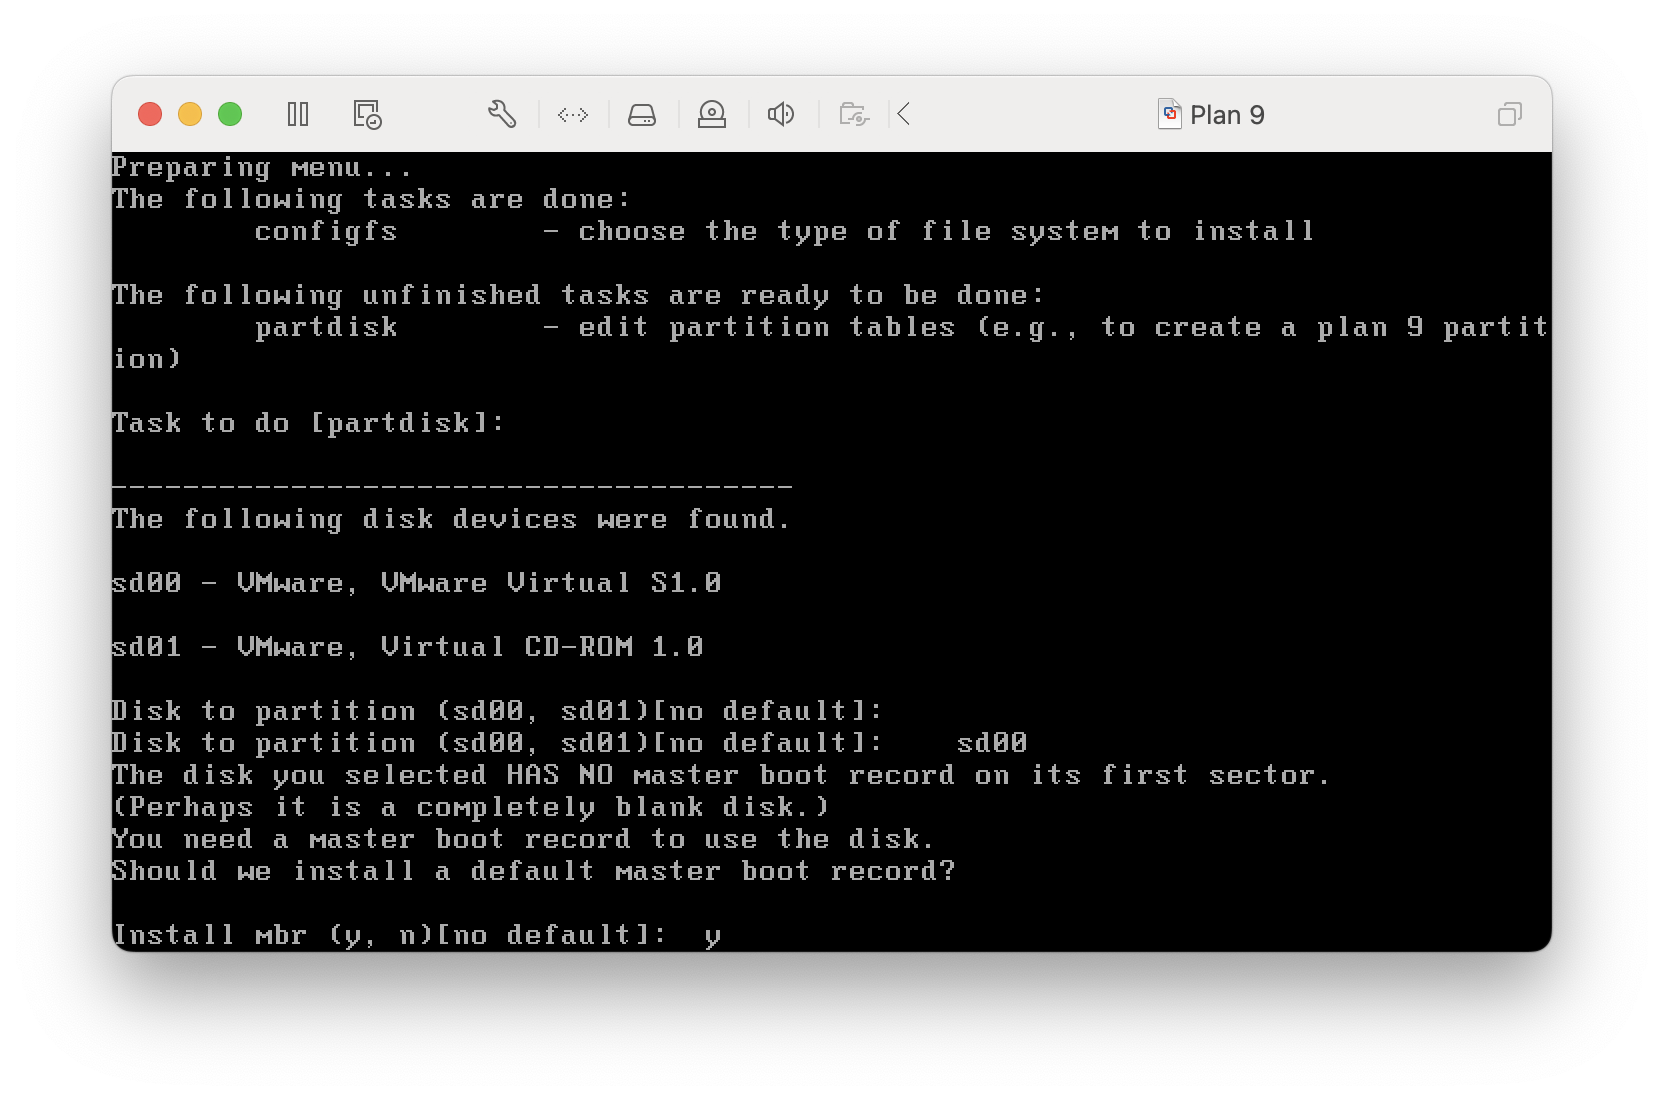
Since the hard disk is empty, the master boot record (mbr, used to start the system) cannot be found. We will be asked whether to install mbr here. Enter y, as follows:
Then confirm again. The method here is different from the previous one. You need to enter w first and then q to enter the next step. Similar to :wq in Vi to save and exit, but written separately. as follows:

You can see that you have entered the next step. Here you still press the Enter key directly. When encountering the above situation, first w and then q until the next situation where there is no default value, as follows:
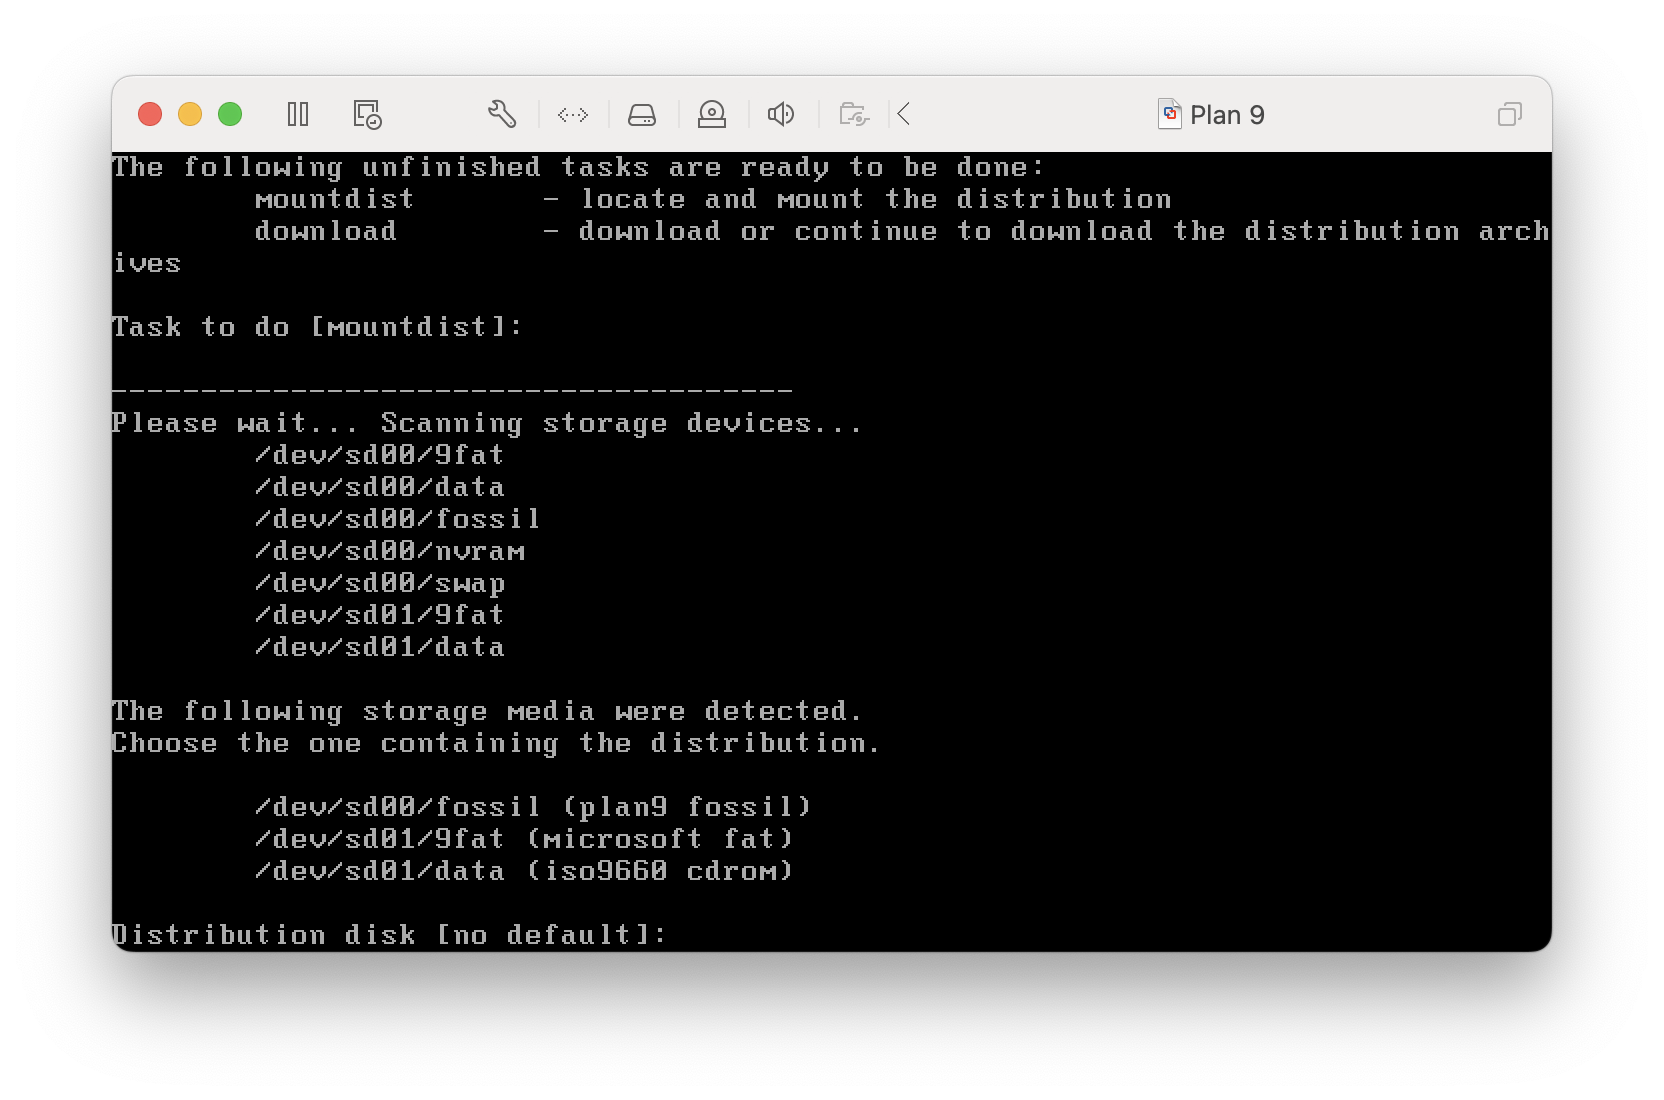
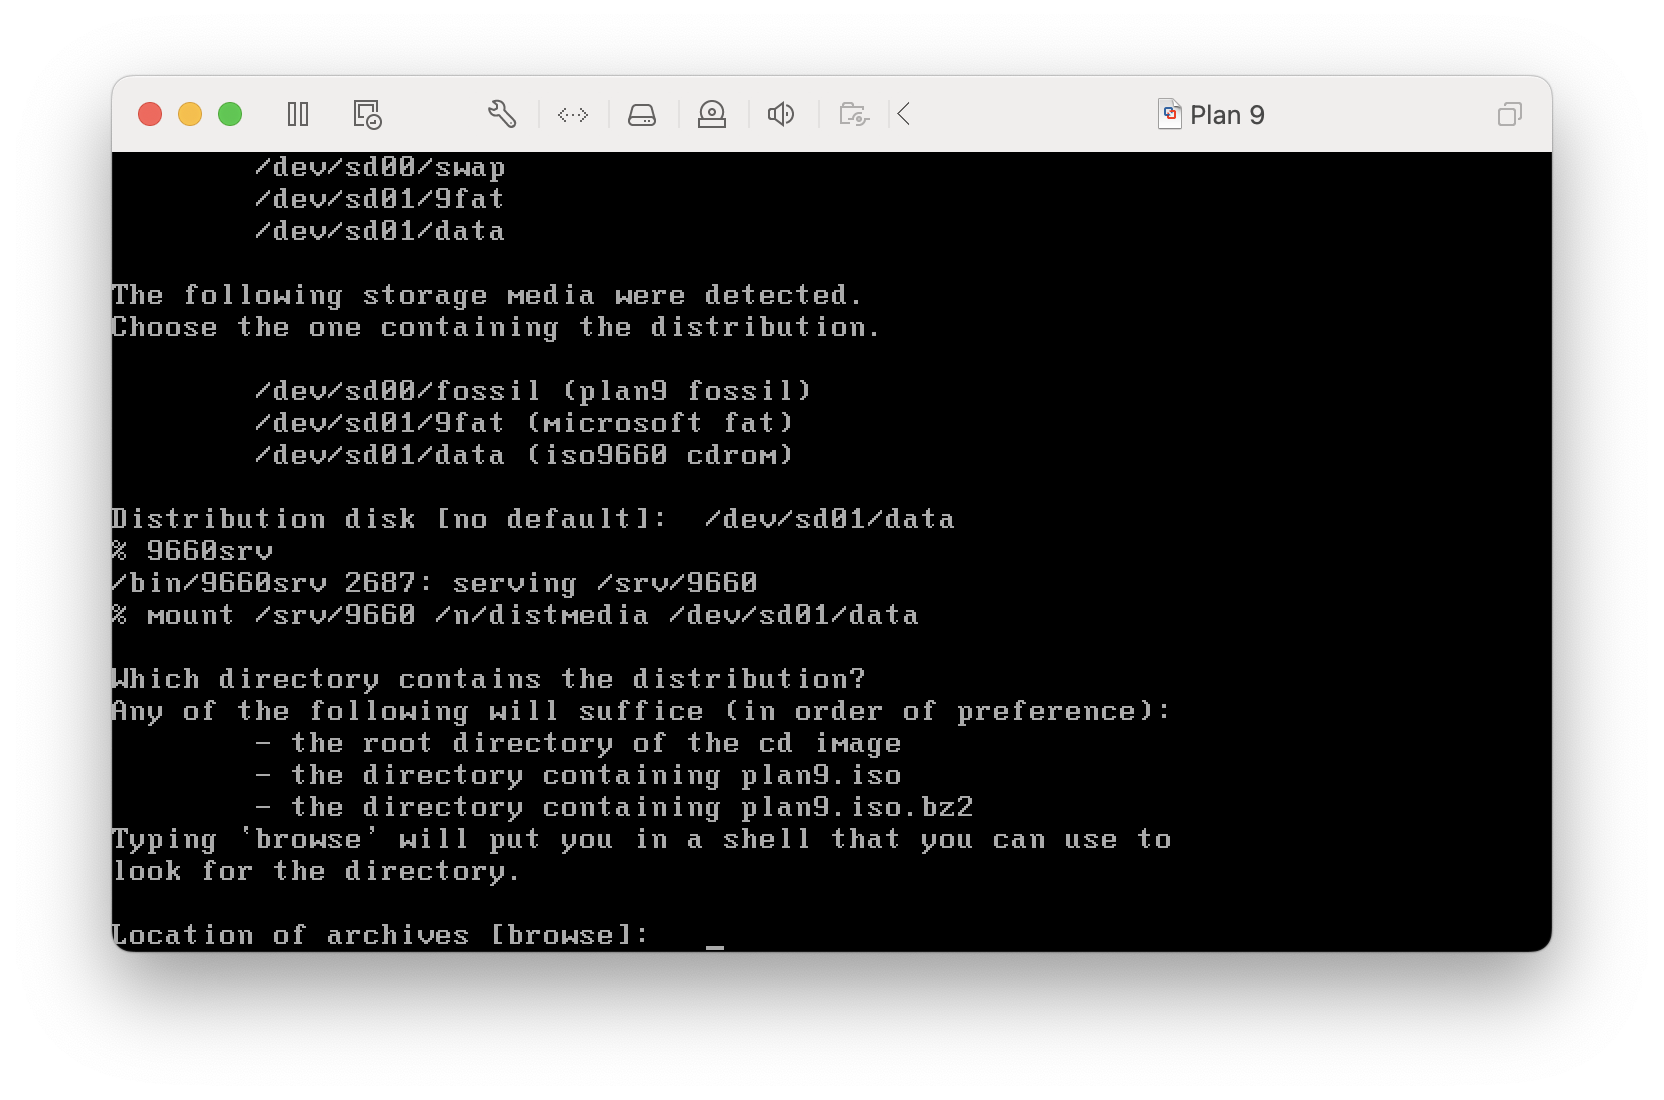
Here let us point out where the distribution is placed so that we can copy it to the hard drive later. Here you need to remember the content before moving out: the hard disk is sd00, and the CD/DVD is sd01.
Plan 9 is placed in the ISO, so enter /dev/sd01/data and adjust this according to your own content.
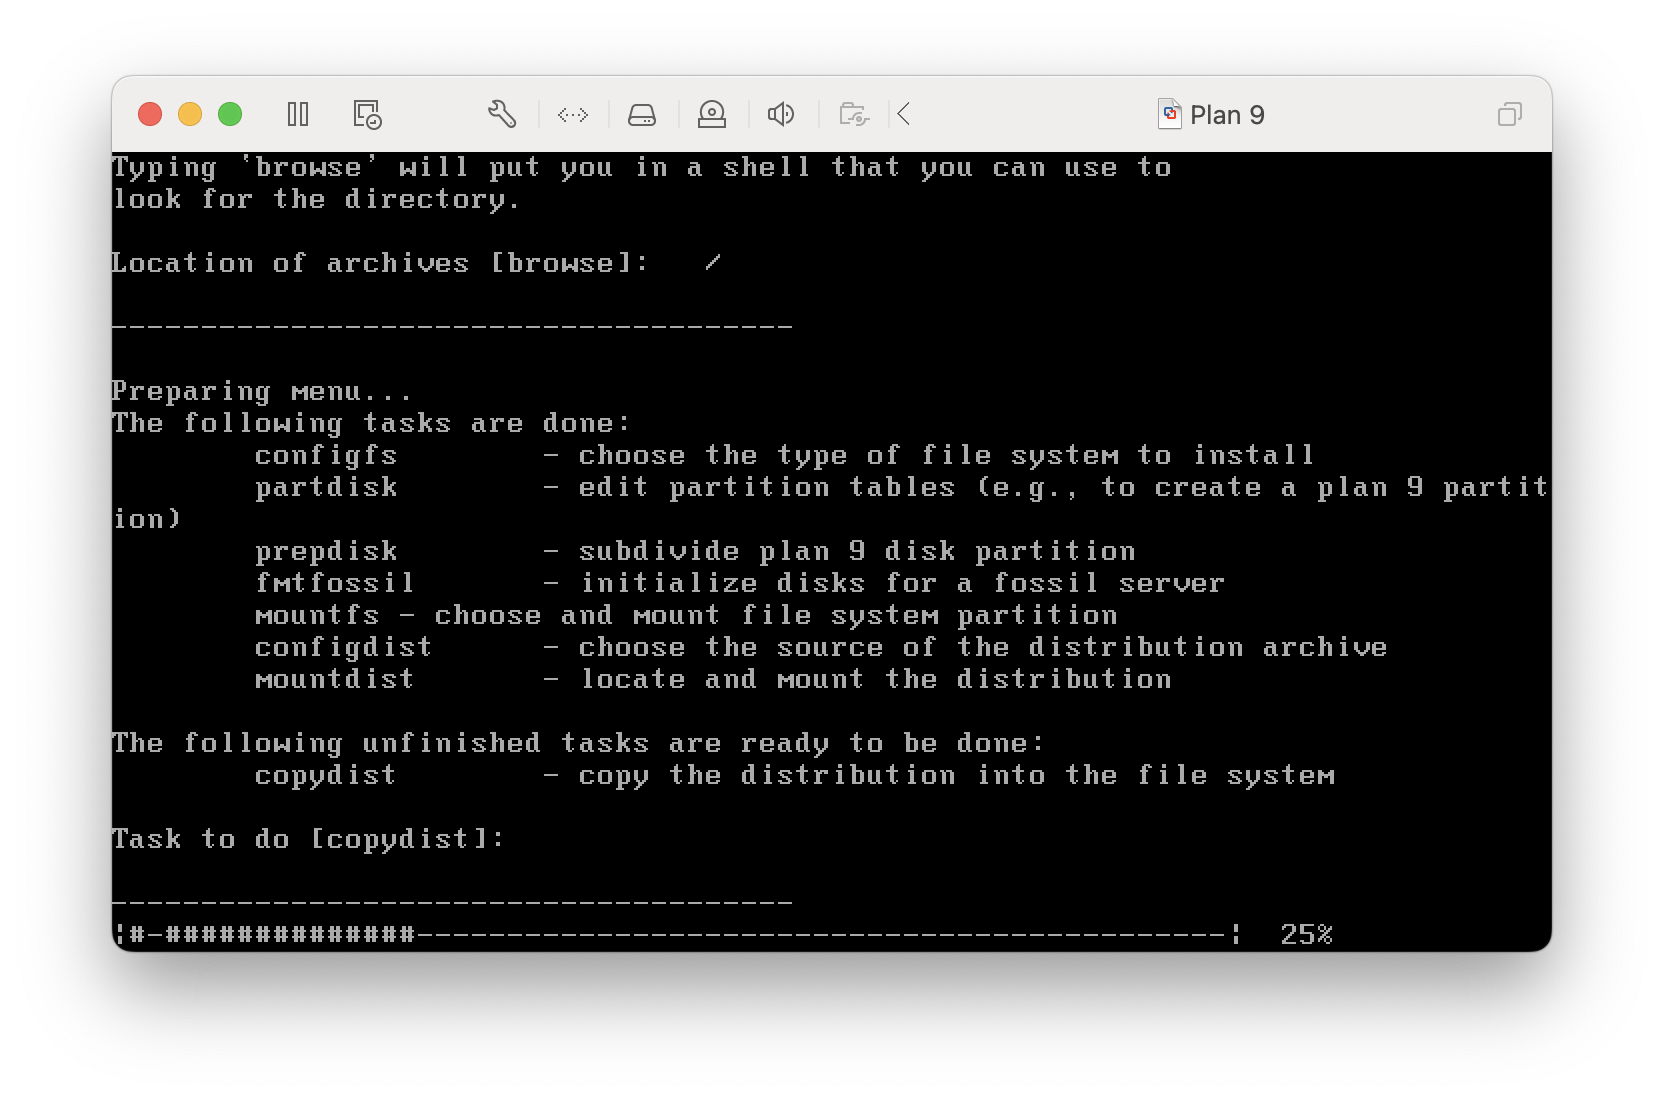
Then the following content will appear, allowing us to enter the specific directory containing the release version. Although there are default values here, don’t press Enter directly, just enter / (that is, in the current directory). Although you can press Enter, you can just enter exit to exit.
Next, press Enter in the copydist part and wait a few minutes for the system to be installed:
Then continue to press Enter until the following situation has no default value:
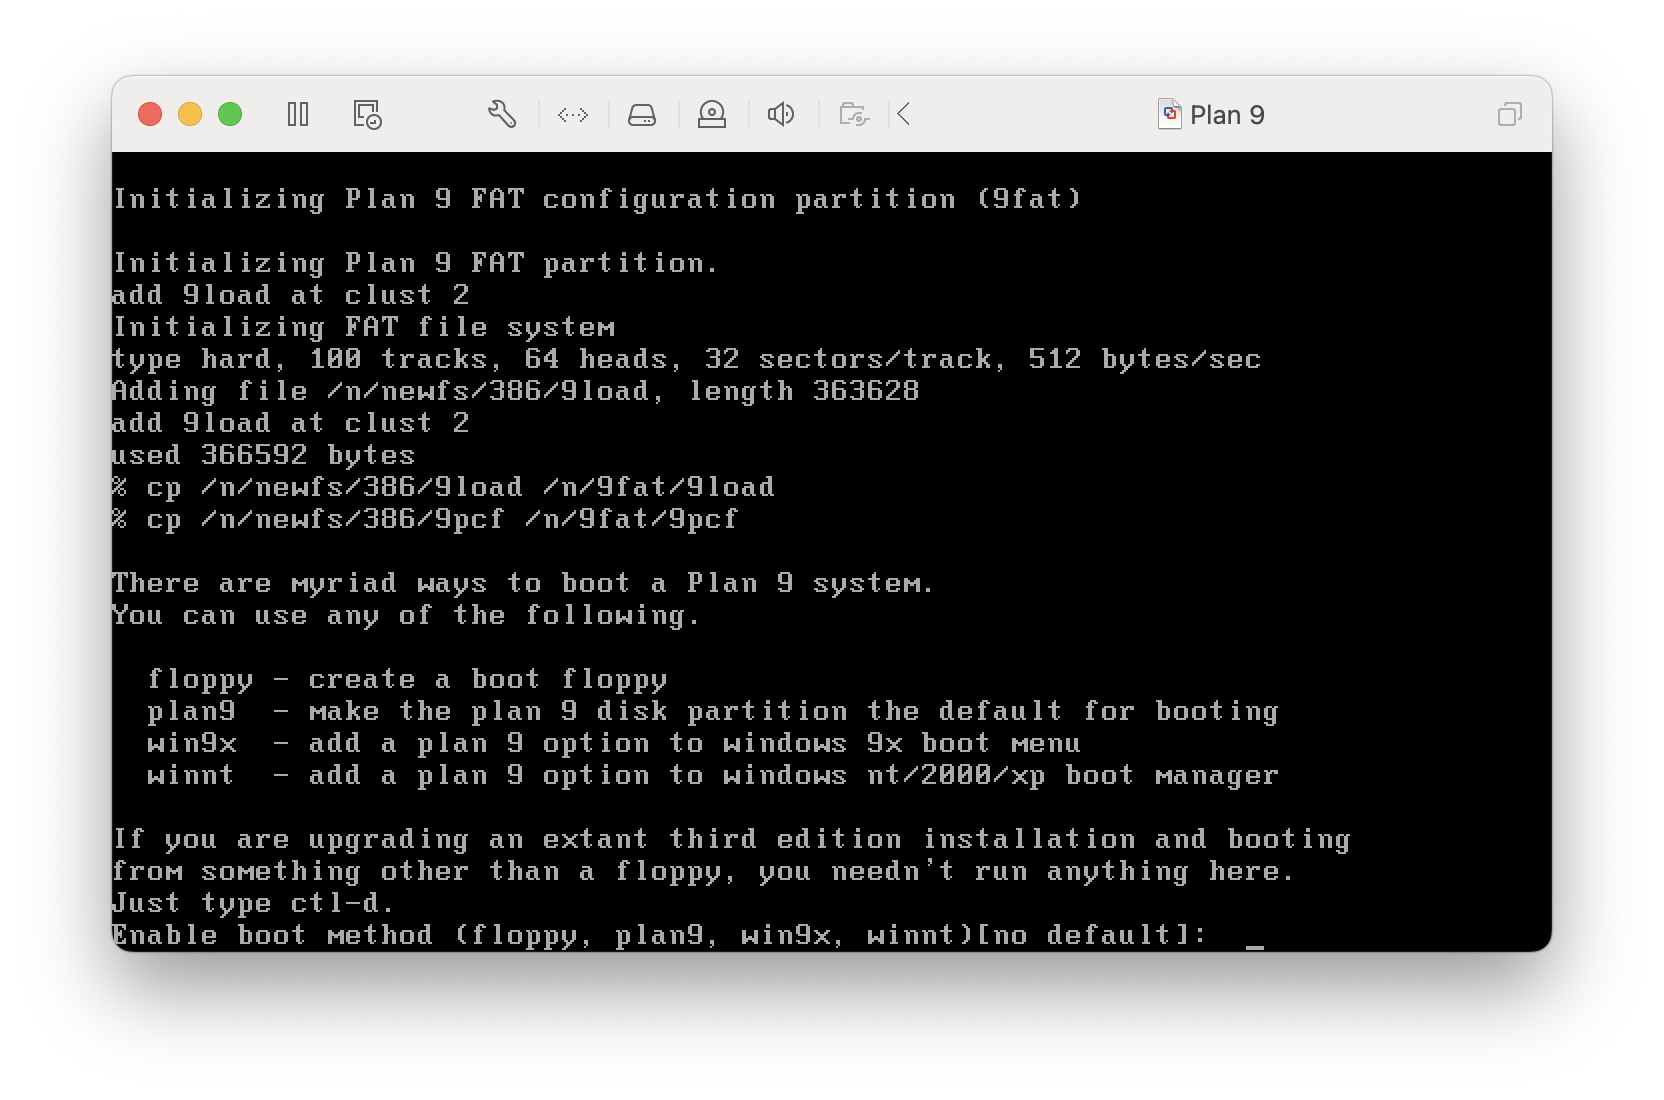
Here we are asked to select the startup method. We enter plan9, and then enter y to confirm.
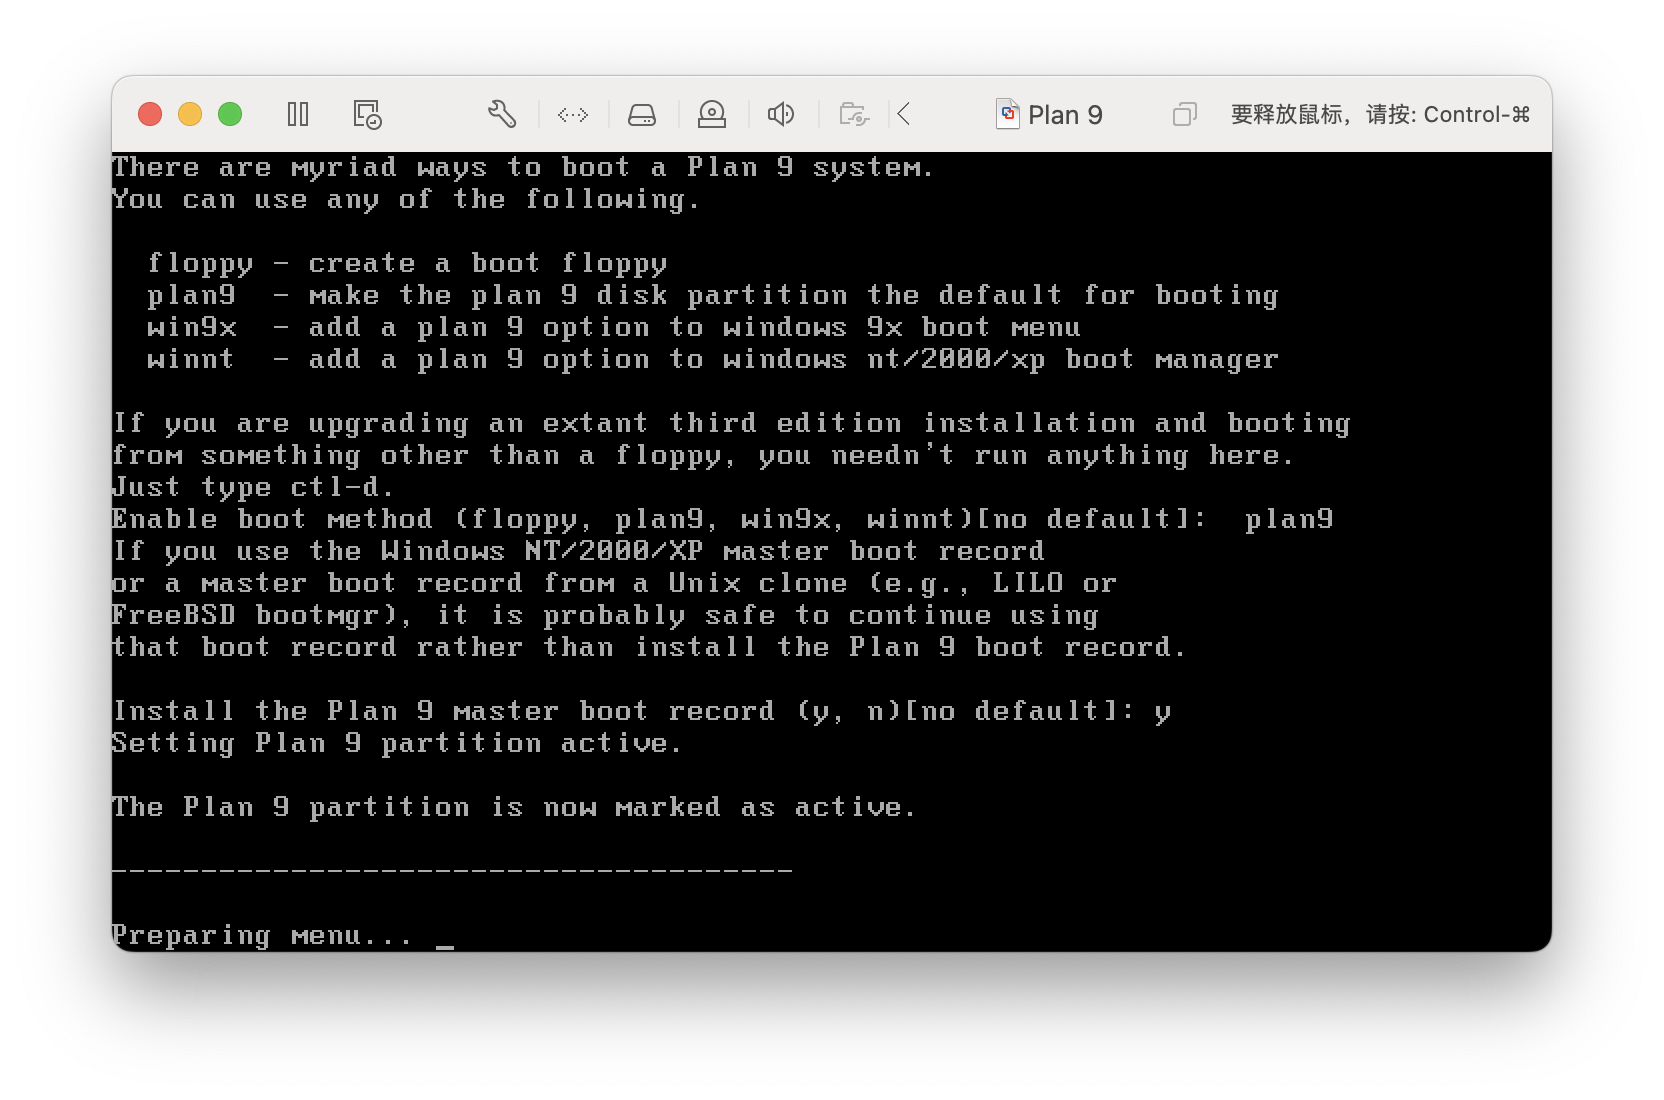
Then just press Enter to end. When the following content appears, you can shut down the virtual machine:
<img alt=”Show “Feel free to turn off your computer”” src=”/assets/images/df1e42c2abd44144a49f988185553723.png” style=”box-shadow: 0px 0px 0px 0px”>
Shut down here (be careful not to choose restart):
<img alt=”Select “Shutdown” in the menu bar - Virtual Machine” src=”/assets/images/8c228fa7b1bb49b59beb0325a9658843.png” style=”box-shadow: 0px 0px 0px 0px”>
Preparations before entering the system
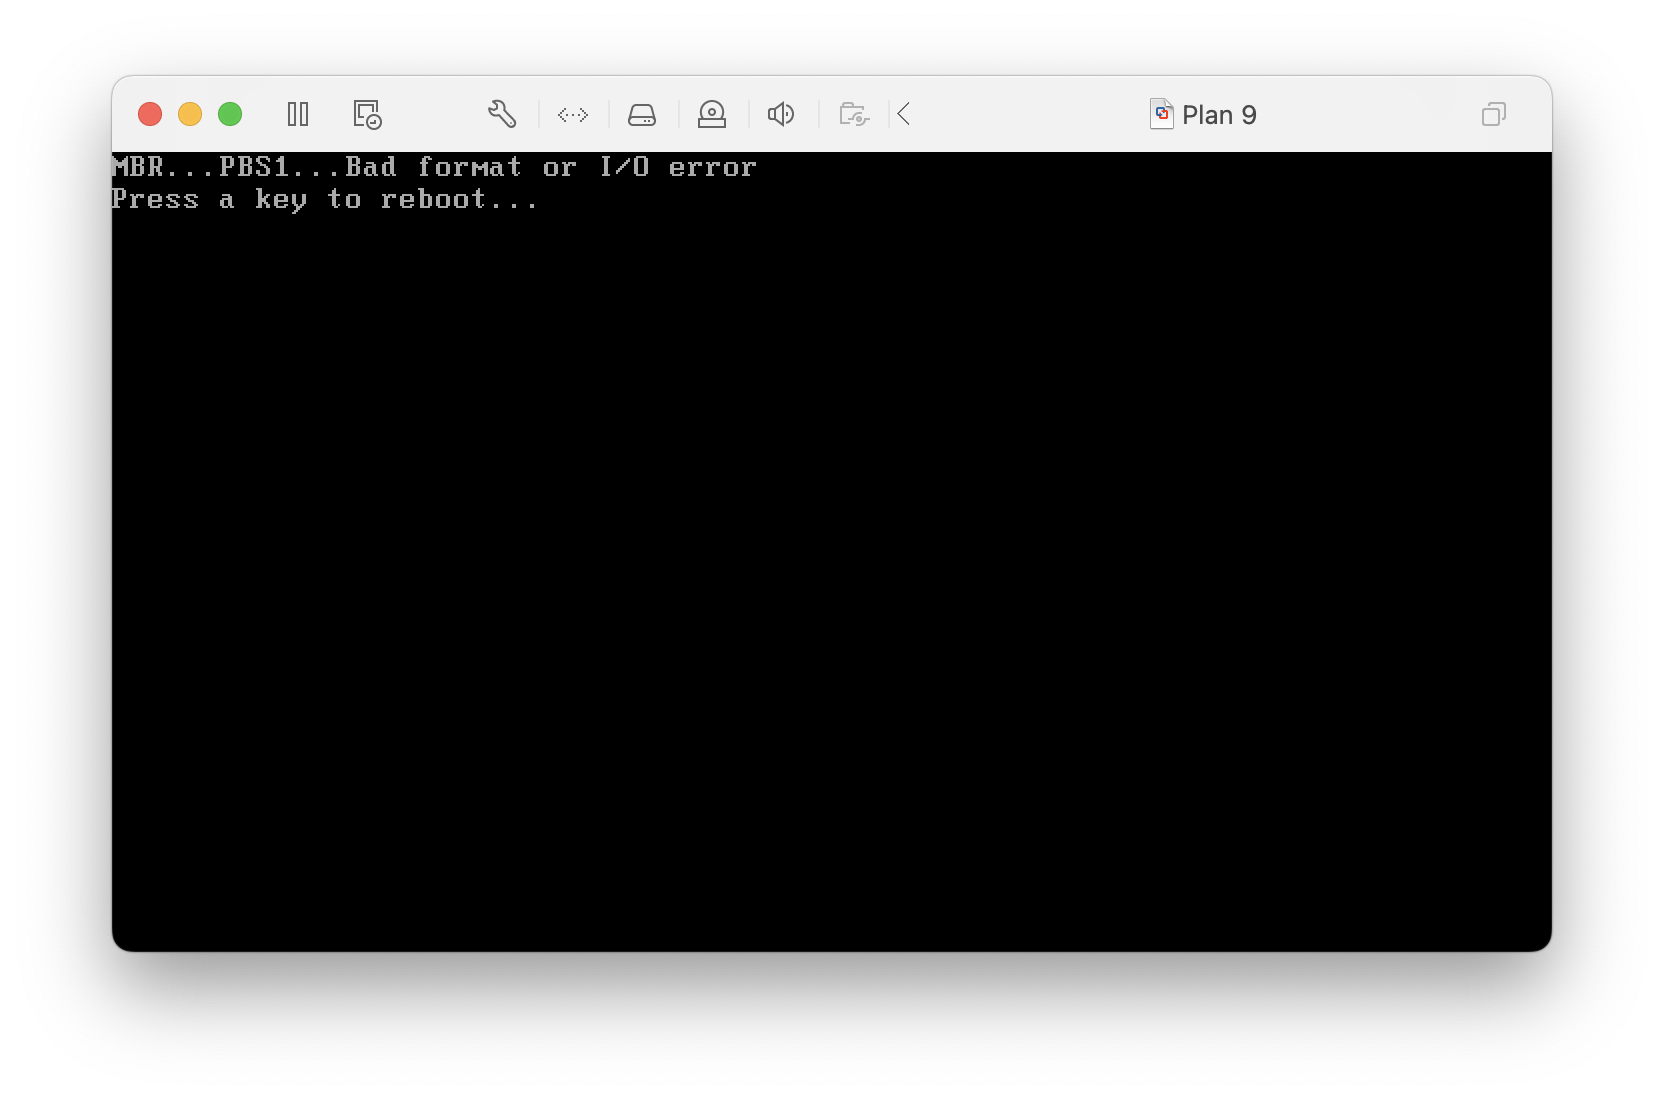
Next, don’t eject the ISO or disconnect the DVD/CD as stated in the official documentation or some tutorials. Just boot up and start using Plan 9. If you eject the ISO or disconnect the DVD/CD, it will show that it cannot find where to start. The page is as follows:
In this case, click on “Virtual Machine-Settings-Startup Disk”, select “CD/DVD”, and then click Restart.
<img alt=”Click “Virtual Machine-Settings-Startup Disk”, select “CD/DVD”, and then click Restart” src=”/assets/images/80d5ea2b1c1e465fbf0150e8a7ae2f82.png” style=”box-shadow: 0px 0px 0px 0px”>
Set up the system
You need to set up the system every time you enter the system.
When the page looks like this, press Enter.
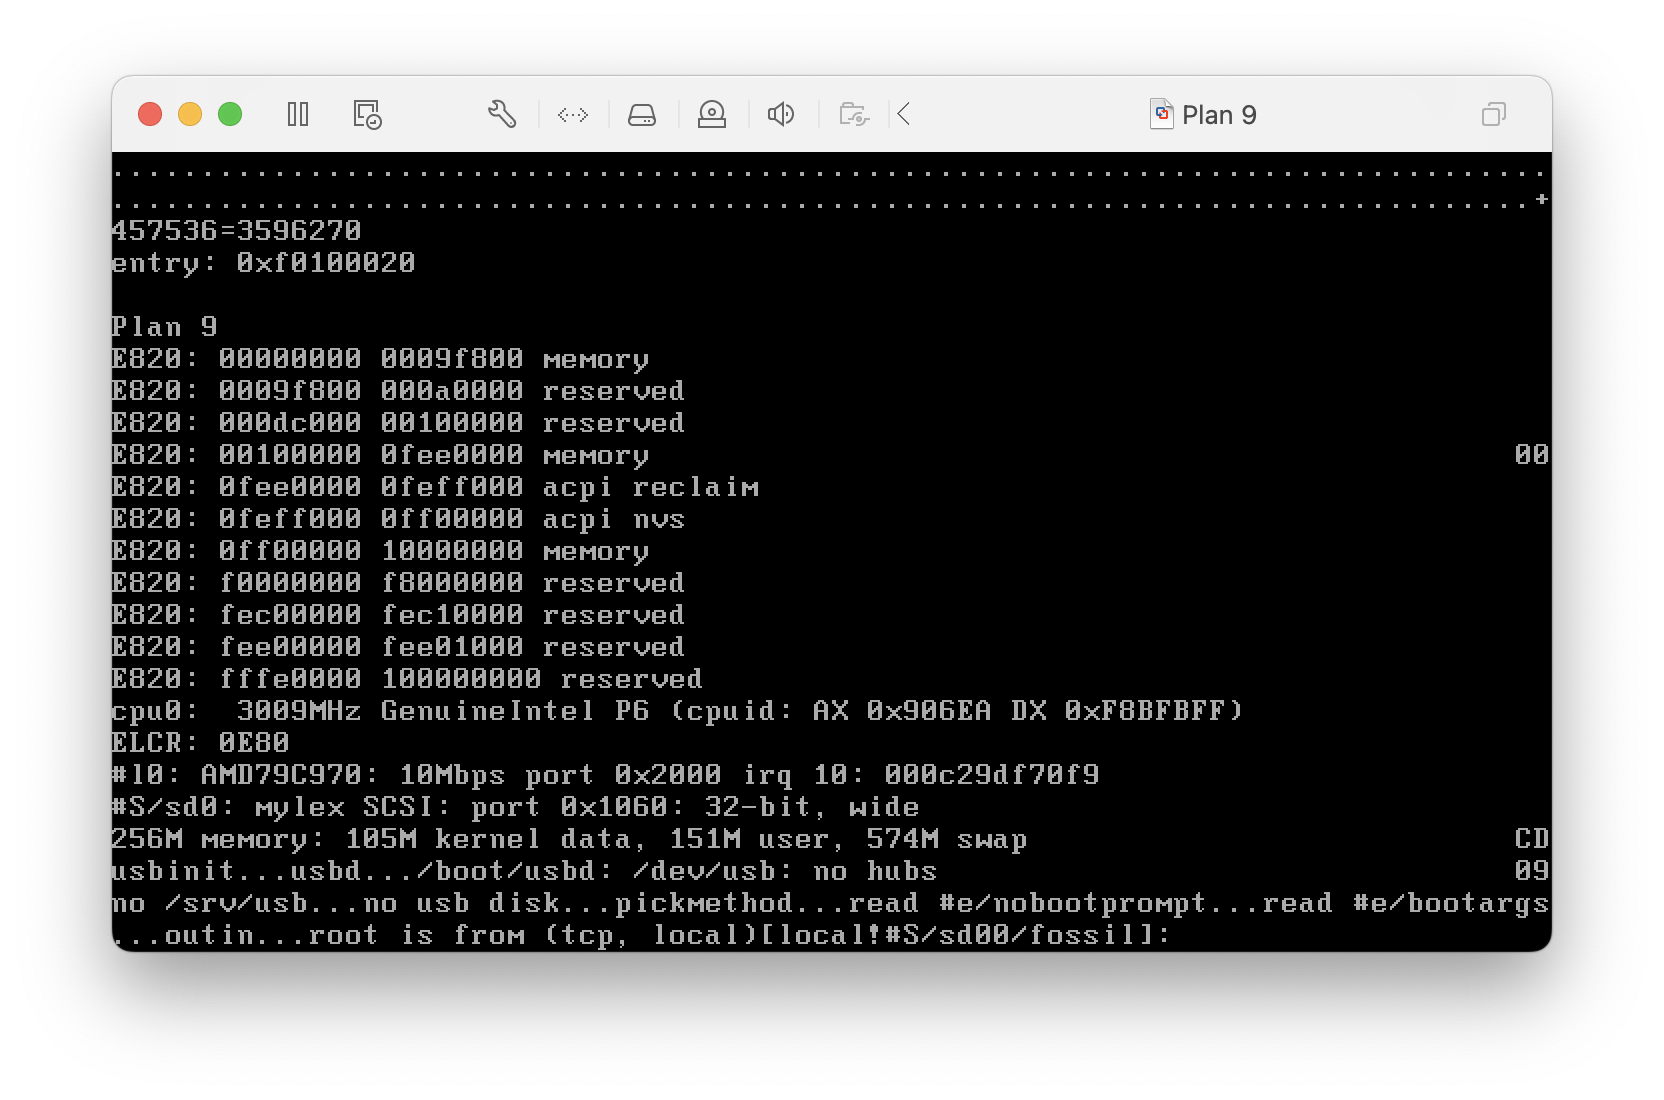
You will then be prompted to enter your username (as shown below), where you need to enter glenda. Never customize your username, because Glenda is the root user of Plan 9, and the meaning of Glenda is the name of the bunny that is the logo of Plan 9:

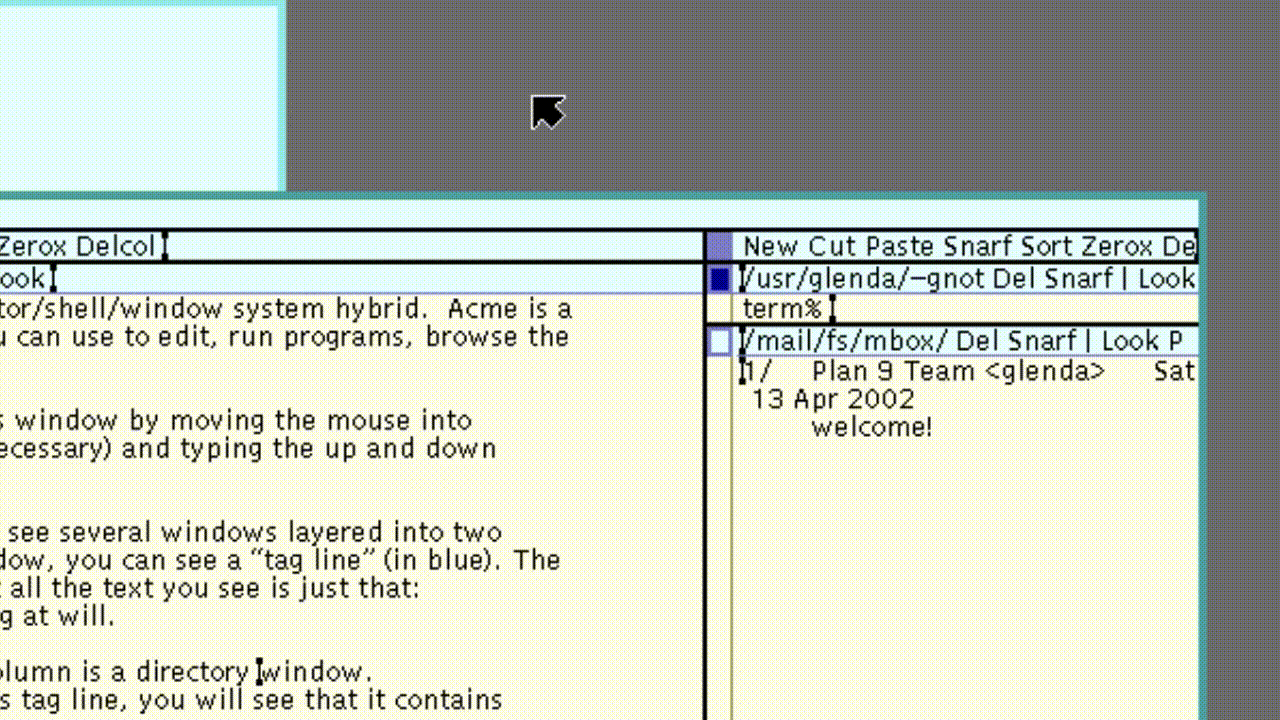
Press Enter and wait for a while to see an interface like this:
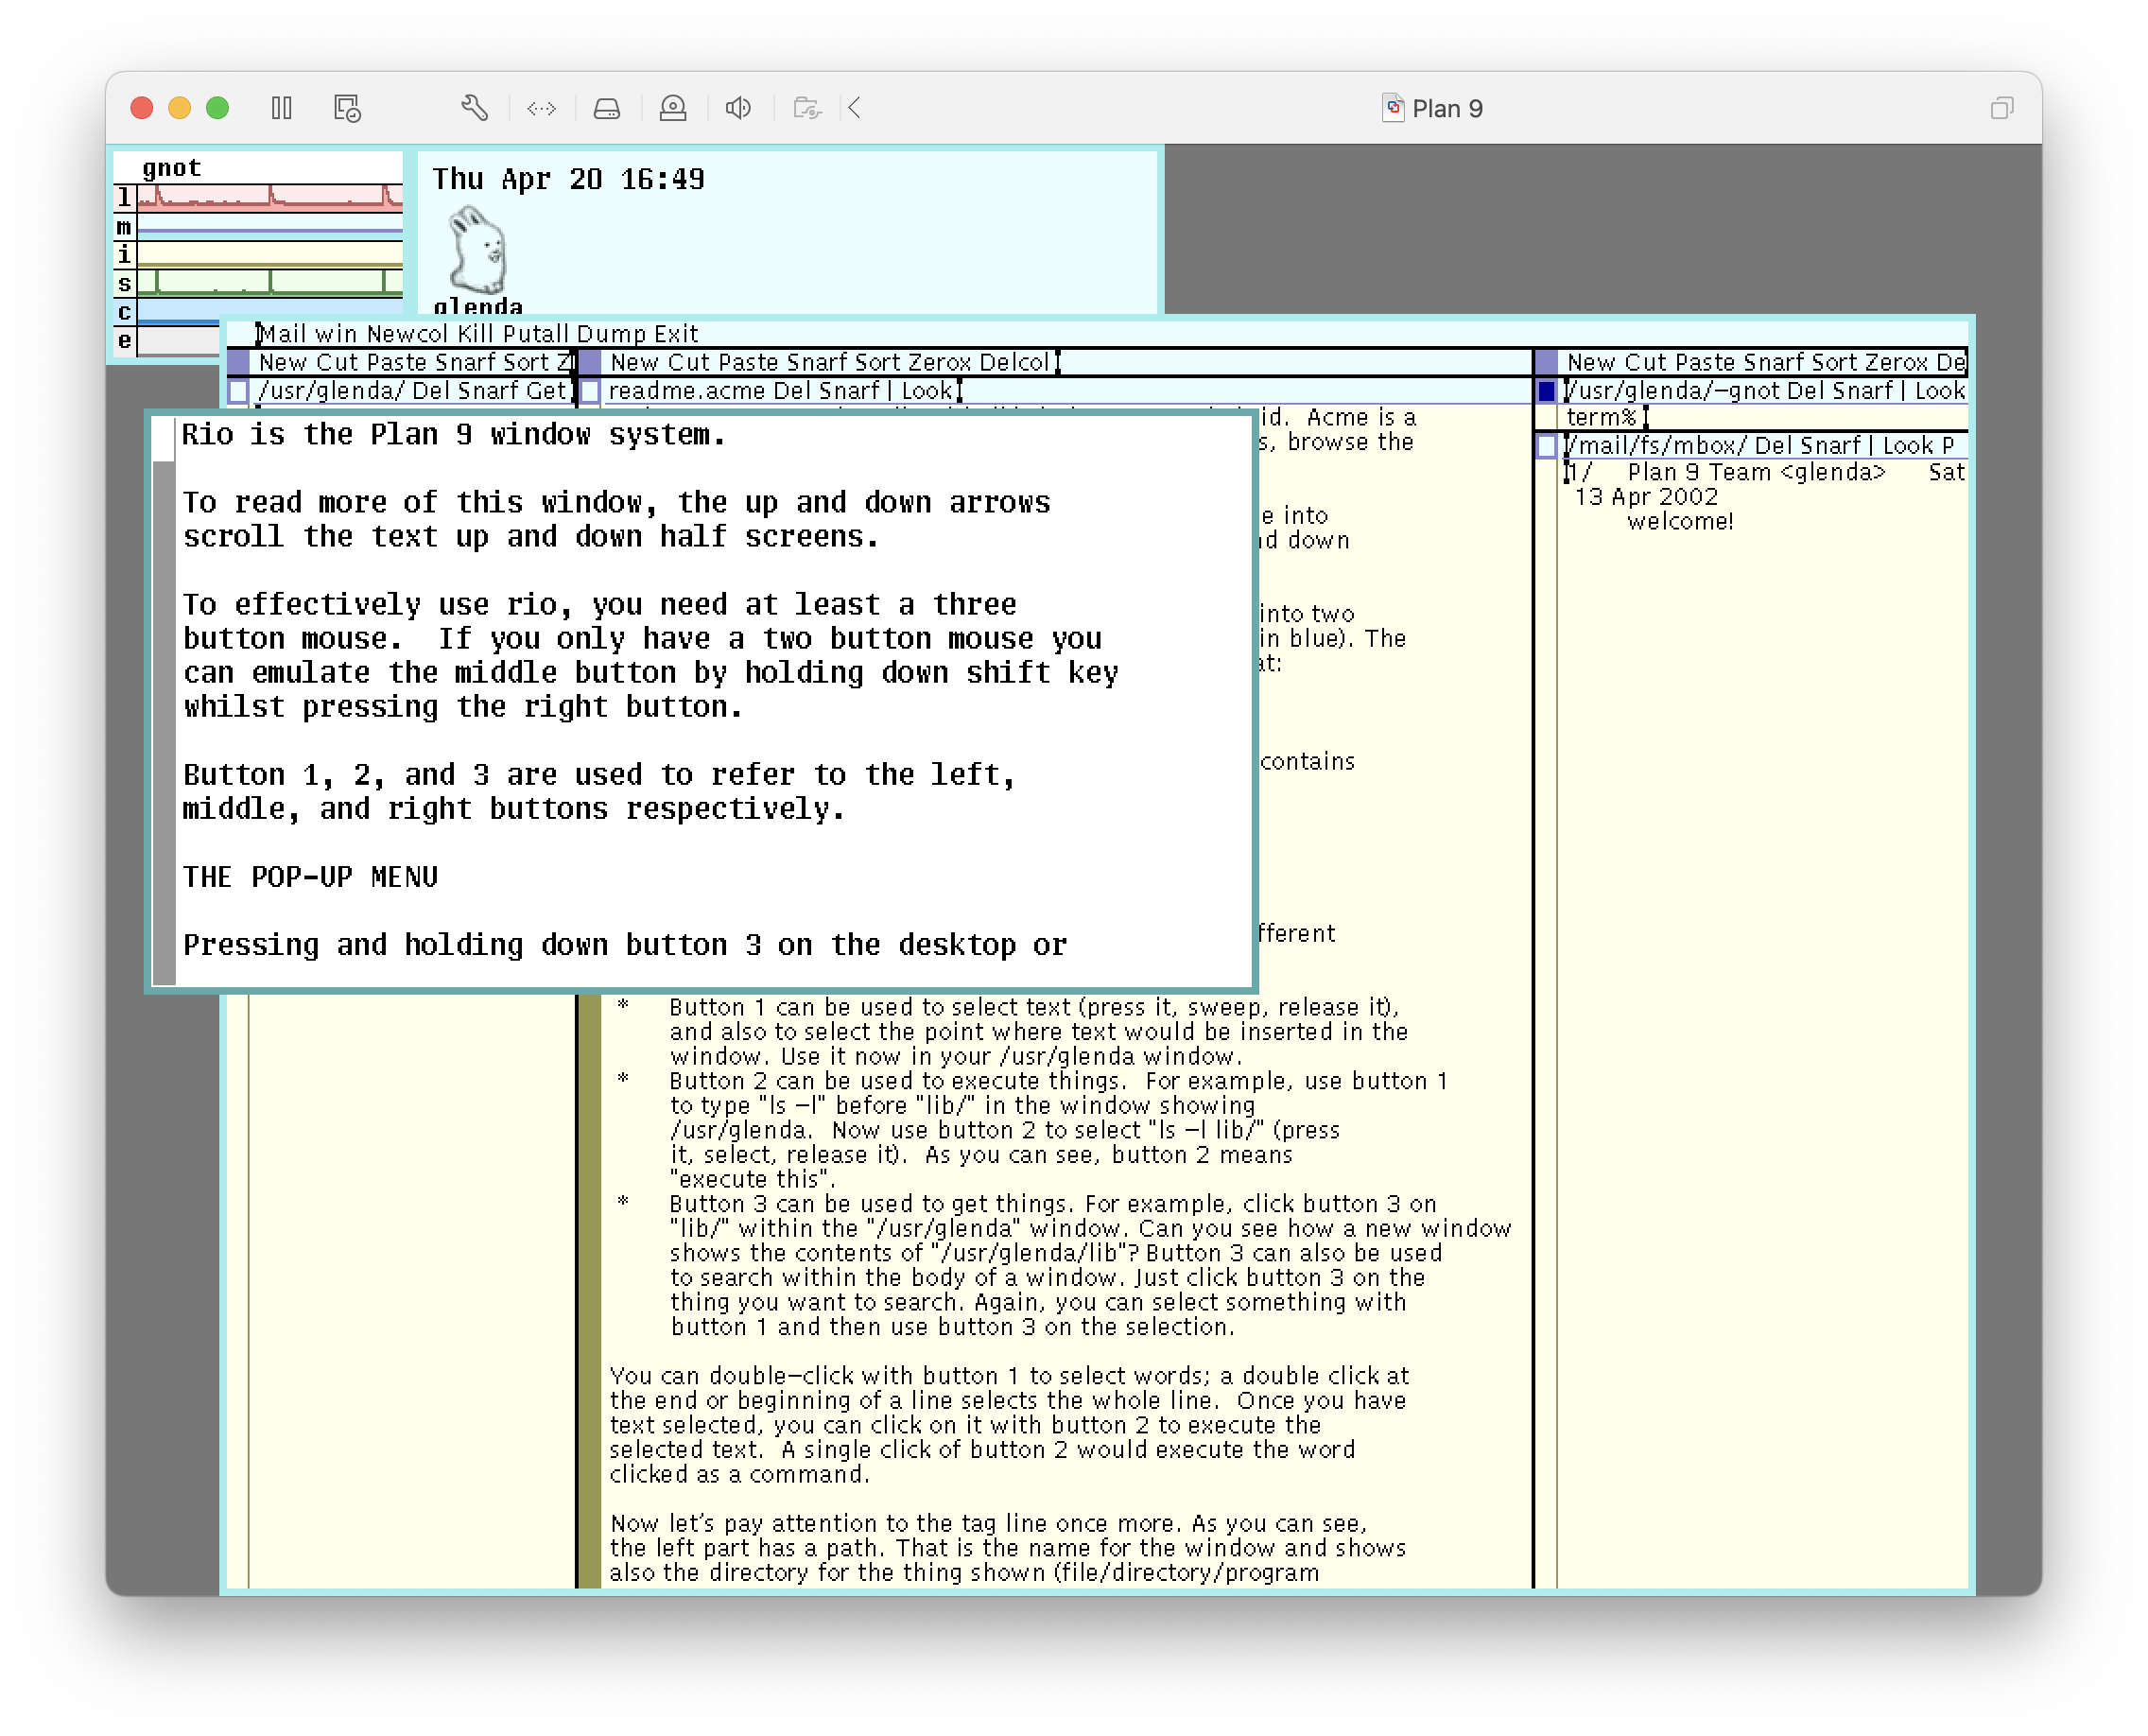
At the top from left to right are system information and time. The second line from left to right is the terminal and the text editor acme.
Simple to use
Here we introduce the simple use of Plan 9, such as basic usage methods such as creating a new window. The usage of program applications such as acme will not be extended here.
The Shell used by Plan 9 is rc, and some compilers are also different from Unix. There is a lot of content on this. I will open a separate blog and put the link here after writing.
Before using Plan 9, you must first understand that Plan 9 is a graphical system born in the 1980s (although it debuted in 1992), so don’t hold onto the logic of today’s graphical operating systems and then complain. , because some of the operation logic used by Plan 9 is also present in the current system. In addition, although it comes from the same school as Unix, there are many things that are different. Anyway, as the paper said: “It makes Unix users strange but also like it.”
Basics of operation
Plan 9 divides the mouse input device into three keys: left, middle, and right, which correspond to the left button, pulley (the pulley is clicked, Plan 9 does not have a pulley design), and the right button on your hand. It should be noted that in Plan 9, the right button means “confirm”, which is contrary to modern operations.
Keyboard input is the same as today’s devices.
Let’s introduce the basic menu by creating and closing windows. Because unlike any modern operating system, Plan 9’s graphical interface has little to do with the file system. For example, the main interface of macOS or Windows is actually a directory in the file system, even the epoch-making Mac OS 6.0.8 (I will write a related blog to introduce it later. A comparison of the same period can show the scene of a hundred schools of thought contending during that time) They all use the file system as the core of their operations.
Create and close windows (basic menu)
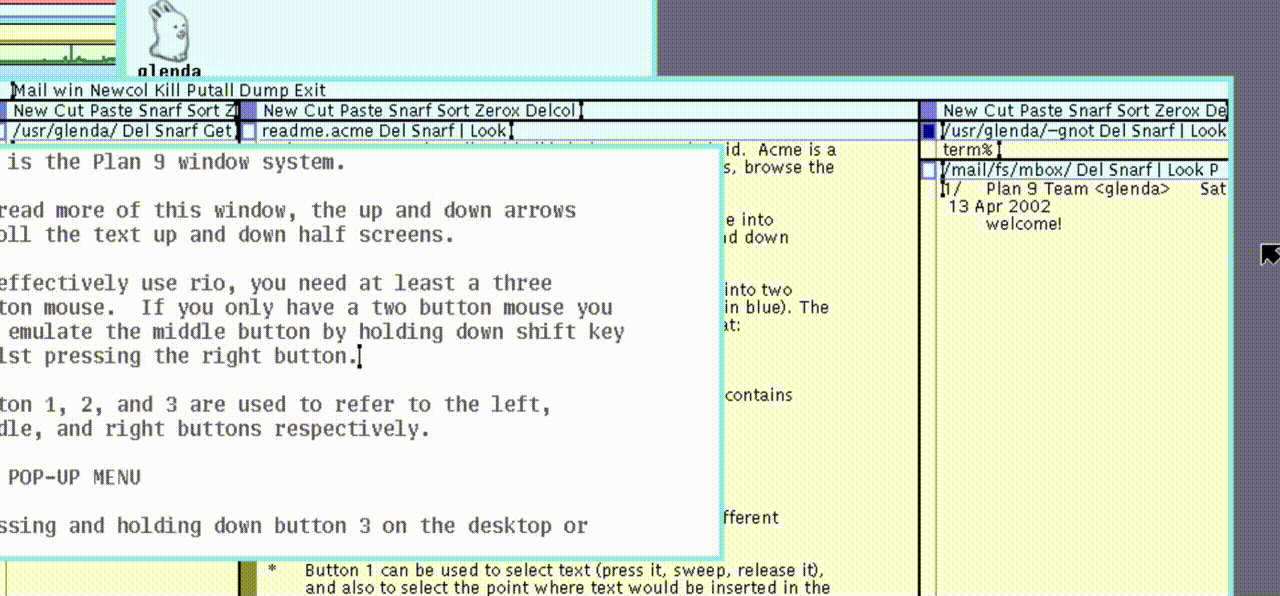
Right-click and hold (cannot release) the blank area of the interface (gray area), a menu will appear, then drag the cursor to “New” (right-click still cannot be released), and finally release the right-click to select “New”, you will find that the cursor changes to a circle and a cross. At this time, right-click and drag to outline a window. This window can only be a terminal, other programs need to be opened through the terminal.
If you want to close a window, right-click on a blank area and in the menu that appears, move to “Delete” and release, then right-click on the window to close it.
The process of creating and closing windows is as follows (the recording operation is a bit slow, please forgive me):
You may wonder why you have to press and hold to move to select and then release to confirm. This kind of operation is unheard of.
In fact, this kind of design exists now, or this kind of design was actually quite common back then. You can try it in macOS. After using it a lot, you will find that it works quite well in some situations. as follows:

Hide and re-show windows
In macOS or Windows, open programs will appear in the Dock or taskbar, but this is not the case with Plan 9. All applications opened by Plan 9 will appear on the interface. If you want to hide it if it is too messy, then you need to use “Hide” in the menu to hide the program, which is the concept of minimization. Hidden programs will appear in the menu that comes out by right-clicking and holding the key, as follows:
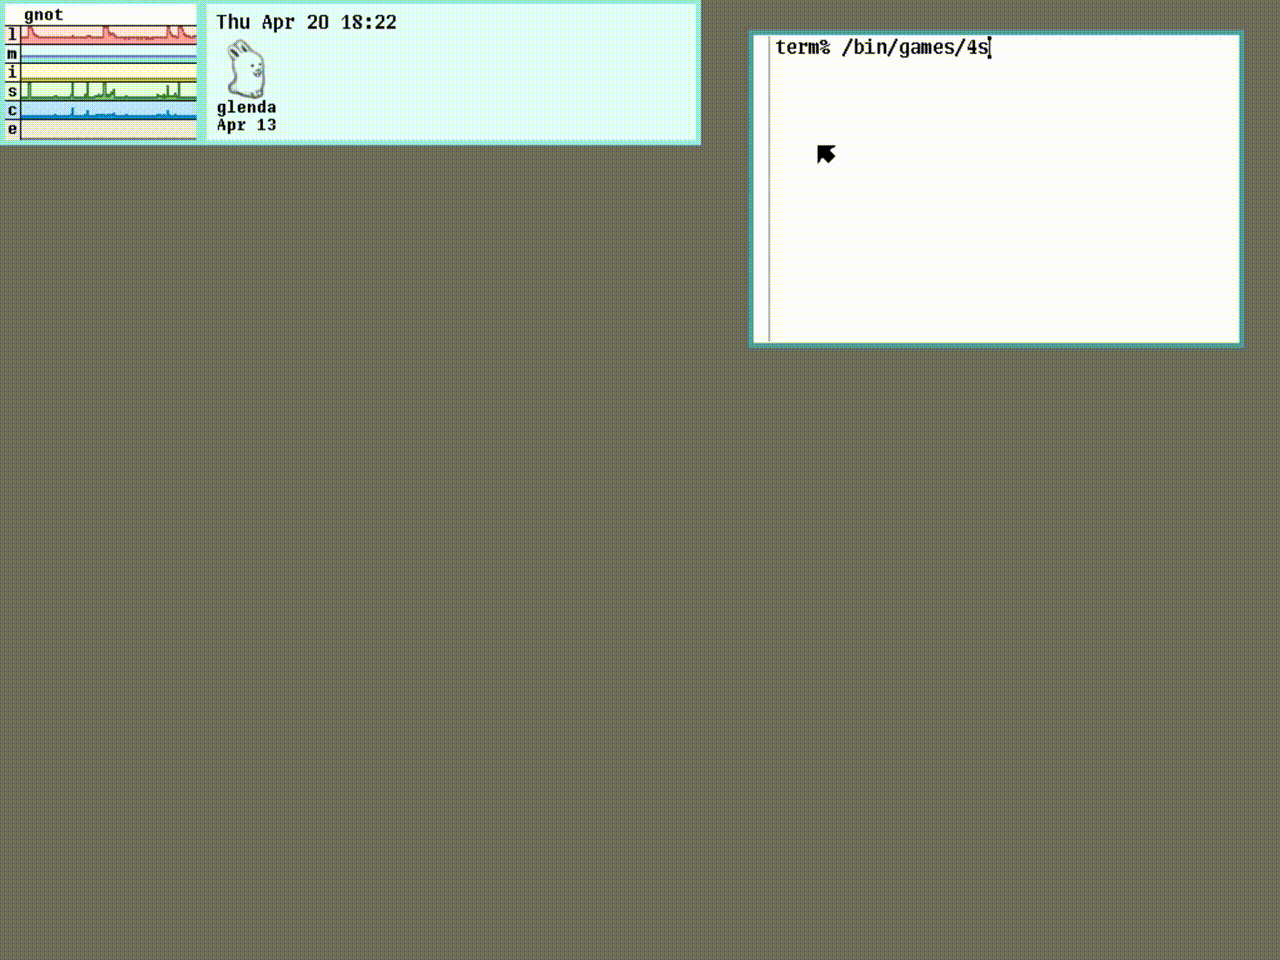
Open an application
Open an application just like in Unix, use the path, or directly use the program name stored in the PATH environment variable. You can open a Tetris mini-game as follows:
Okay, this is enough to explore Plan 9 simply. I will update the in-depth parts, such as the user system, the use of acme, and the use of various compilers, into new blogs.
I hope these will help someone in need~